

Okay, client training is today. Open "InDesign". Click "Print". Wait.
Pick up stack of papers. Collate. Find cover sheets. Bind.
Hand out. Flip through. Throw into bag.
Put on desk. Put other things on top. Move to drawer.
HELP! Out of date. Call developer.
Download PDF attachment. Click "Print". Staple. Put on desk.
A CMS Manual’s Journey (2015)
The Help plugin for Craft 2 revolutionized the idea—for me anyway—that the CMS manual should live right in the CMS. All of the issues we ran into with printed documents seemed to go away and clients were always impressed that the CMS guide was always available and up to date.
Guide came along during the Craft 3 beta and its goal was to make it easy for a developer to create CMS guide templates and display them in their own Control Panel section. Shortly after its 1.0 release, a fellow developer suggested that one of our clients would love the ability to update the guide herself. So the ability to create guides in the CP came along.
A year and a half later Guide 2 was put together by learning what worked and what didn’t always work in Guide 1. Here are some of the new features you’ll find when you start using Guide 2.
Features That Got the AX
The focus of Guide 2 is on making it easier for clients and project managers to contribute to their website’s CMS guide. This resulted in re-thinking the way guides got written and the way guides were organized and managed. That led to a re-write on how guides are stored into the CMS and how they are displayed within the CP.
Guide Editor
The first thing that got an upgrade in Guide 2 was the Guide Editor. Instead of using a basic text area to write your guides, Guide 2’s editor includes a Javascript-based code editor. This offers syntax color-coding and a few other things that make it easier to look at the code and Markdown that you are writing.
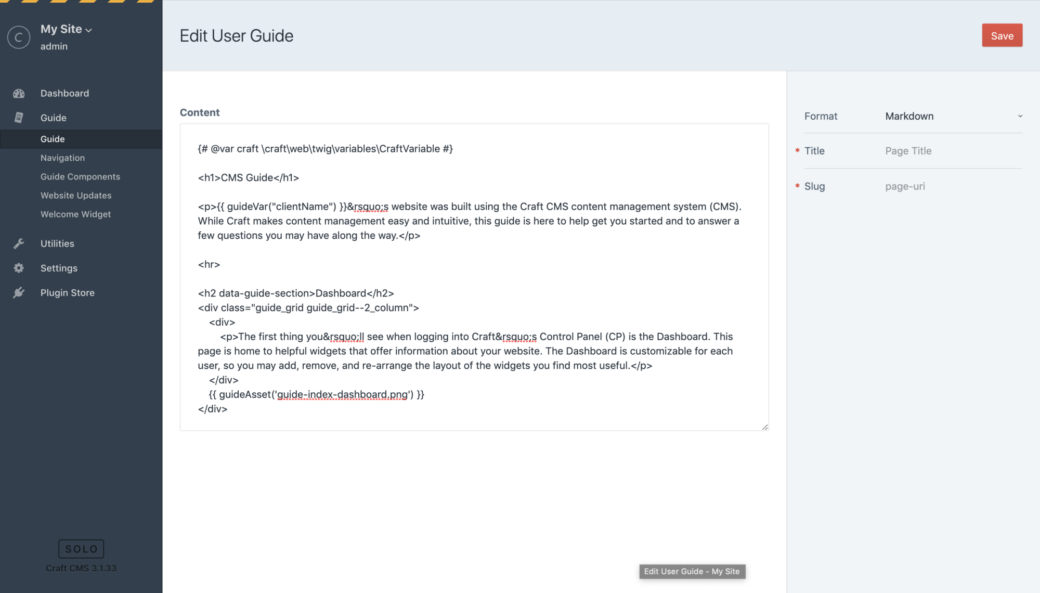
The Guide Editor in Guide 1.
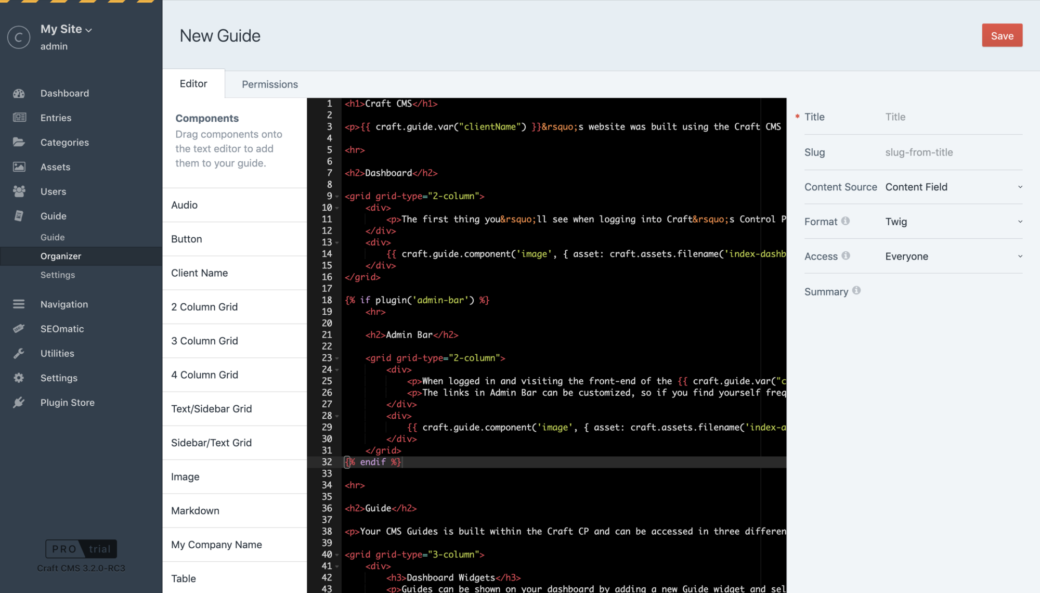
In Guide 2, the editor is syntax highlighted.
Guide Components
Components in Guide 1, were a way to standardize HTML and CSS code for things like buttons, grids, and code snippets. To add a component in Guide 1, you would visit the Guide Components page, copy the code, return to your guide and paste the code in.
In Guide 2, you drag the component from the Components sidebar onto the editor—and that’s it.
Components have been created for both Markdown and Twig formats and they take advantage of each language’s strengths.
<img data-lazy-load data-src='[GUIDE_VOLUME_PATH]/assets-field.png' alt='Assets field'>Dragging an image component into the editor creates an HTML img tag with everything it needs to display the image.
{{ craft.guide.component('image', { asset: craft.assets.filename('assets-field.png').one() }) }}In Twig, the components allow you to pass in an object of options that gives you more flexibility.
To be completely honest, navigation settings in Guide 1 was added quickly with the intention of improving it at a later point. For it’s purposes a table-based setup worked, but it only showed guides found in the Guide CP section and columns like, "User Guide ID", were not user friendly.
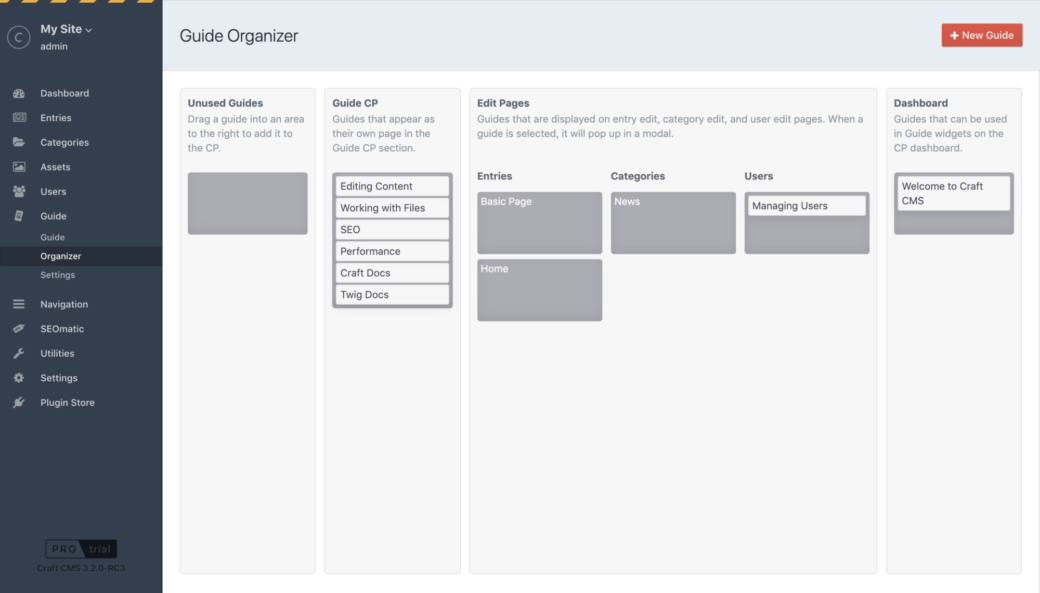
In Guide 2, the Organizer section lets you see all of the guides in the CMS. Managing guides is based on drag-and-drop from one area to another. The Guide CP navigation is set here, and this makes it easy to see what guides can be found on edit pages and which guides are available for Dashboard widgets.
Guide Templates
A big part of using Guide is the ability to create a guide for one site, then create your own boilerplate template that can be used on future projects to come.
Craft Guide Templates was created as an open source repo that’s templates could be downloaded to your templates directory and used as a starting point for your CMS manual.
To make the process of getting these templates into your CMS easier, importing templates, assets, and guides can be done right within the Guide settings page.
From there you may edit the templates just like you would in Guide 1.
Guide 2 now allows more of Twig’s features to be used. You may now {% include %} or {% import %} guides from your selected template directory.
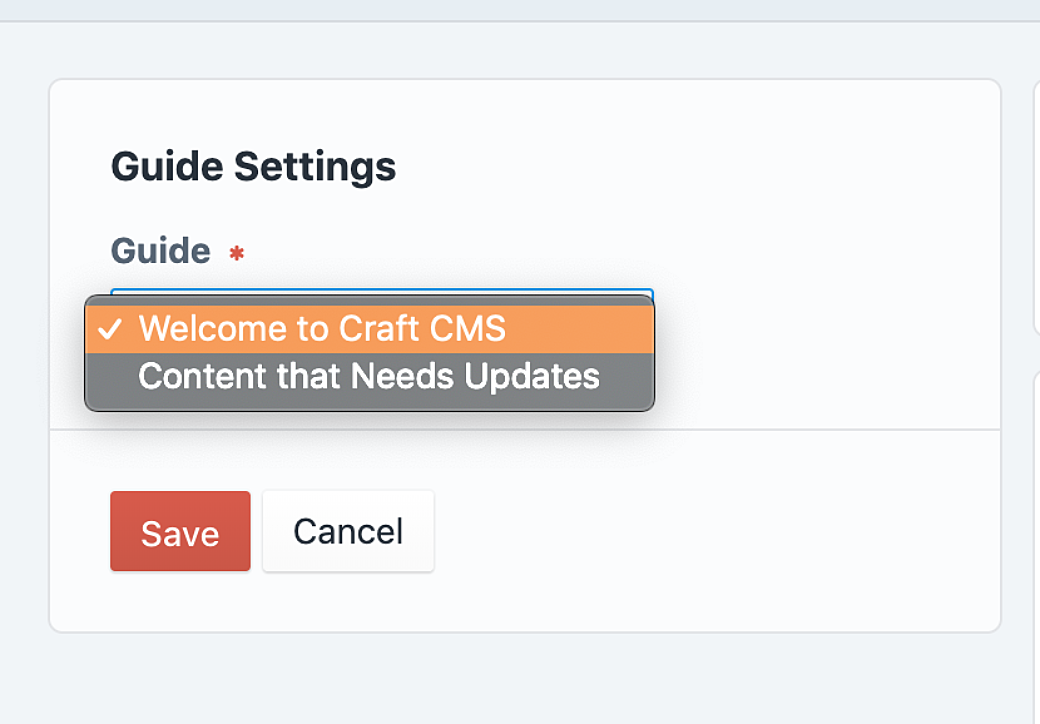
Guide widgets now pull from guides in the CMS. When a content editor adds a Guide widget to their Dashboard, they can choose from a list of guides that are available to them. This allows for updating Guide widget content once and having it distributed to everyone.
Guides can now appear on entry edit pages, category edit pages, and user edit pages. Multiple guides can be added to each section, allowing better organization and more help for content editors.
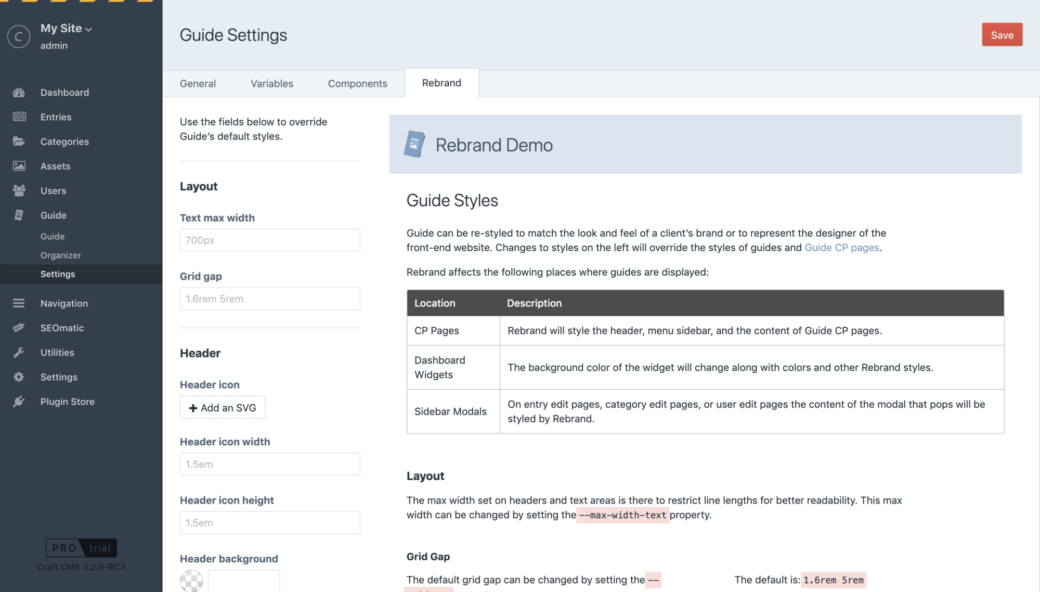
Colors and layout options are now set as fields in the Guide settings page. A custom logo can now be uploaded for guide headers.
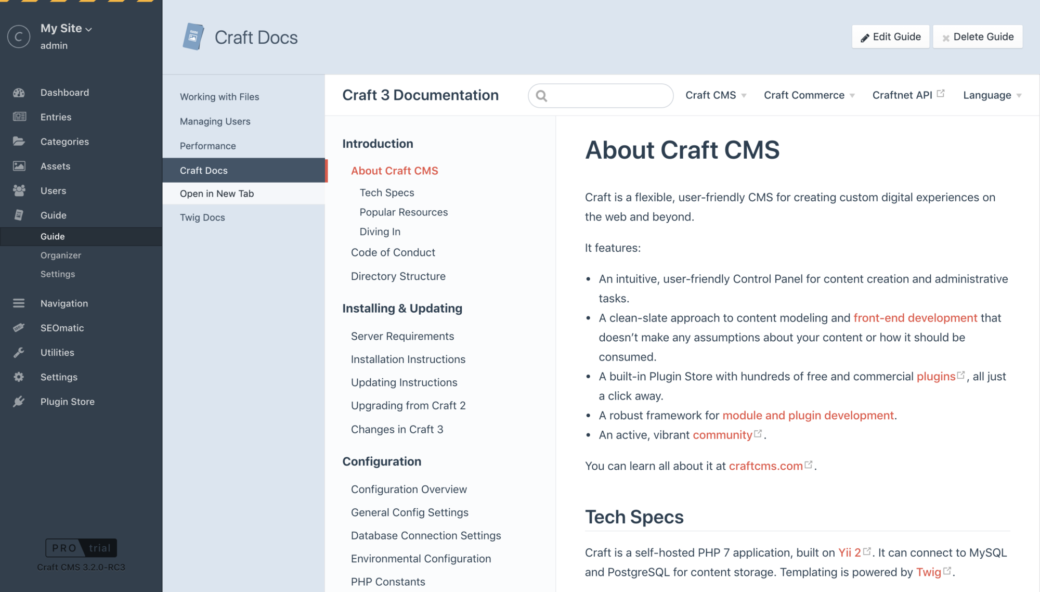
External documentation for plugins, Craft’s documentation, or any page on the internet can be used for a guide’s content.
Grid components are now resized based on the width of the guide’s content, so guides are formatted better in modals, dashboard widgets, and on smaller mobile devices.
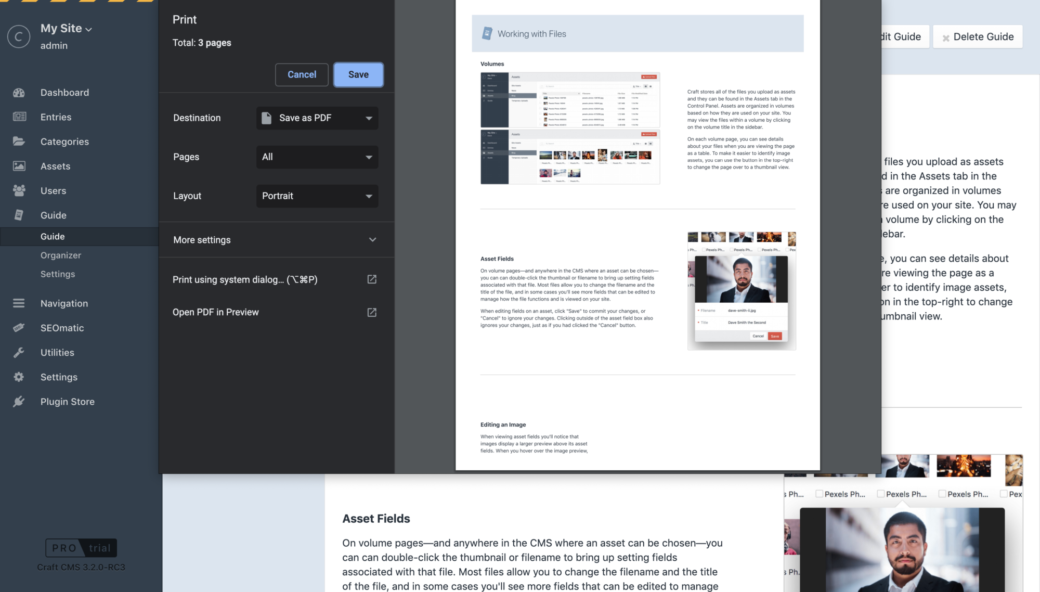
When printing a Guide CP page, a new @print style sheet will remove Craft’s UI so the only thing on the page is the Guide content.
Lite
The lite edition of Guide is free to use and it’s intended for developers who want to write their own guide templates and display them in the Guide CP section.