
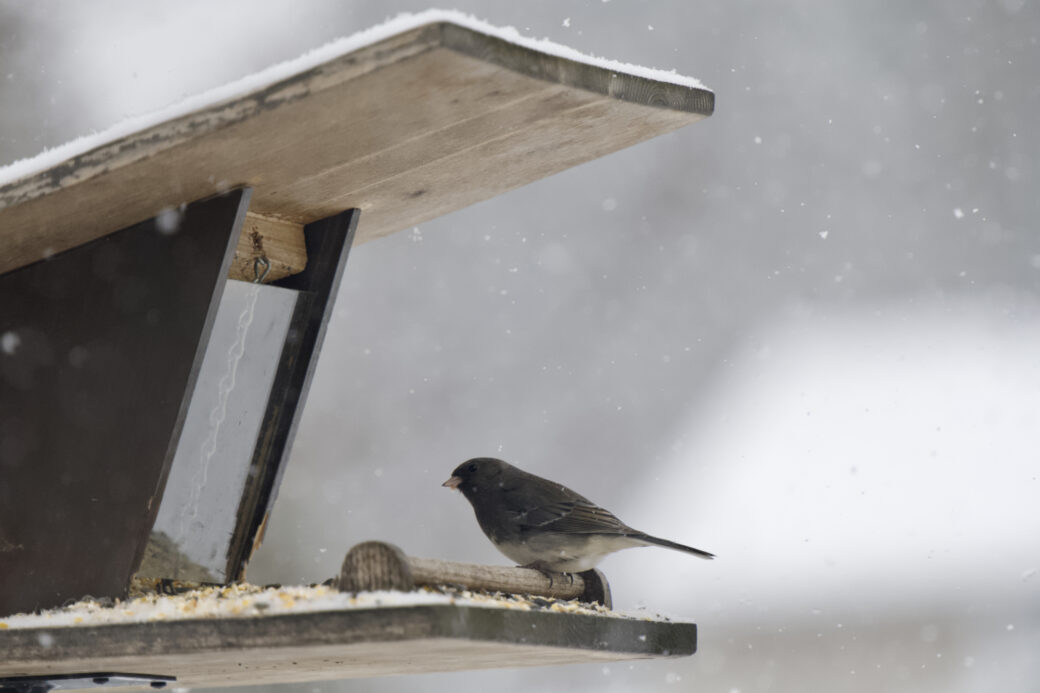
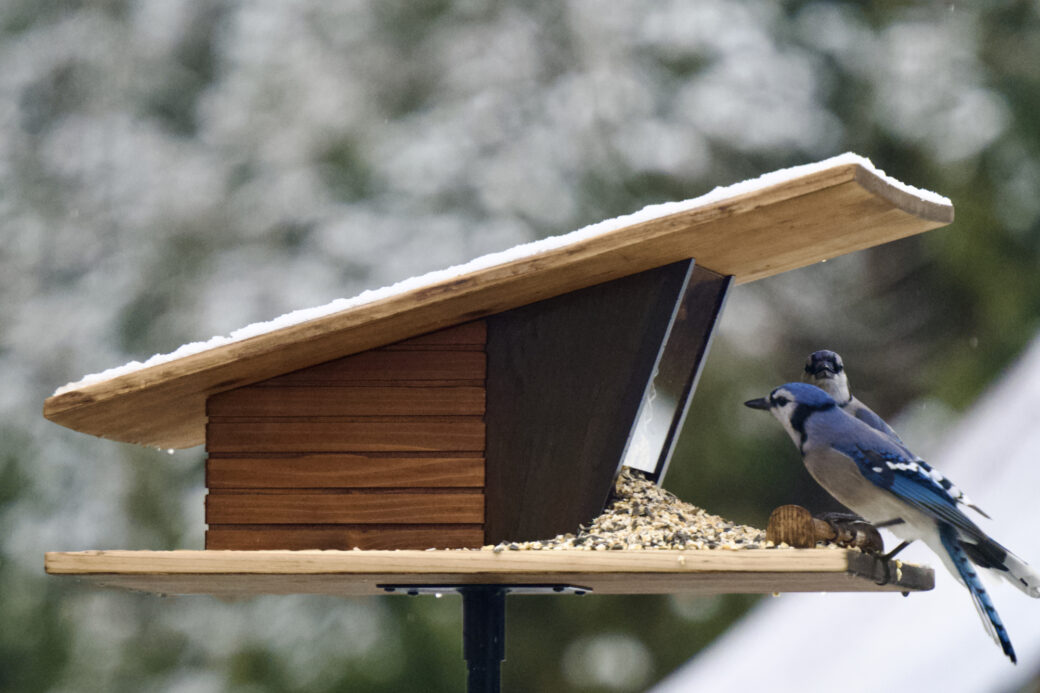
A few years ago, I put together this mid-century inspired bird feeder and it’s been awesome to see a regular gathering of birds hanging out at it every day. When we originally placed the bird feeder it was about 50 feet (15m) away from our house, in the middle of a flower bed, in the middle of our lawn. It was a perfect spot for it, but it made it hard to see the birds and filling the feeder in the winter meant trekking through the snow or a muddy lawn.
So I decided to move it closer to our house right near a hanging planter and a pole that held up some outdoor lights. The view of the birds was great, but one day I noticed that a pack of 3-4 squirrels could reach the feeder by climbing up the light pole, getting onto the planter, then jumping a few feet over to the feeder.
At first it was just an innocent thing. They would grab a few seeds and jump down to the ground after getting their fill. I would shoo them off of it when I was around, but for the most part I let them be.
Then I noticed this:
A small bite mark on the lower-right side of the glass seemed to appear after the feeder was getting low on seeds. The squirrels must have seen the seeds inside the glass and tried to get to them. I was disappointed to see this, but figured it’s not all that hard to touch it up. Since this was the winter time I would wait until the weather got a little nicer to fix it.
Then, about a week later, I came out to fill the feeder and found this:
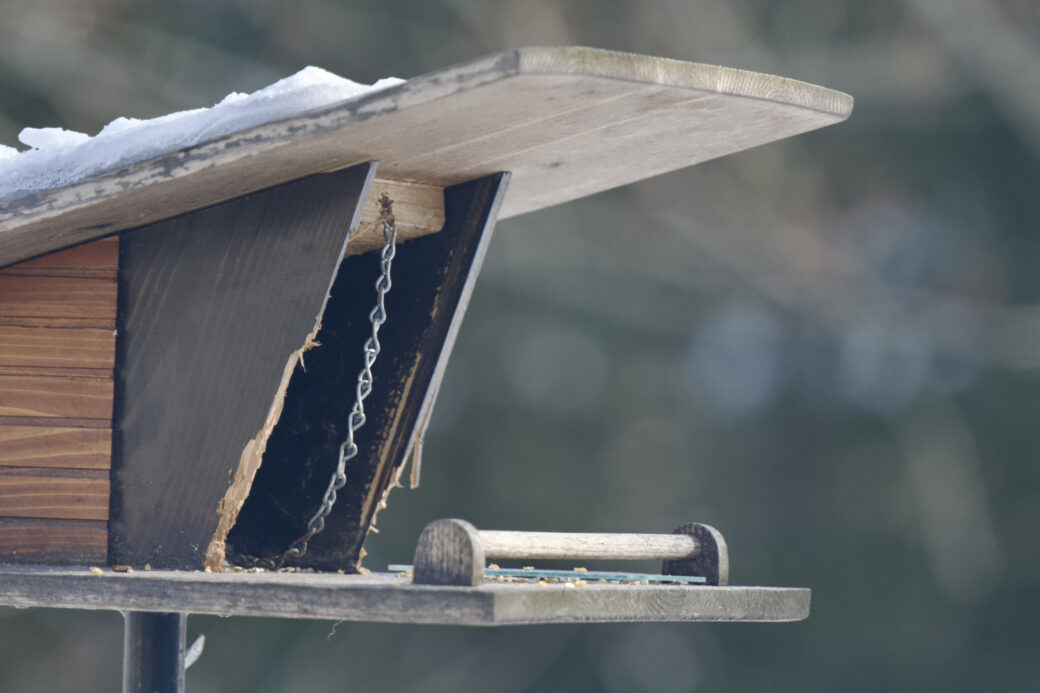
¡Esos bastardos! Look how they massacred my boy!
Luckily no glass was broken, but the feeder was looted and the front frame was broken so bad that the glass couldn’t safely be put back. I took the bird feeder off of its pole and brought it inside until I could take some time to restore it.
Well, it took about 7 months for me to find the time, but I finally cleaned up the wood shop and got to work on the bird house. I fixed the broken wood, refinished the entire thing, and I added a couple of ways to avoid running into this issue again in the future.
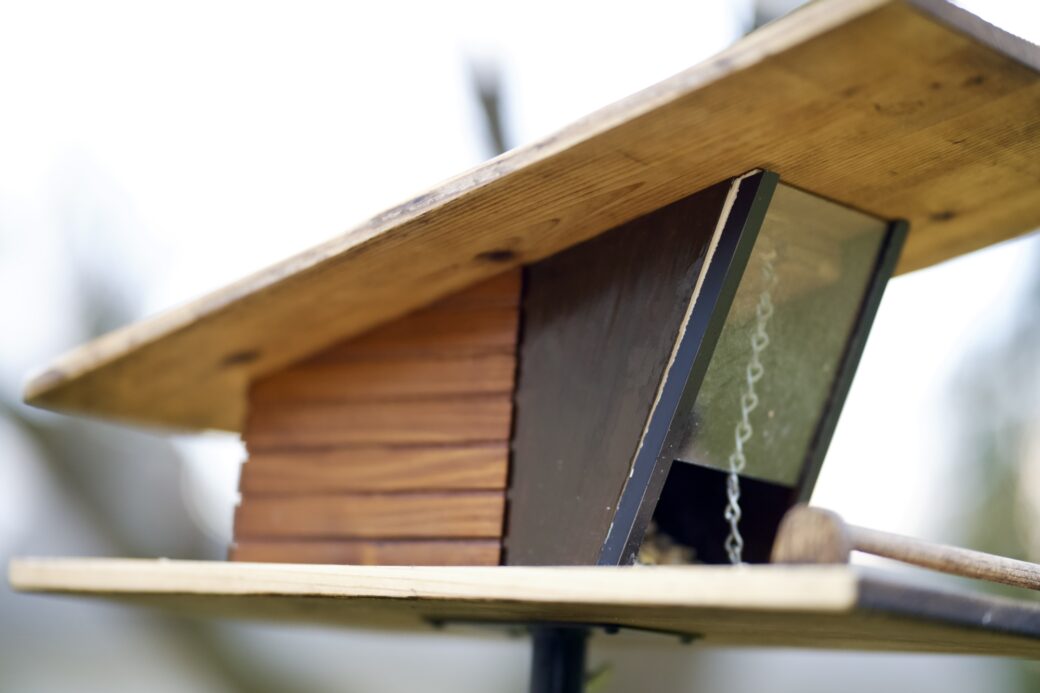
For one I added metal to the areas around the glass so it would be harder to chew through. While I know this isn’t a bulletproof solution, I hope it will be a deterrent to any squirrel trying to break in. And secondly, I simply left the opening where the glass goes a little taller so hopefully there's no need for chewing through the wood. It’ll also be safer for any cheeky birds who try to get into the feeder to get the last scraps before a refill.
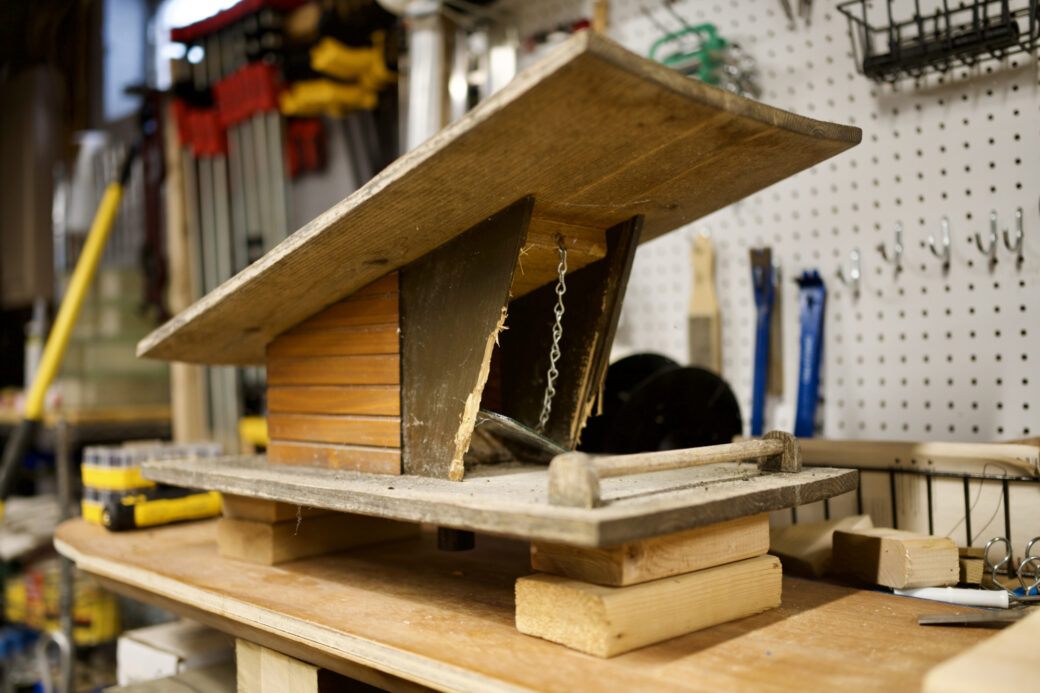
Demolition
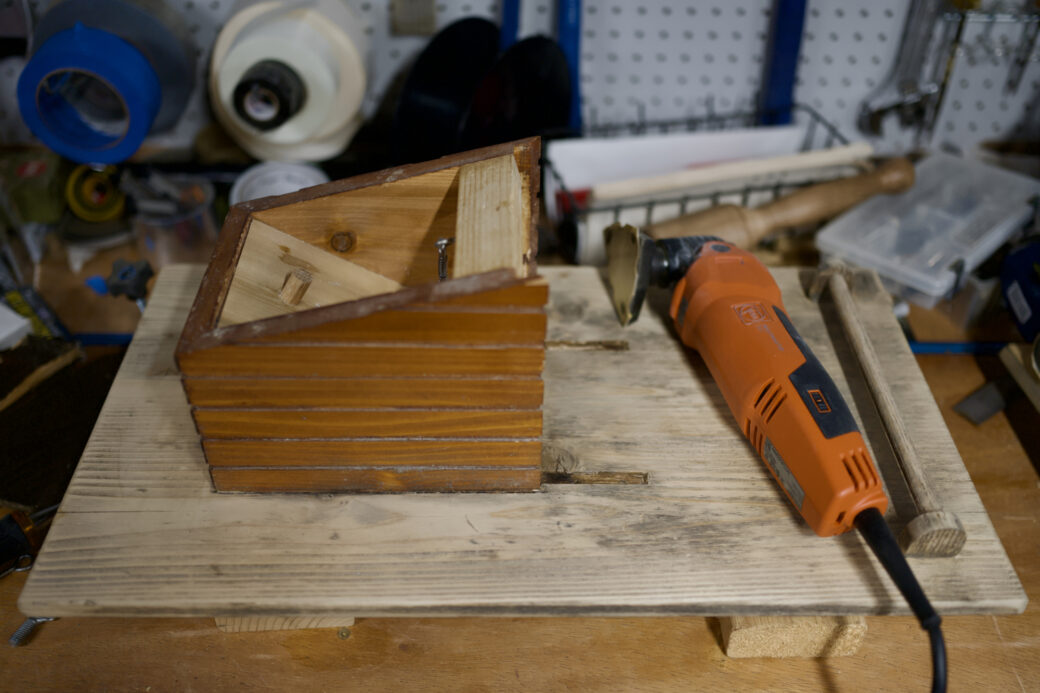
The first thing I did was cleaned up the feeder and scraped off any caked on seeds or bird poop. Then I took a mallet and carefully knocked away the two broken walls.

Each wall had 3 brad nails towards the bottom so I was careful not to let them destroy the base piece of wood while I was at it. Depending on how stuck they were, I pulled the brad nails out or used clippers to shorten them and pounded them back into the base. Then I used a chisel to help remove some of the remaining wood glue.

I used both an orbital sander on the bigger parts of the base and a multitool with a sanding attachment to sand the hard edges without affecting the parts I didn’t want to refinish.
While I wasn't too worried about removing all of the dark stains on the base, I tried to get as much of it off as I could with the sander.
I know eventually I’ll want to redo the wood on the top, and depending on how this feeder holds up over the next few years, I might redo the base while I’m at it.
Reinforcing the Sides
To re-cut the side pieces I found a scrap piece of cedar and lined up the broken wall pieces on top. I traced the old wall piece and then used a straight edge to clean up the lines.
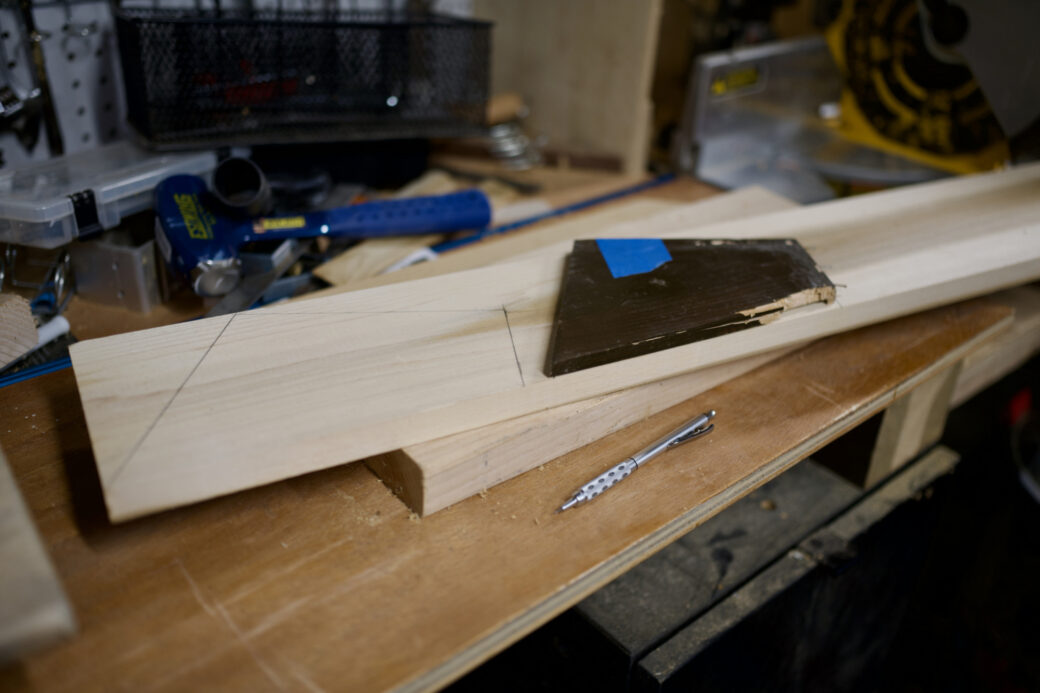
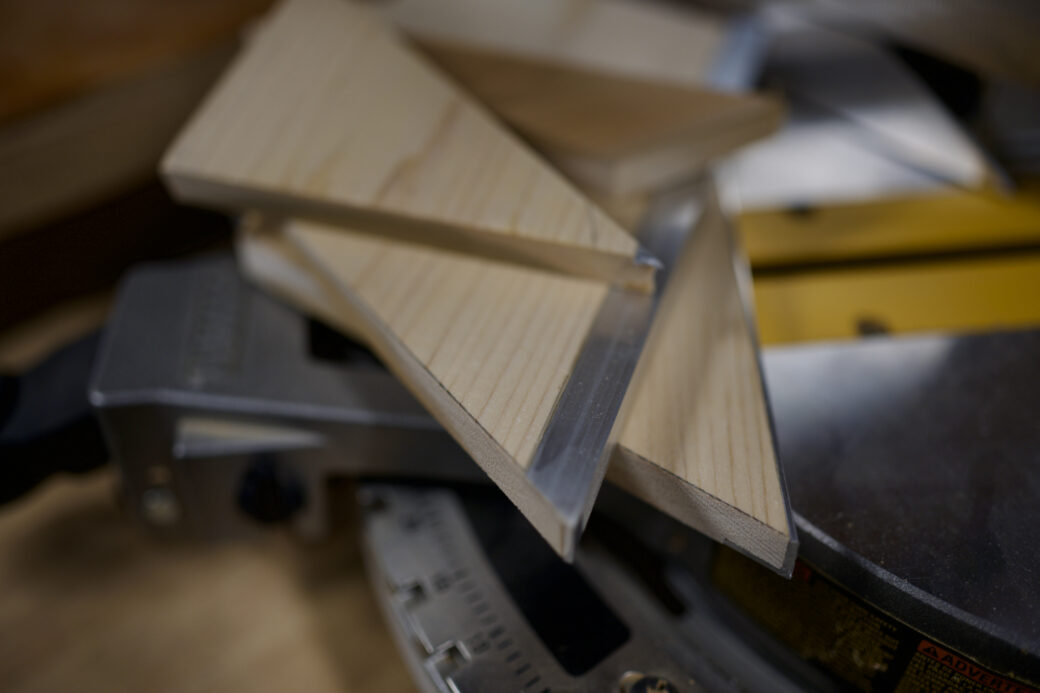
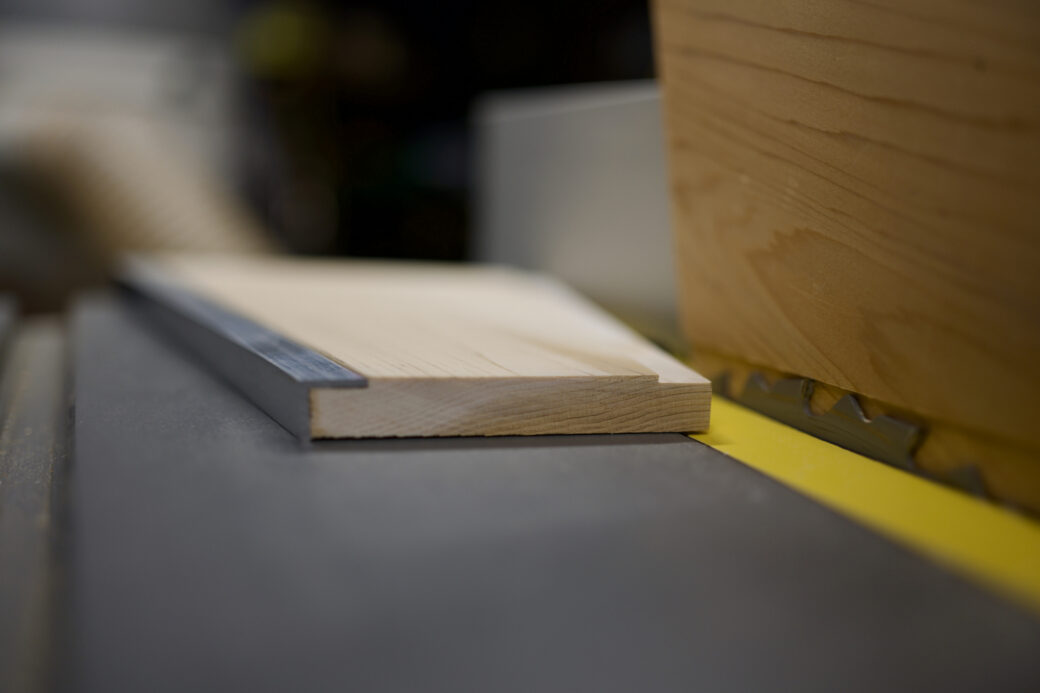
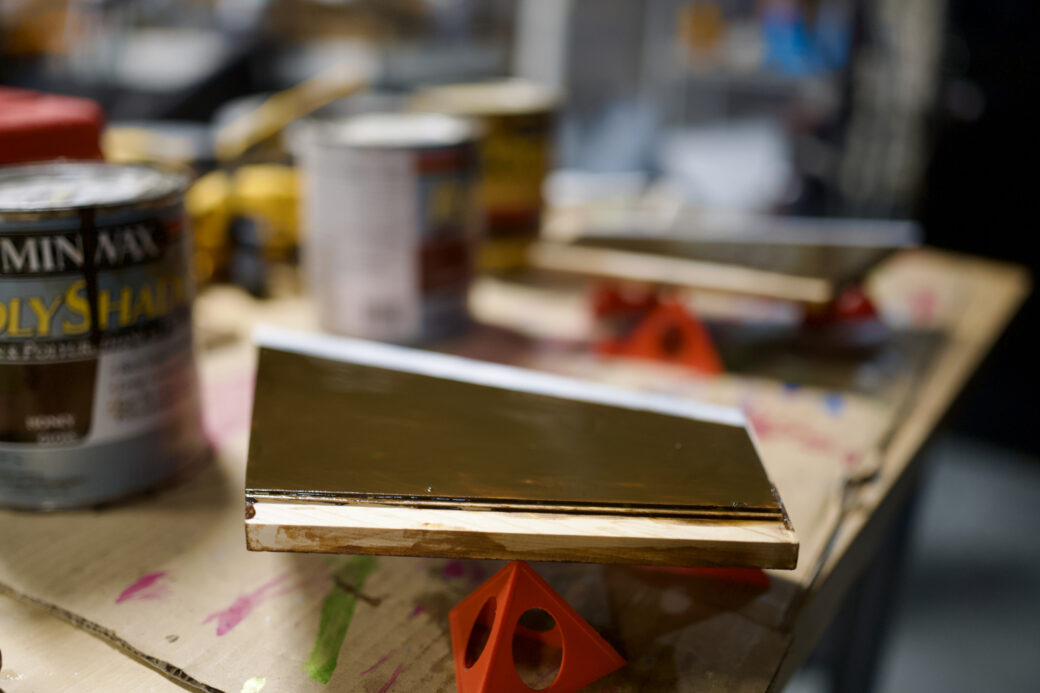
I brought the wood over to the miter saw and started making a few cuts, then planed them down to the right thickness. Before getting too far, I picked up an aluminum corner strip and drew out where it would line up on the edge so I can cut a rabbet into the corner.
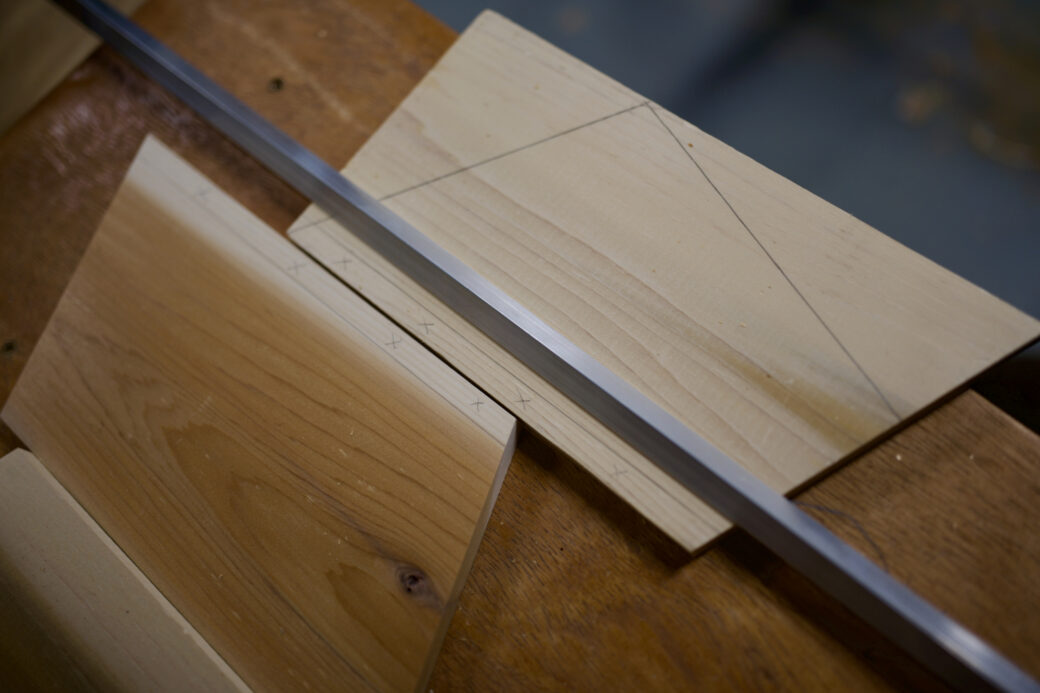
I used the table saw and moved the fence over bit by bit to cut away enough wood to fit the metal corner piece. I used a hand saw to cut down the metal to the right length and checked the fit.
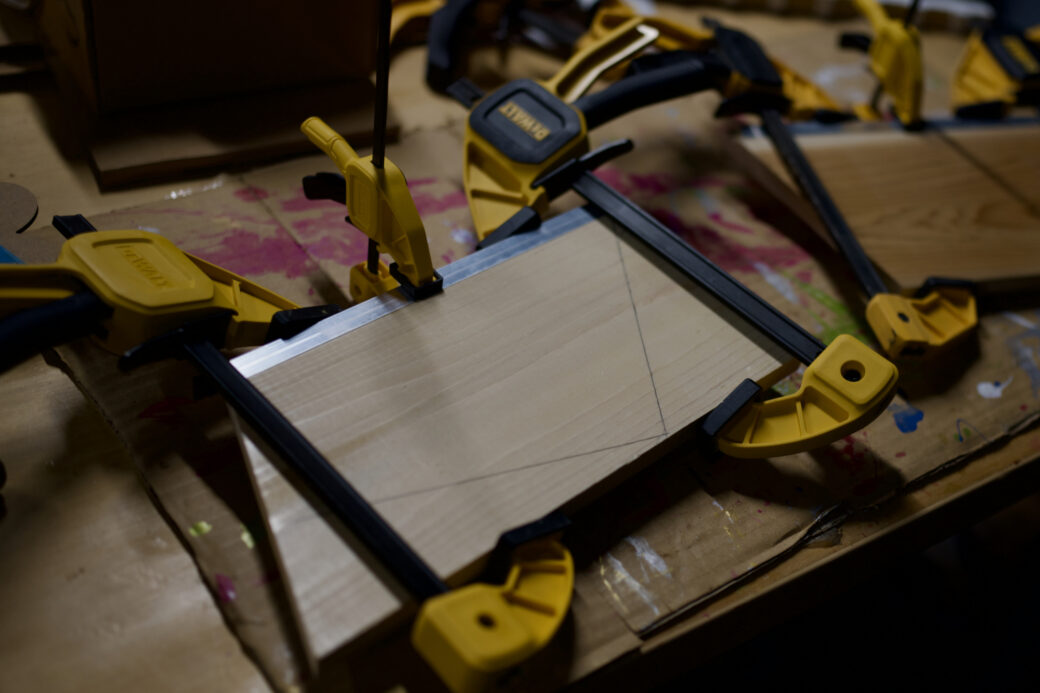
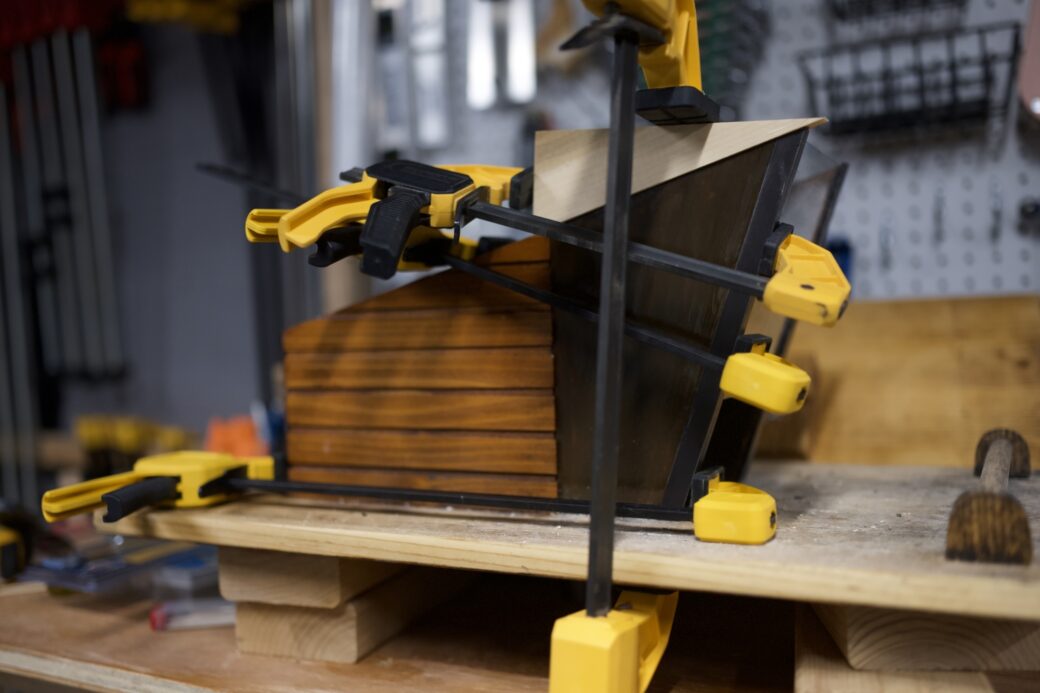
I used some two-part epoxy to hold the metal to the wood and let it sit in clamps over night.
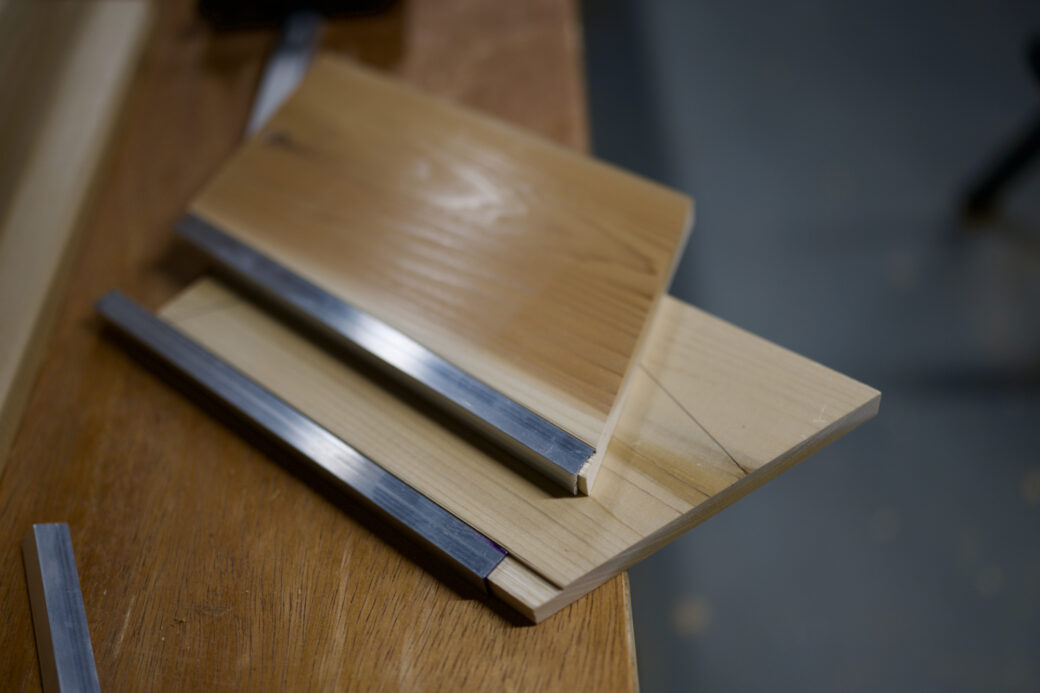
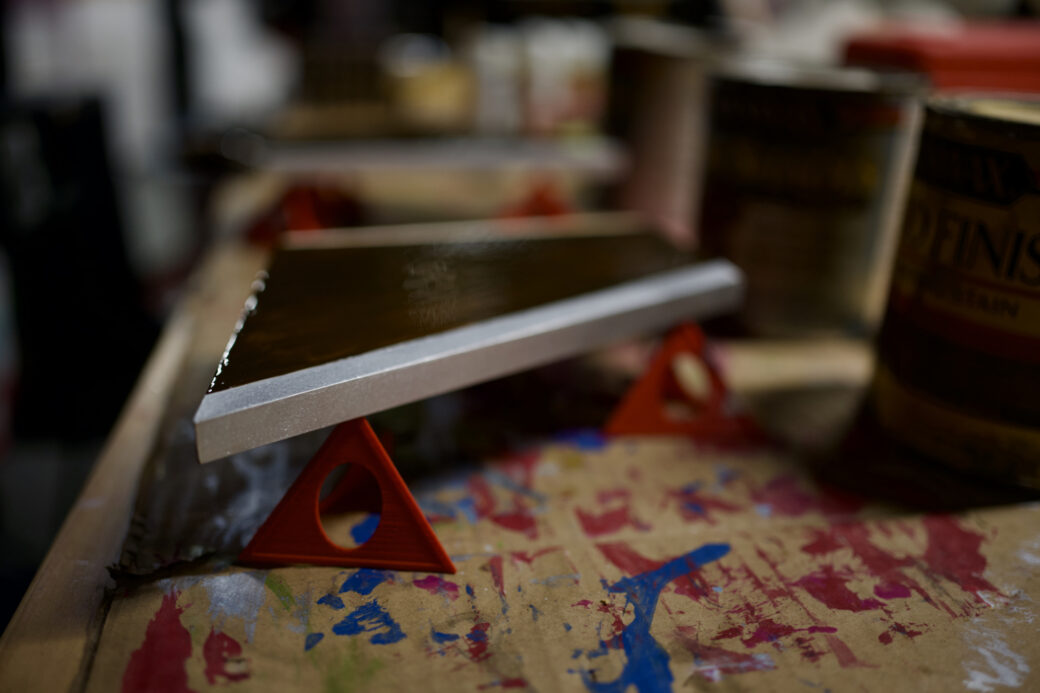
I really wanted the metal to be flush at the base and along the roof area, so I lined up the miter saw and used that to make the rest of the cuts—going slow to make sure the aluminum stayed in place.
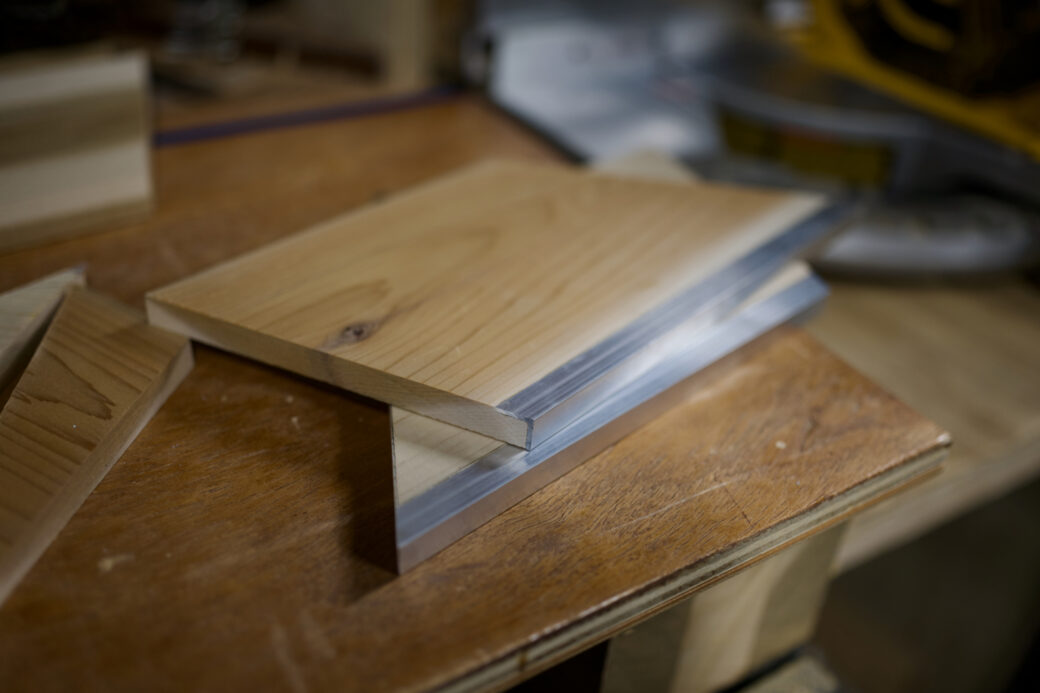
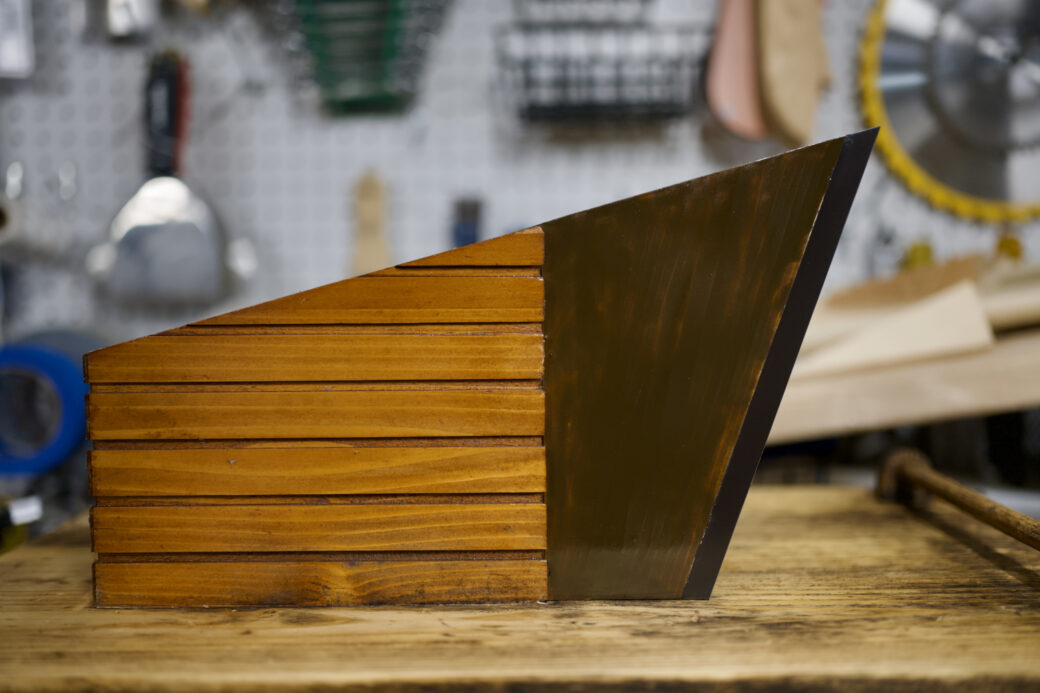
So far so good and the metal looked great with the cedar. My intention was to restore the original dark brown look, but I was on the fence about just leaving the colors to their natural look.
Refitting the Walls
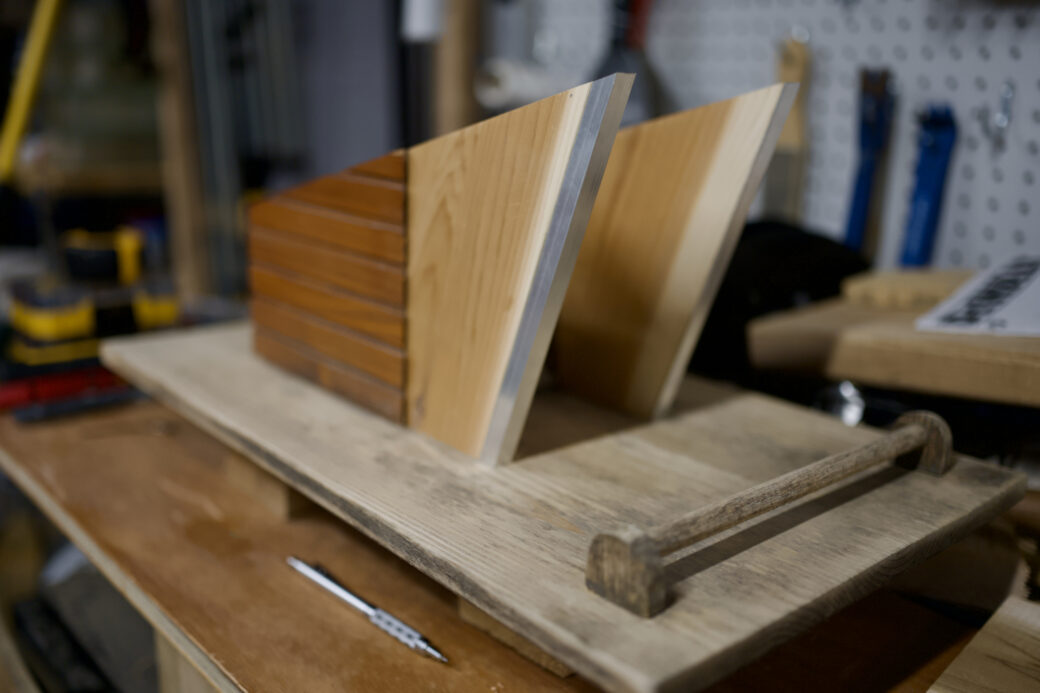
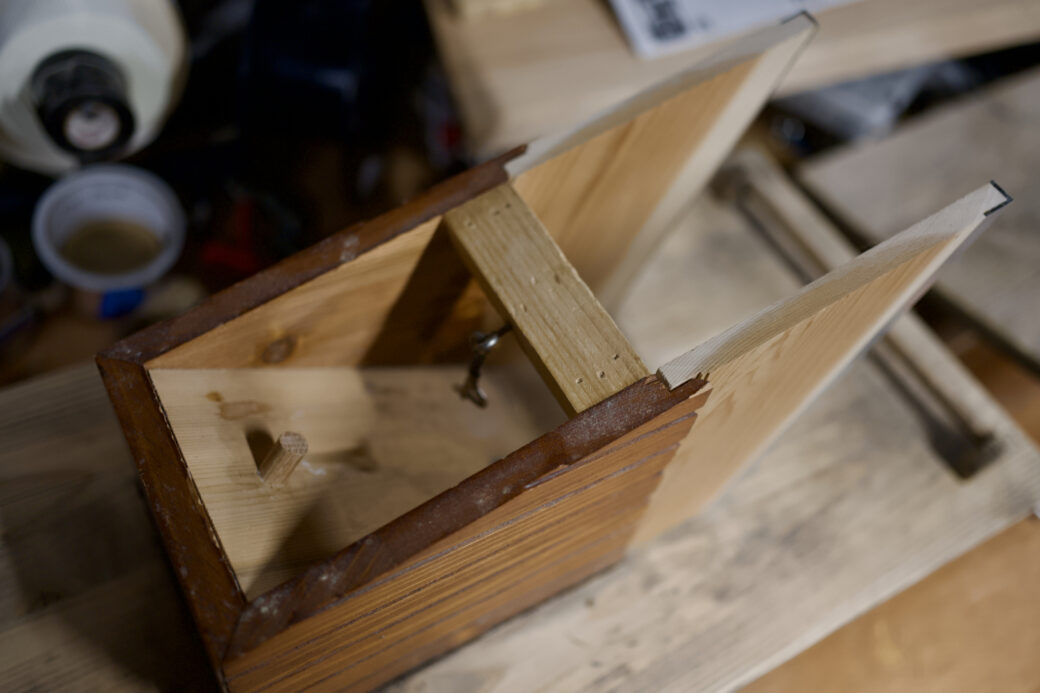
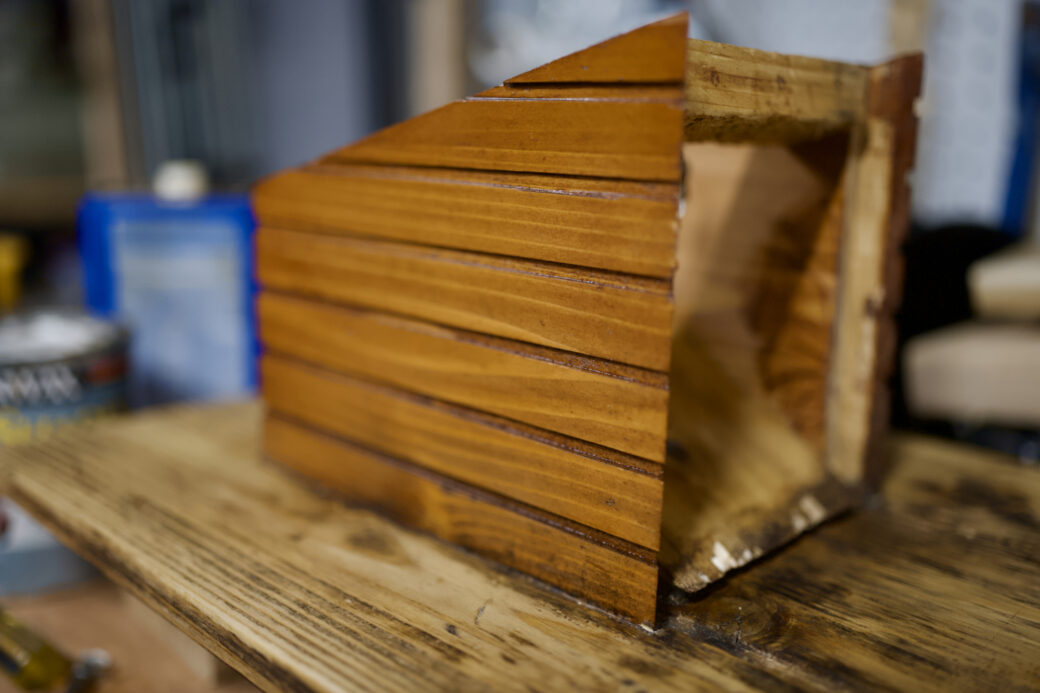
The next thing I needed to do was to fit the walls into the original place, and that meant cutting the back edges of each wall down and then cutting a little bit off the bottom to fit into the base.
I raised the blade on my table saw and dragged the wall pieces along the fence to make the first cut along the back edge. I then moved the fence and made a second cut to account for an angled piece on the part that the wall was glued to.
I moved the fence and lowered the blade to make the bottom cut. Again, this cut would go through the wood and the aluminum, so I was careful about holding it and making sure nothing would get stuck on the blade.
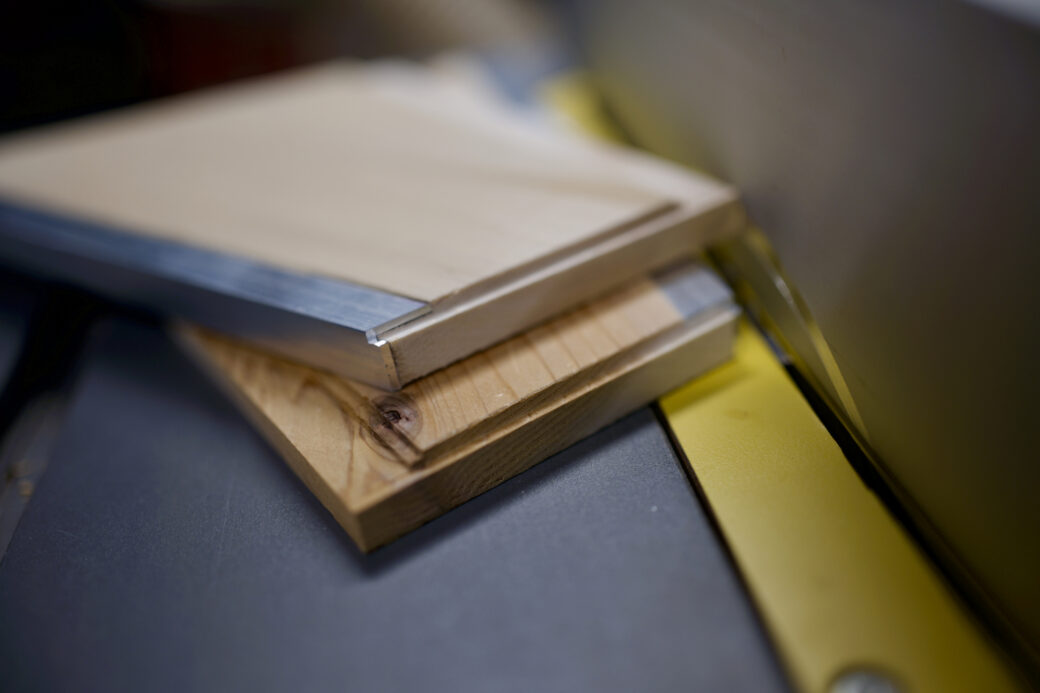
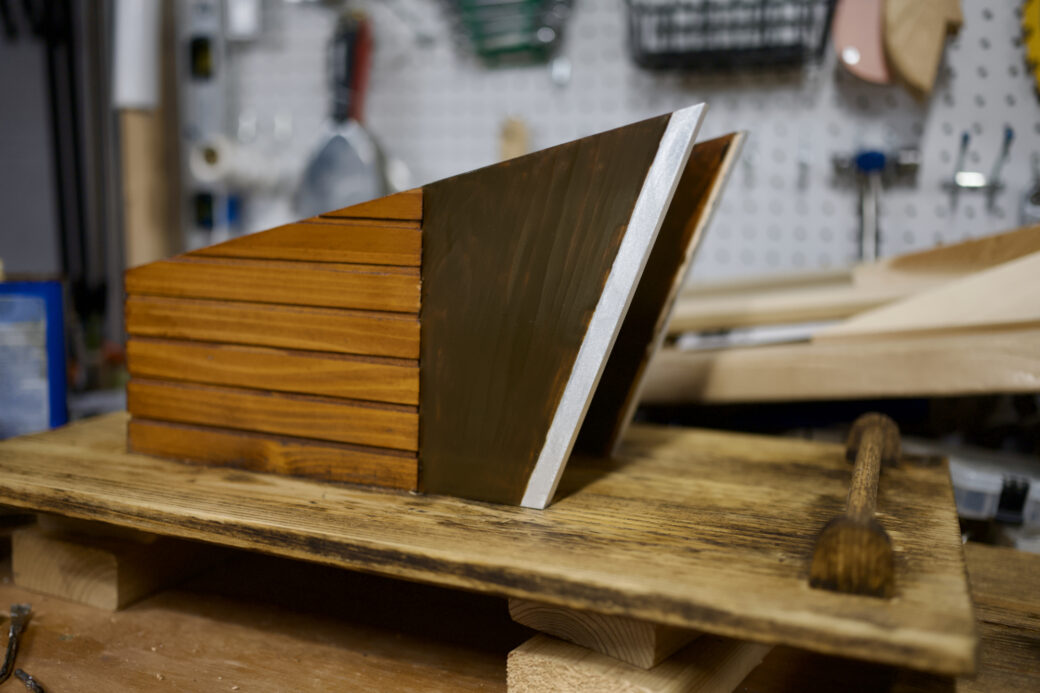
Doing a dry fit and using a mallet to move the pieces into place worked well. I really liked how the metal felt like it was part of the design from the start.
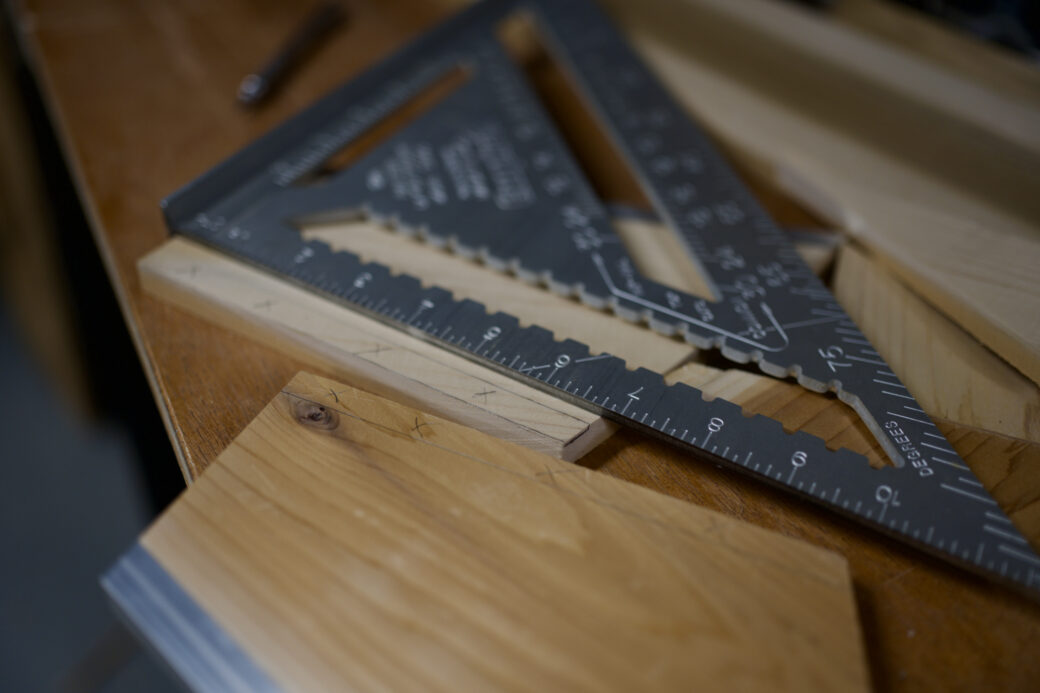
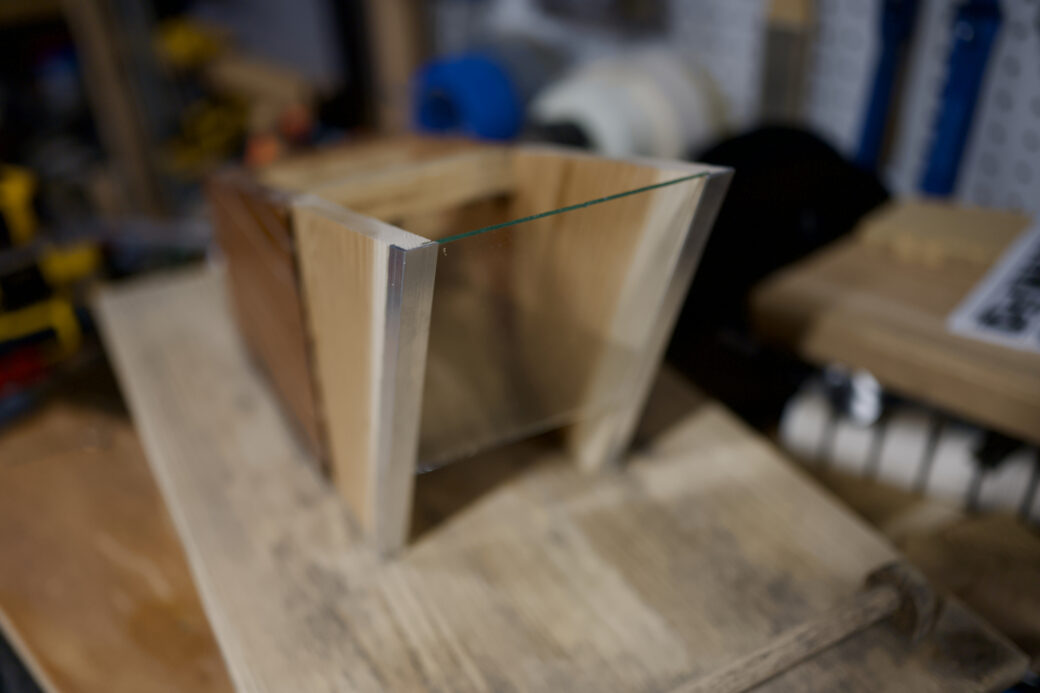
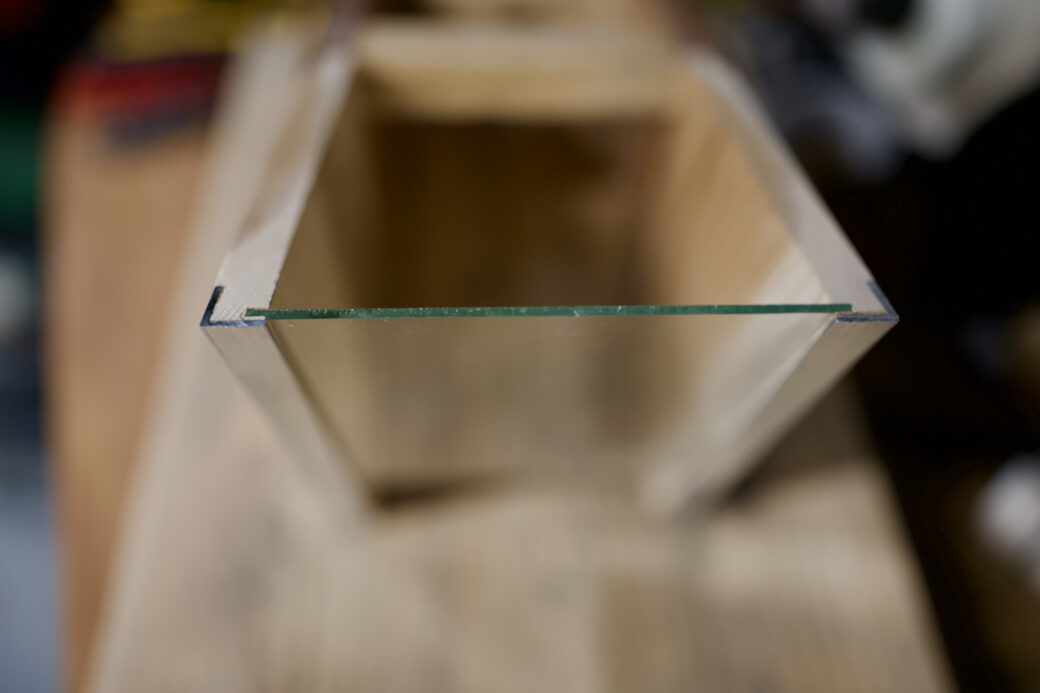
I grabbed the piece of glass that was on standby, measured it, and marked where it needed to go on both sides. Then I went back to the table saw and cut a groove a couple of millimeters from the metal edge.
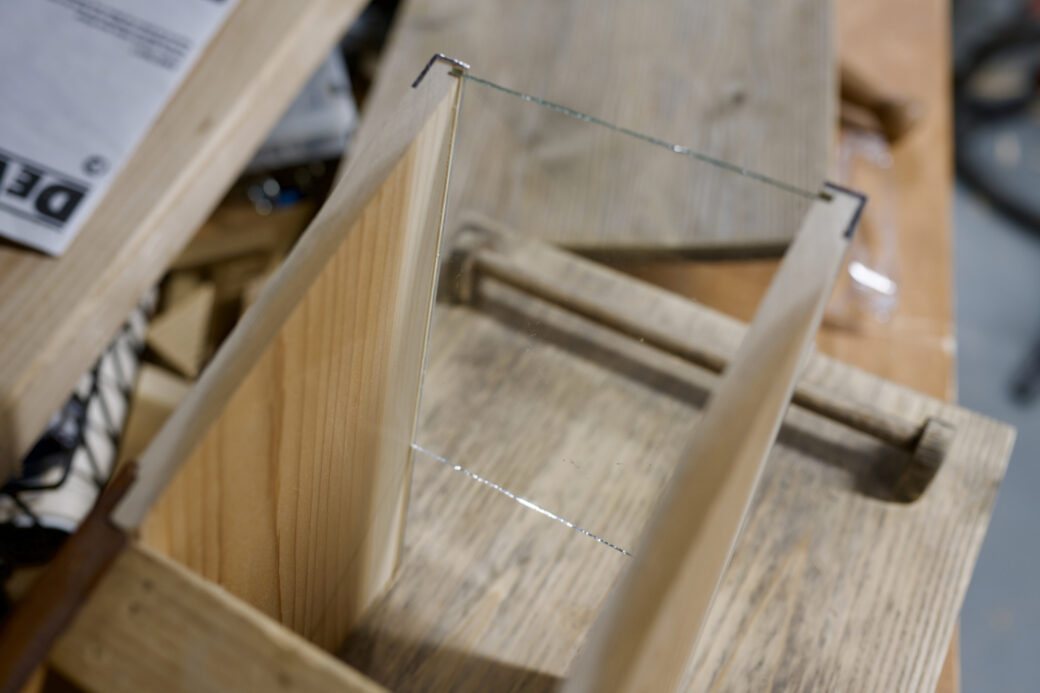
To keep the glass in place, I didn't want to do anything permanent because it's totally possible the wind or something else will break the glass and it will need replacing. To make it easier to do this, I took a skewer, cut it down to two pieces at the same length, then shaved them down with the belt sander to help them fit into the grooves.

Now if I ever needed to replace the glass and I wind up with a longer or shorter piece I can pop these out and either cut them down again or replace them very easily.
Refinishing Everything
I still had the cans of the polyurethane and stain mix from the first time around. For the parts I was replacing I had used a color, called Honey, so I popped open the can, stirred it up and applied some to the back and front sides of each wall piece. I did this over a few sessions so I could let it dry and so I could fix areas that were uneven.
I wasn’t sure how well the polyurethane would stick to the aluminum, so instead of chancing it I just avoided it for now.
While I was waiting on the wall pieces to dry, I grabbed the other can, called Antique Walnut, and applied a light coat over the back walls of feeder. There were a couple of pieces of wood that had chipped and I don’t think the extra coat will hurt.
I also pulled out a can of boiled linseed oil and applied some to the base and the roof. Similar to a normal situation where oil brings out the wood grain on a piece with more contrast, I noticed that this time it also brought out some of the grungy stuff that seeped into the wood. I was thinking of sanding this layer off and sanding the base down some more, but I don’t know how deep the dark parts go. It’s fine and at this point the oil is mostly there for protection from rain and snow.
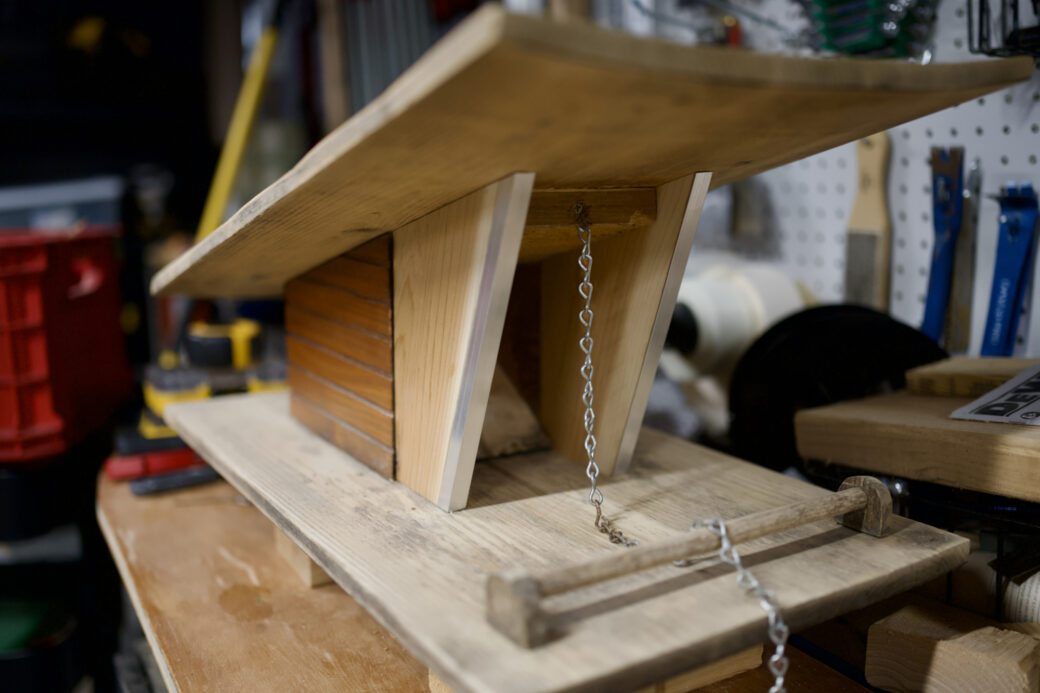
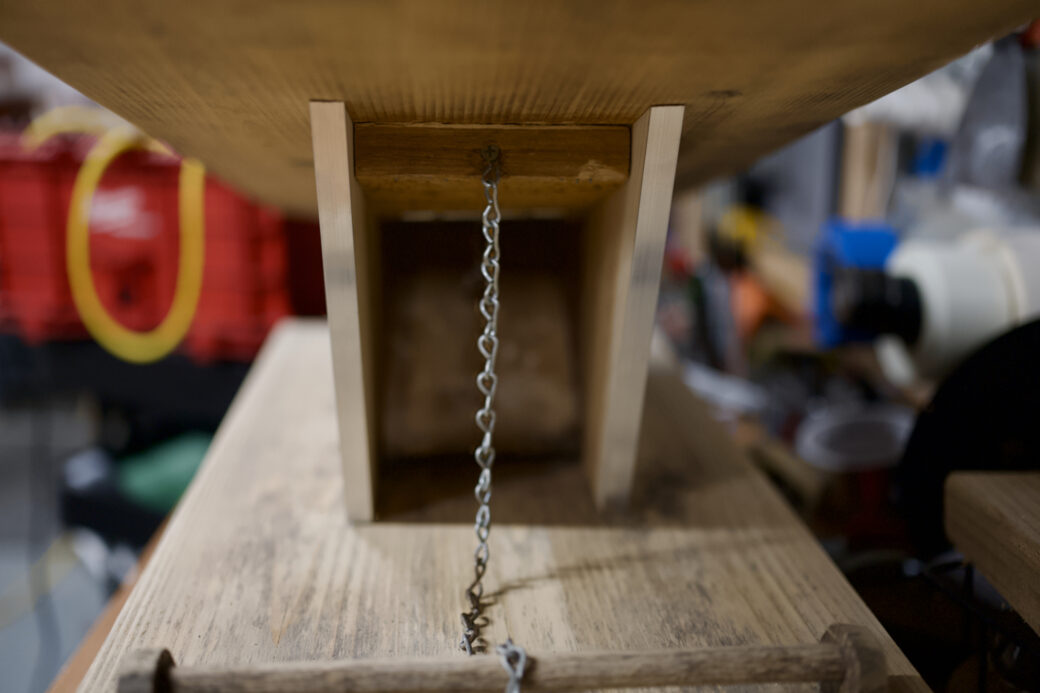
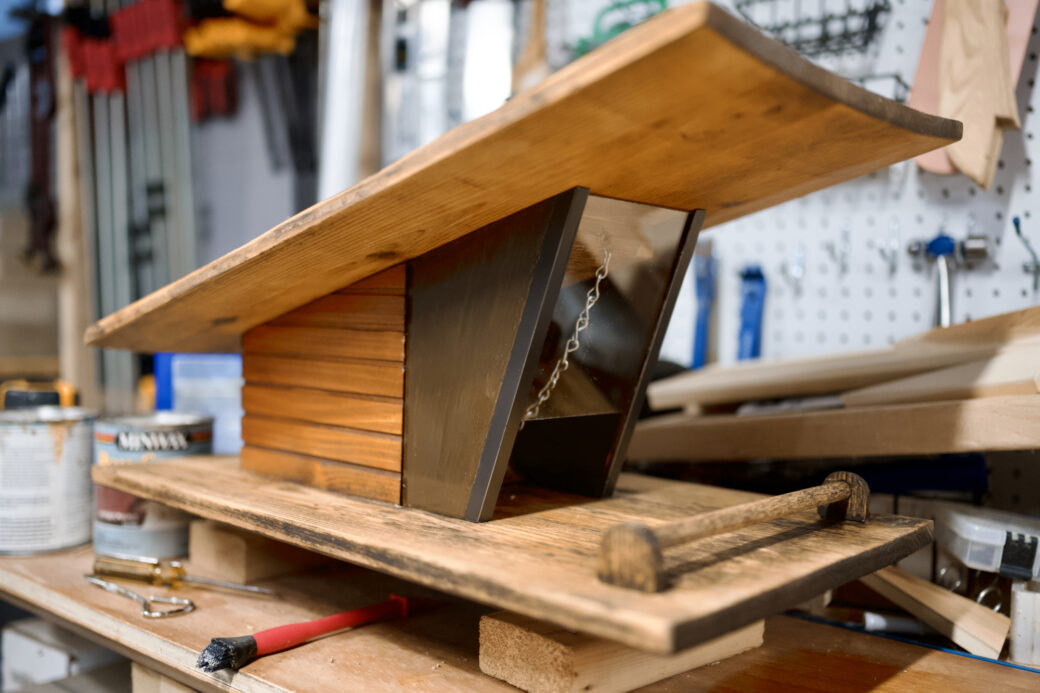
One more dry fit and it was still falling into place nicely.
For the metal pieces I had picked up a can of satin Dark Walnut spray paint. I wrapped the wood in painters tape and gave the metal parts one smooth coat.
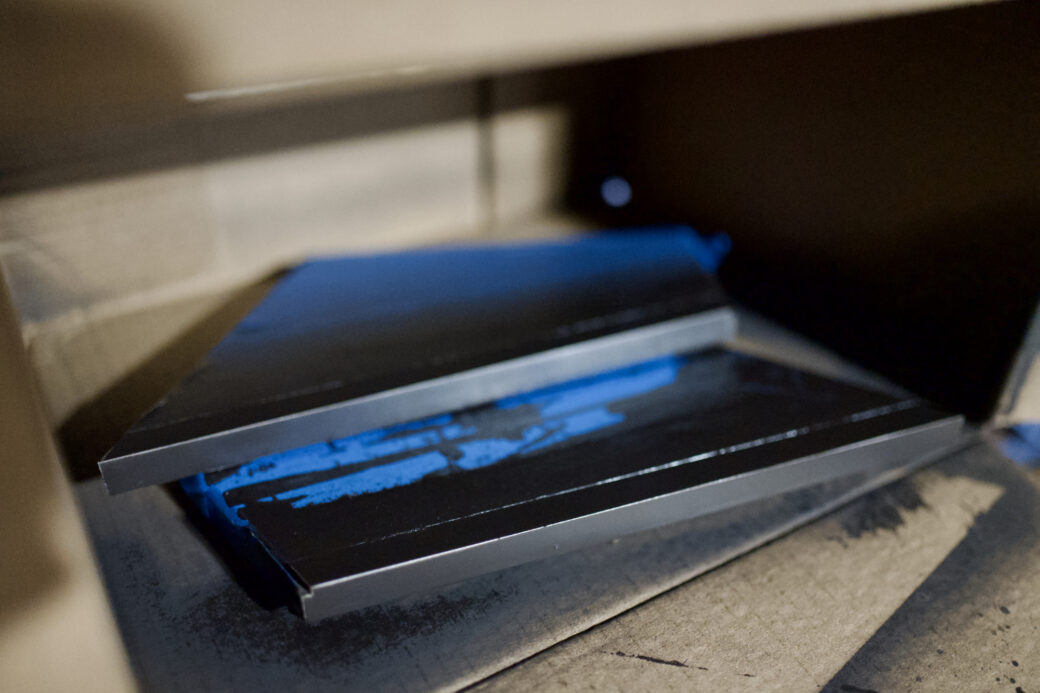
I let that dry for a few hours and then took the tape off. I applied some wood glue to the base and used a mallet to move the walls into place. Then I popped a couple of brad nails into the bottom of the walls, just like before. I fully expect that I'll have to repair this again in the future, so I tried to make it easy enough to disassemble it again without breaking anything.
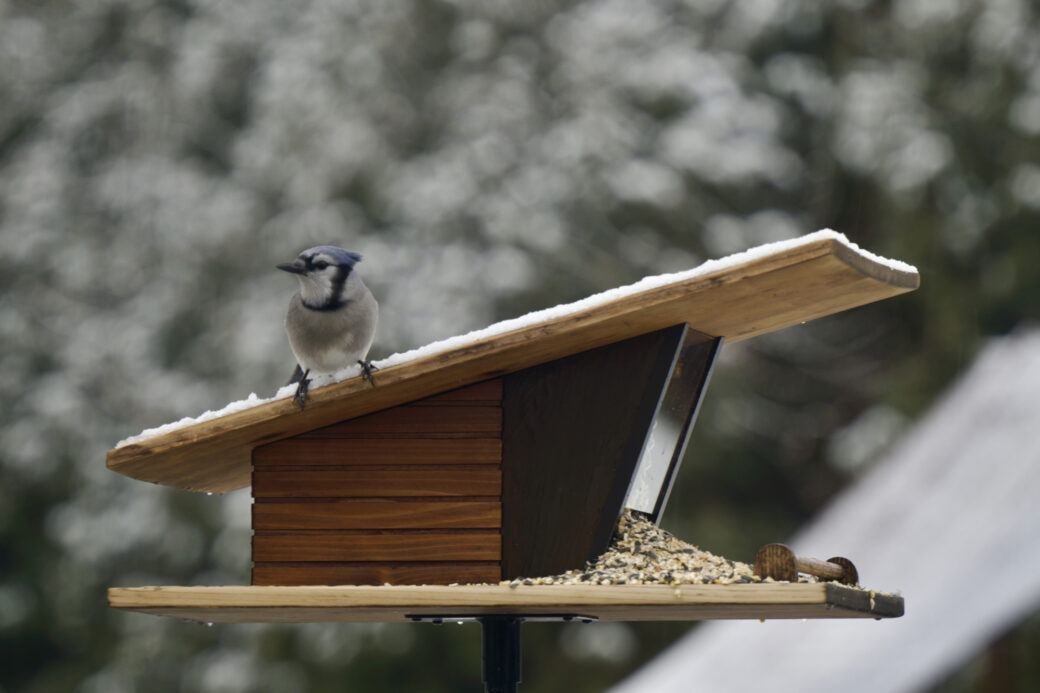
I did one last touchup on the finish and let it all dry for a few days before putting it outside for the birds to enjoy.
It was nice to see everything fall into place so easily with this repair job. It also went a lot quicker than the original build and I think it’s because a lot of the time upfront was thinking through the build, measuring, testing out finishes and troubleshooting issues.
I moved the pole that the bird feeder sits on a few more feet away from the light pole and planters so I don’t think the squirrels will have an easy time jumping over to the feeder. There is a tree that has some branches maybe 10 feet above the bird feeder, so an extra ambitious squirrel could make it if they really wanted to fall onto the feeder.
I’ll keep an eye on it and if I do see a squirrel successfully getting onto the bird feeder, I’ll deploy another project in our house since last year:
Update: January 2026
So it looked like I either put the bird feeder out a little too early, or I didn’t apply the glue properly to the metal pieces on the front of the feeder.
About a week after I put the feeder out, I saw that this one rail came loose and was just held into place by the pressure at the bottom of it. I removed the railing, cleaned up the gluing surface, and re-attached it with a little bit more epoxy.
After a couple of days in this trap of clamps, I put the feeder back outside and hopefully the metal will stay this time. We're in the middle of a snowstorm, so the birds should be happy to see its return.