
A few months ago I created this Mid-Century Bird Feeder and showed the finished photos to some family members. Upon checking it out, my mom made a request: she asked for a birdhouse made specifically for North American bluebirds. My sister was with us and asked for one, too.
I had a bunch of ideas for some cool and colorful bird houses, but after doing some research I landed on a lot of parameters and pointers that make for a successful bluebird house. So I dialed my ideas back a bit and—despite sticking to some standard birdhouse plans—this project led to a new tool and some cool experiences.
Article Updates
-
Before going any further, just a heads up that there are a few links to products by Netvue here. They didn’t sponsor this article or anything, but those links are affiliate links that do pay me money when you buy something from them.
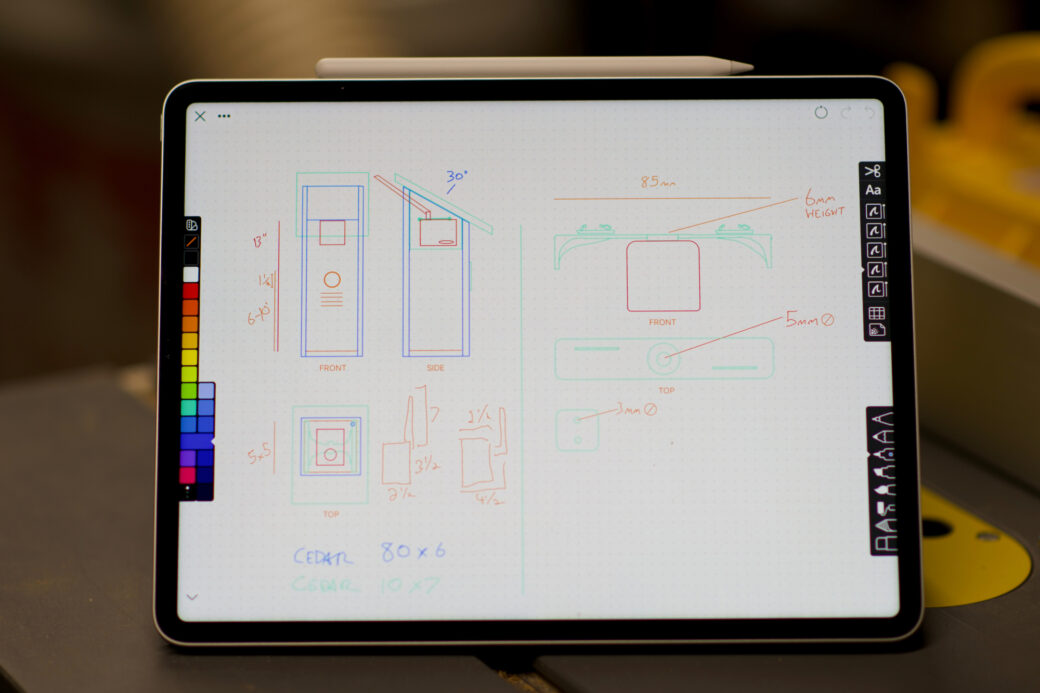
Design
In my research I found several great sites that shared the basic plans for bluebird houses. I made note of the optimal dimensions for the inside of the birdhouse and the height of the entrance hole. I also read about a few features you can add to help keep the entrance hole safer from predators, as well as a way to help newborn babies leave the nest for the first time.
One thing that caught my eye was that a lot of makers had added cameras to their birdhouses and bird feeders so they can see their avian guests up close. This was a whole entire rabbit hole that included lots of options, ranging from all-in-one camera kits to some how-to articles for creating your own DIY camera feed. Since this was a gift, I was leaning towards the camera kits that had software that was simple to set up and use.
With that in mind, I left the design of the bird house a little open-ended until I was sure as to what the camera hardware setup would look like.
Technology Testing
I did some shopping around when looking for a good camera kit to use. A lot of makers had something similar to a Wireless Bird Box Camera, so I started my search there. These looked very compact and there were lots of options to choose from.
I liked some of the AI bird feeders, like the Bird Buddy, that include things like bird recognition and activity notifications. However, Bird Buddy didn't sell a stand-alone camera kit and being a bird house, the AI recognition feature would go unused.
I eventually stumbled upon Netvue’s Birdfy Cam and it seemed to be exactly what I was looking for. I liked the idea of using a solar panel as a way to keep the camera battery charged up, so I bought the bundle that included both the camera and the panel.
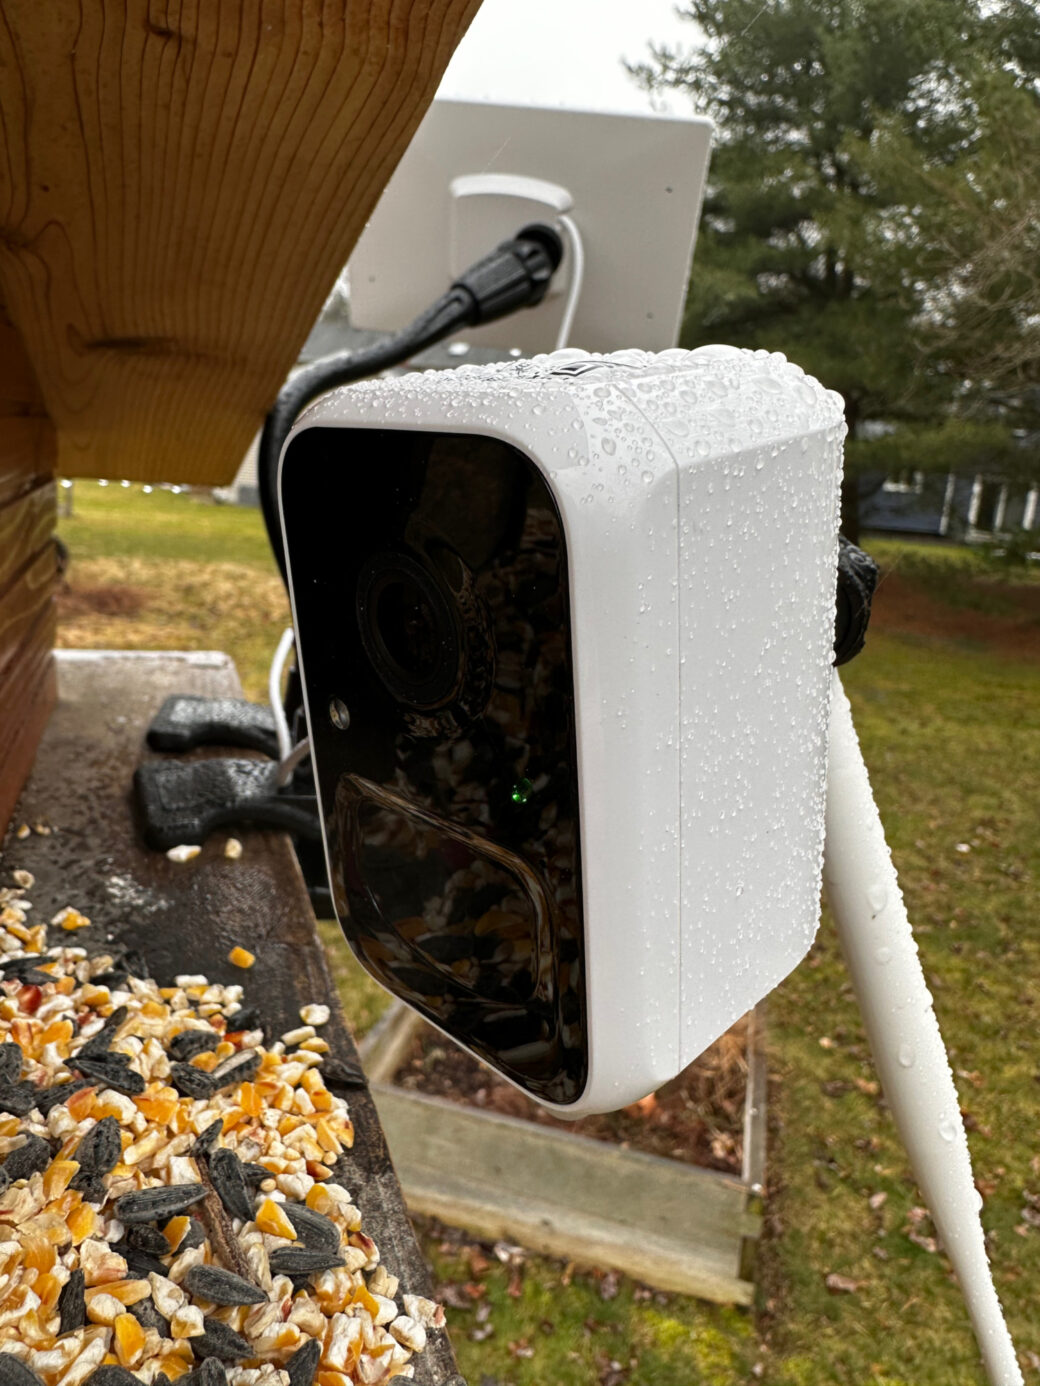
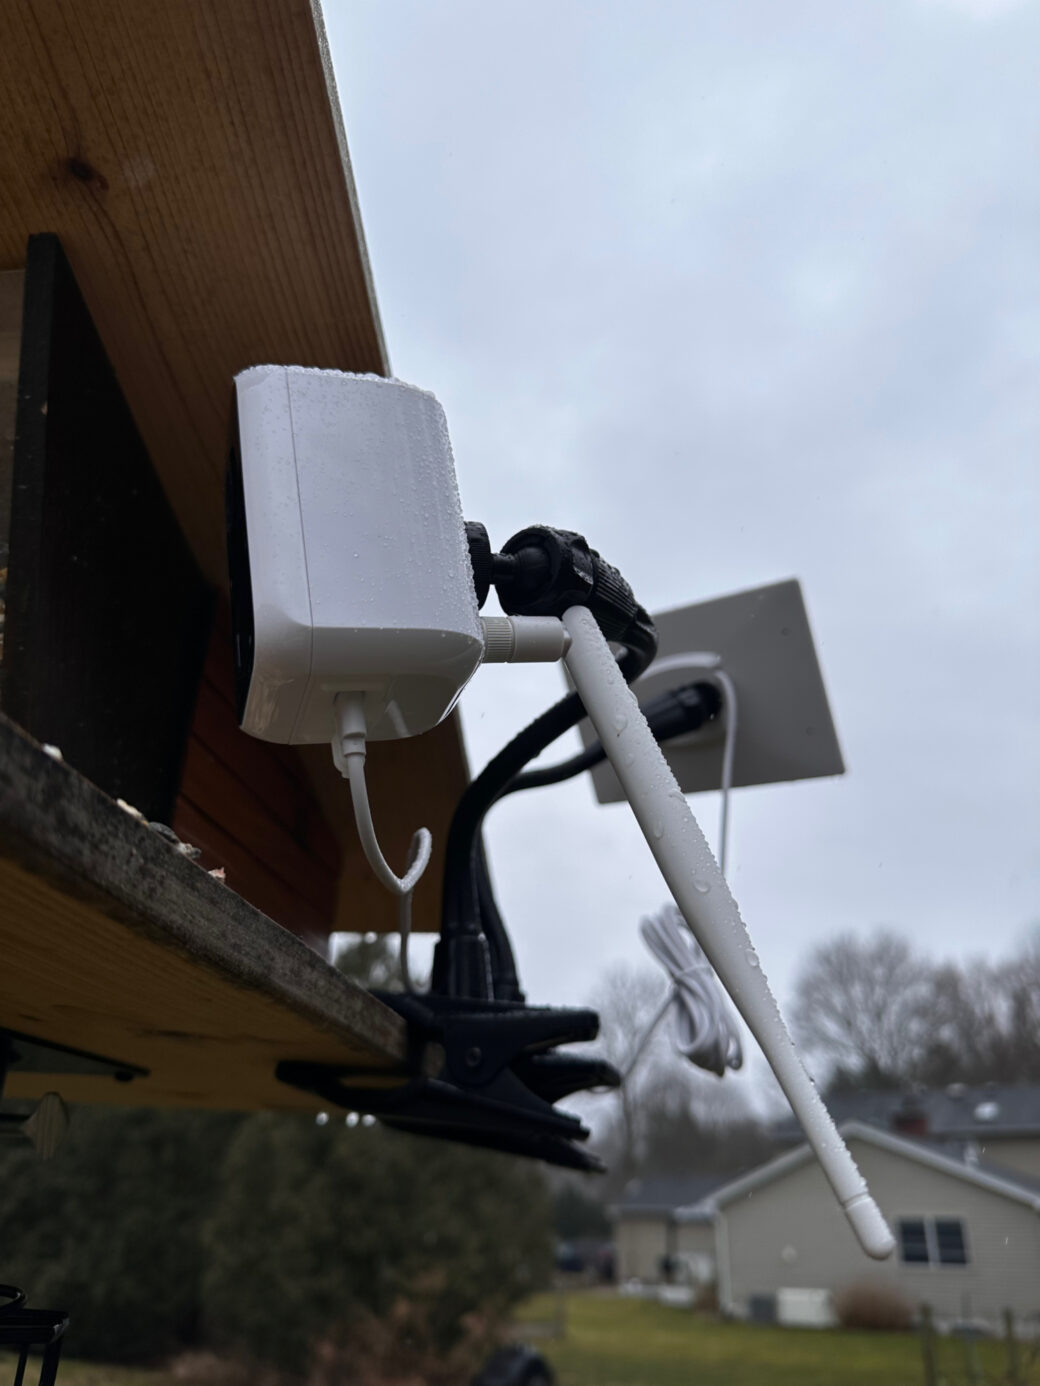
The camera used a standard ¼ inch mount, so I used a couple of flexible lighting mounts to clip the camera and the solar panel to my bird feeder. I wanted to test the overall experience of capturing clips, streaming, and getting notifications via the app. Here are my general notes:
- The software made things really easy to set the camera up and to change options. I really liked that you could flip the camera upside down and set the recording quality.
- I liked that you could quickly save clips and that on iOS it created an album in Photos for storing the clips you saved.
- The solar panel did its job just fine. While I don’t live in the sunniest area, we still got plenty enough to charge the camera and to keep it charged for the entire time I tested it.
- The clips are only 1080p, and I hope one day they offer a camera that lets you record in 4k (even if it only streams in 1080p), however, recording at HD quality was still pretty good and I think most people would prefer better battery life over image quality.
Throughout the day it was fun to see the variety of birds that visited my feeder.
Next up I wanted to make sure the camera would work within the rough dimension of the birdhouse and I wanted to figure out the best viewing distance from the bottom of the bird house to figure out the final measurements.
I used my sketch to cut a cardboard box into a 5-by-5 inch tunnel and placed the camera at the top. With my phone streaming the camera feed, I marked the height that I thought worked the best.
I cut a hole in the cardboard and stacked up a couple of 1-2-3 blocks at the bottom of the model to get an understanding of what the height of a nest or some eggs might look like.
From there I had finished up my plans and started gathering materials to build two birdhouses.
Building the Base
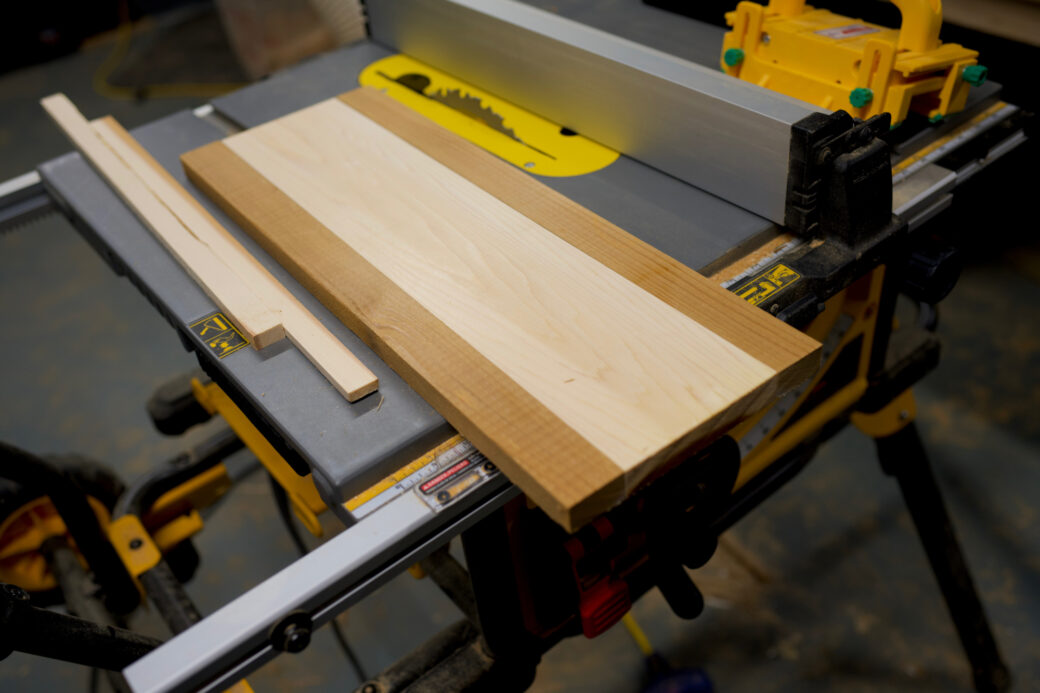
I wanted to use cedar for the birdhouses as it holds up well without any finish. I know the sun will eventually fade the color a bit, but I still picked pieces that had nice grain patterns and as few knots as possible.
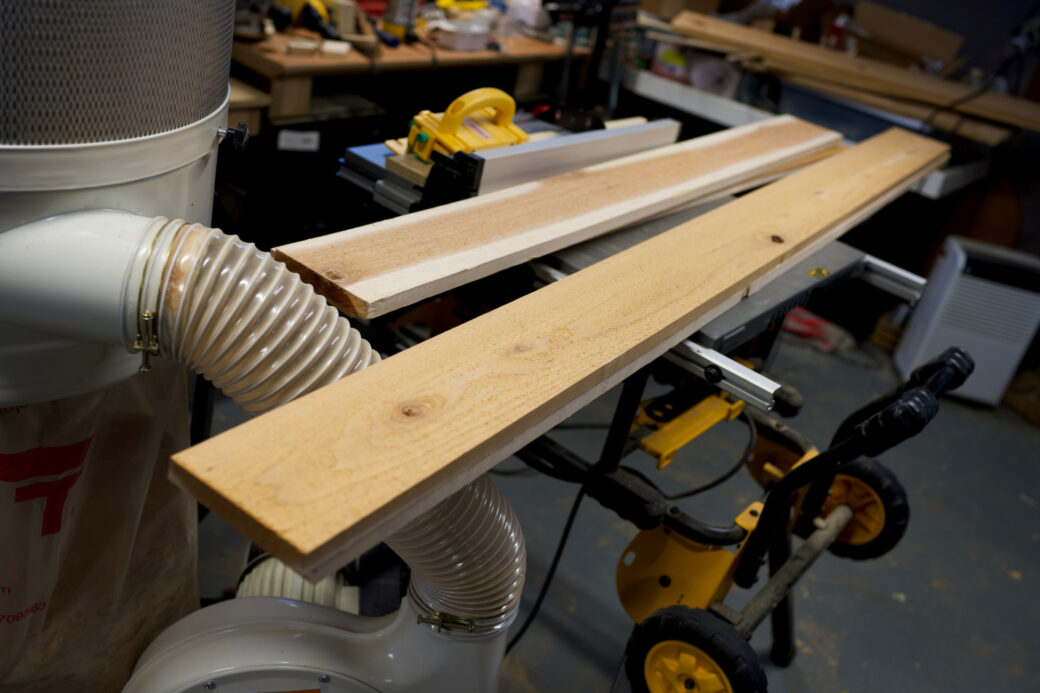
I picked out lumber that was close to the width in my plans, and I trimmed down the rest of the pieces as needed.
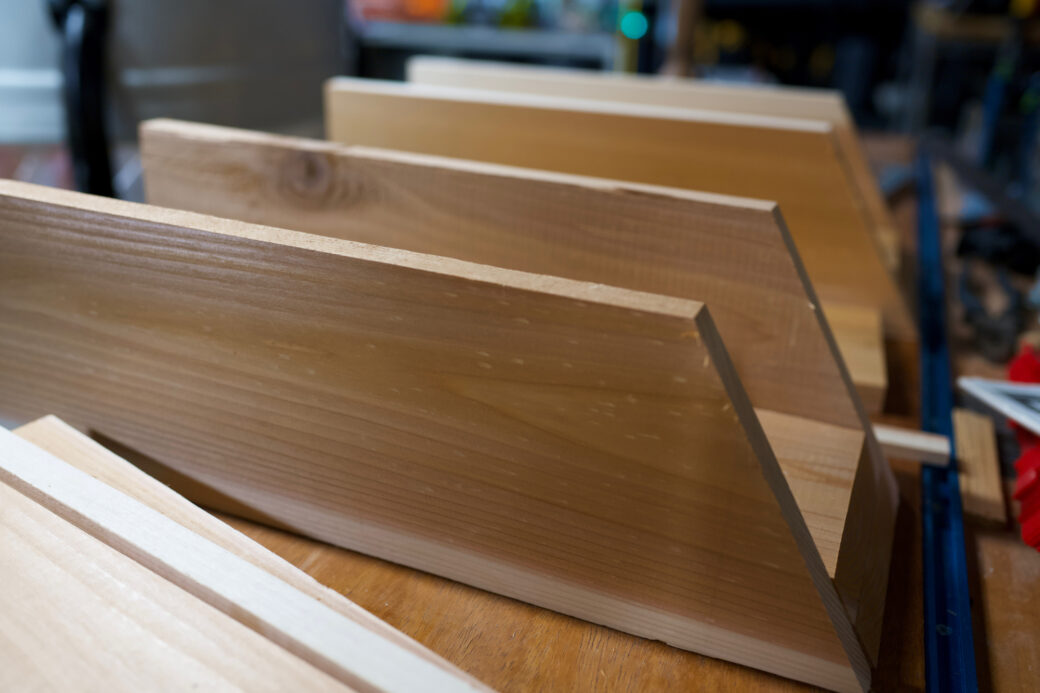
I had figured out the height for the sides and the front and the back, so I used the miter saw to cut two piles—one for each birdhouse.
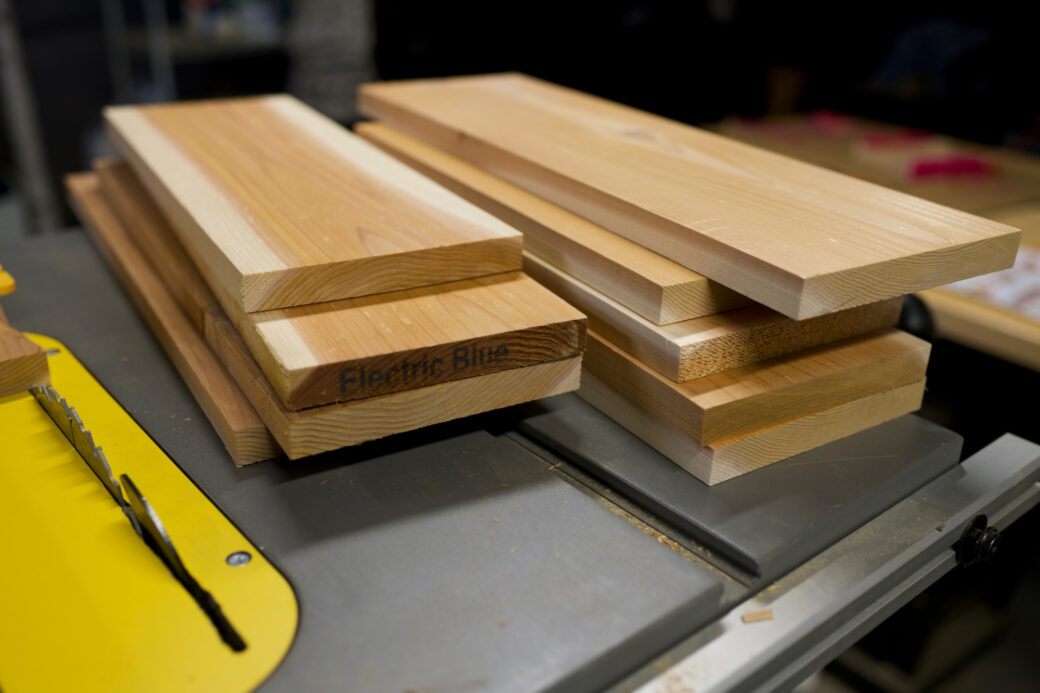
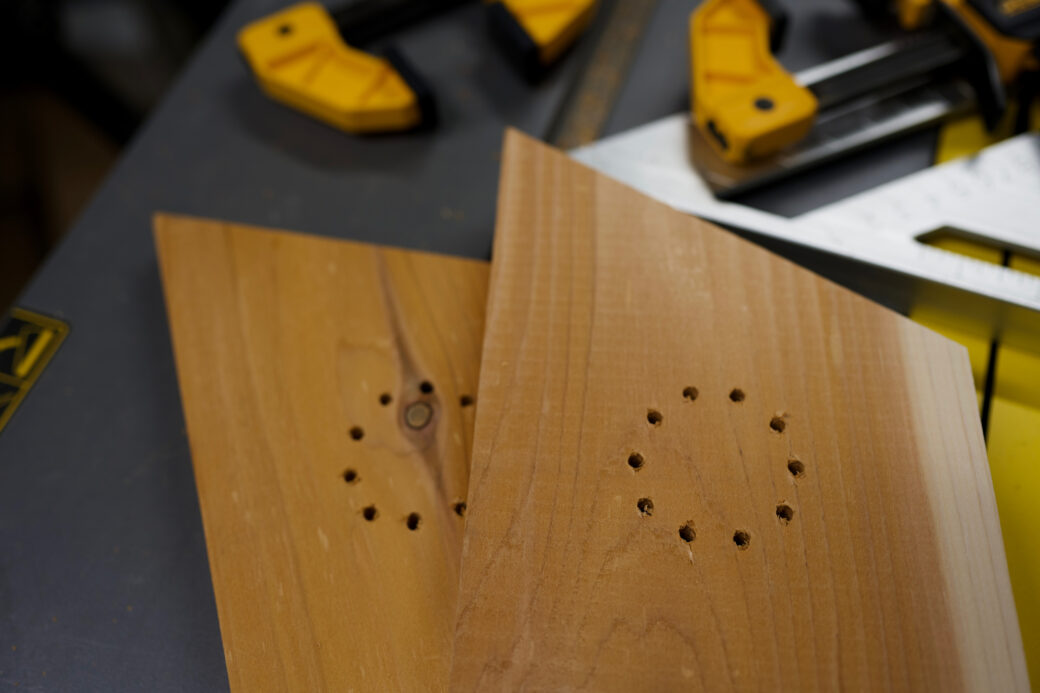
There was a slight color difference between each pile of wood so I decided that throughout the whole project I would try to keep the wood from getting mixed between each pile. This way each birdhouse would look more cohesive than if there was one or two pieces that had a very different grain pattern.
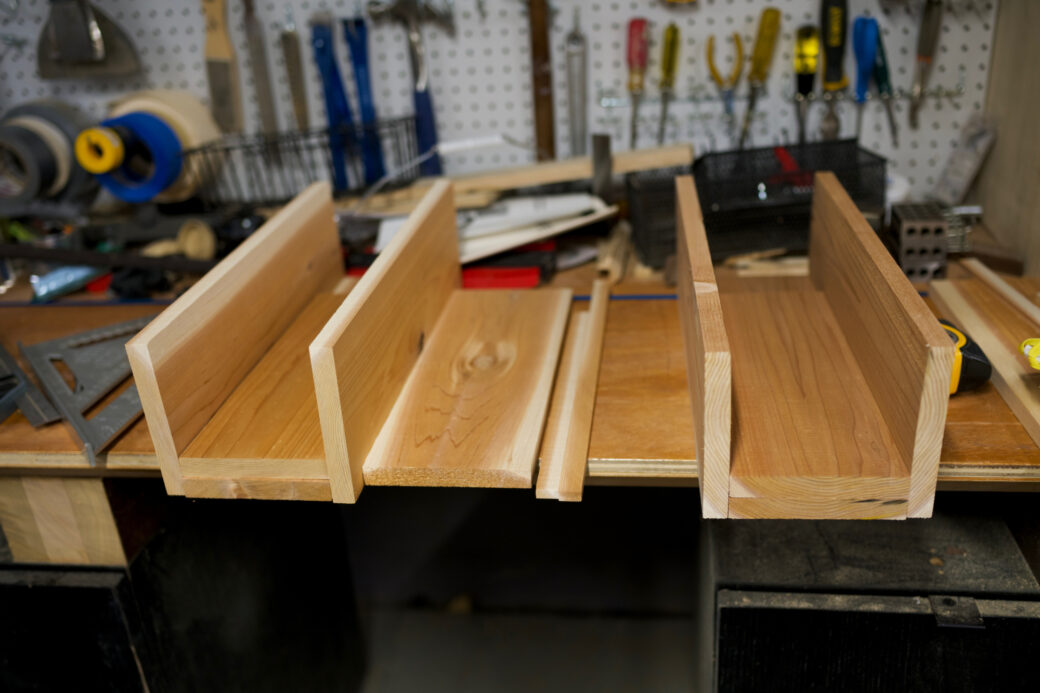
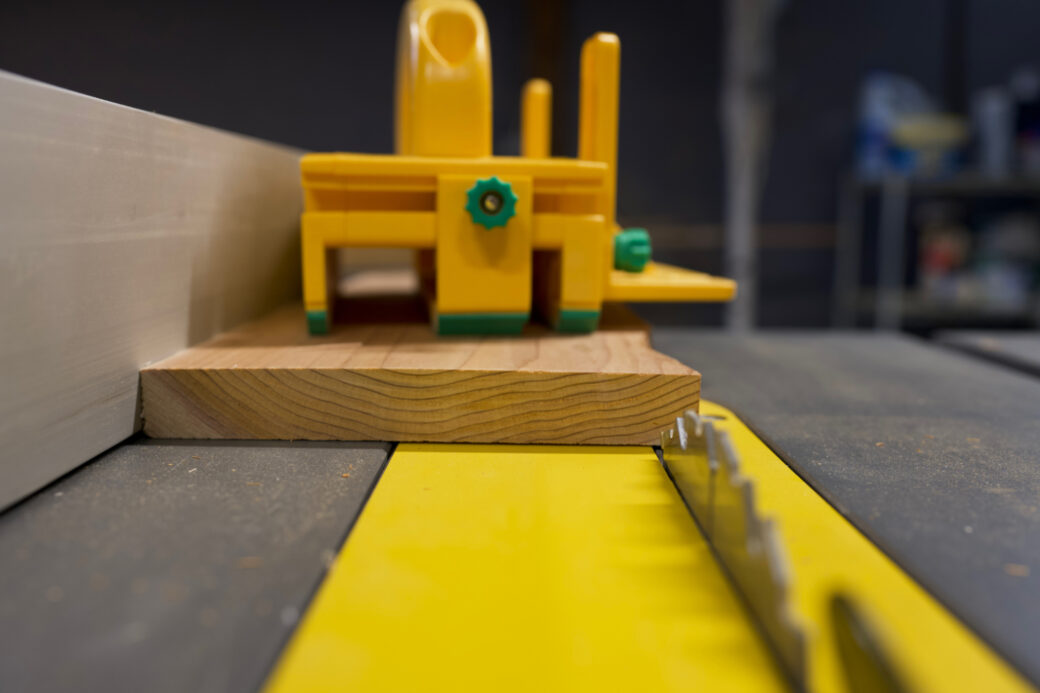
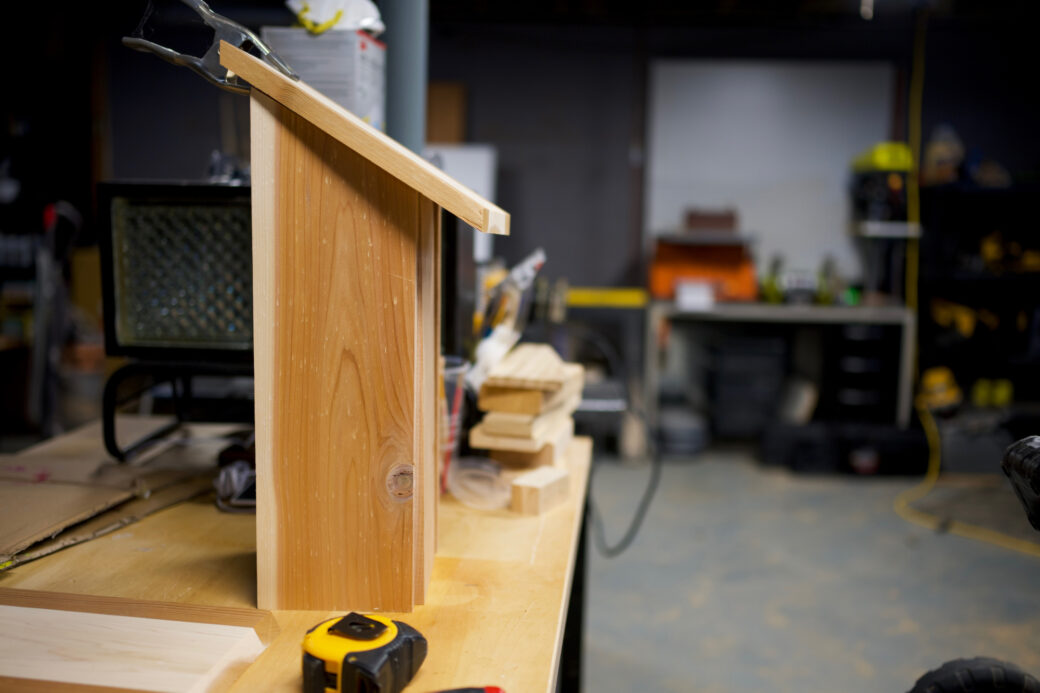
Once I had the walls done, I set my miter saw to a 30 degree angle and cut the diagonal top of each of the side walls.
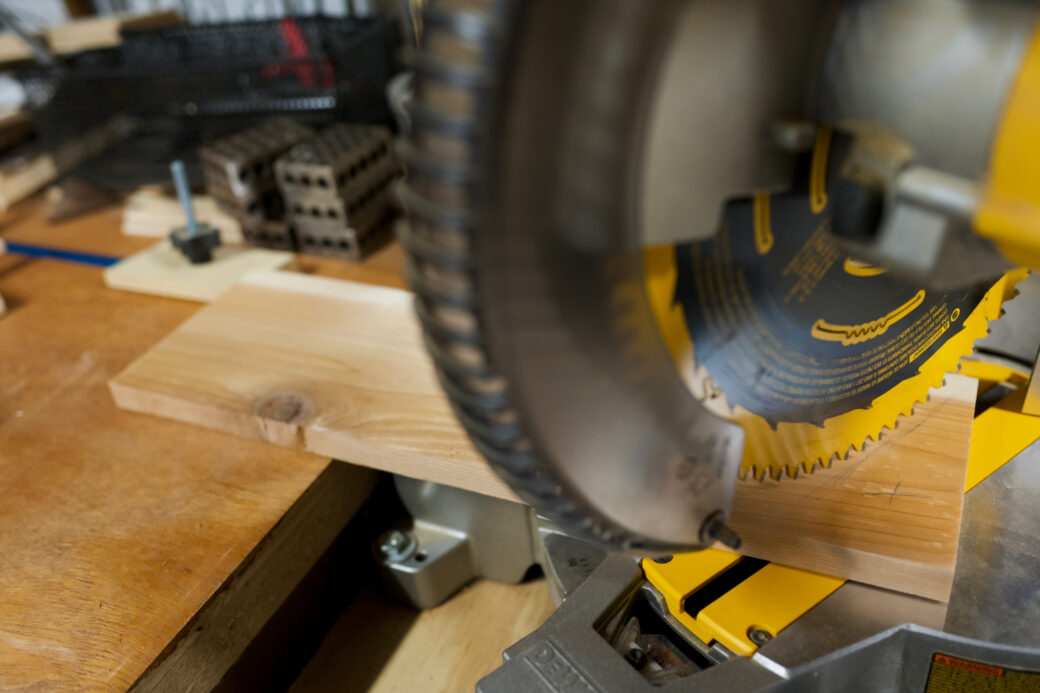
I set my table saw to a matching angle and cut the tops of the front and the back down to match the side walls.
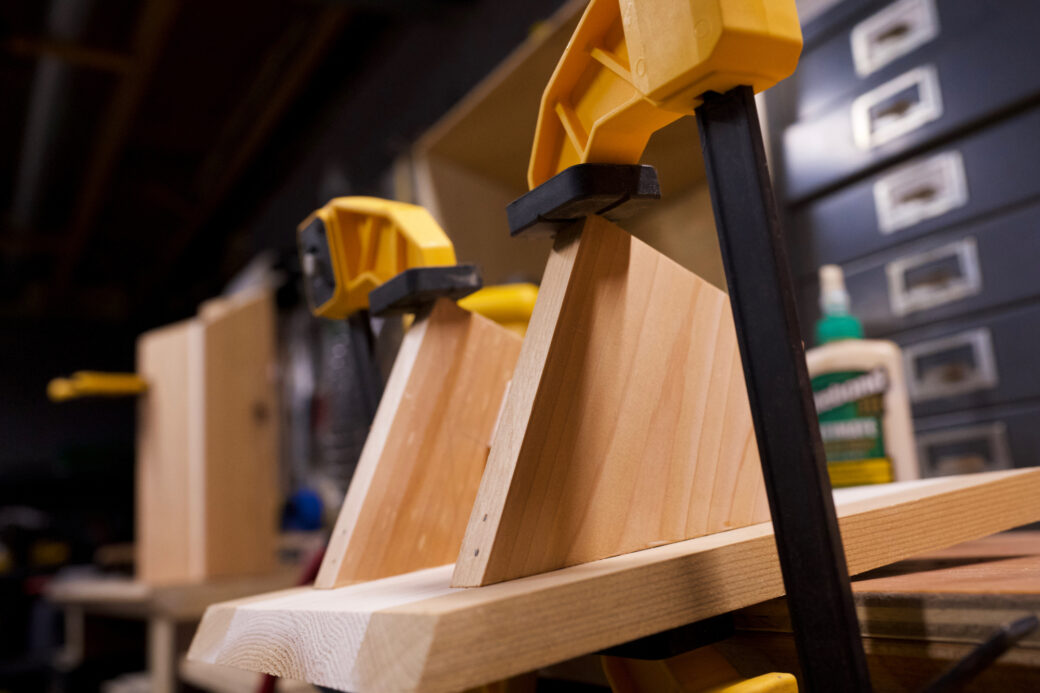
Because I was planning on using wood glue and brad nails to join the walls together, I wanted to give the bird feeder some extra support by cutting some rabbets into the bottom piece. To do this I first cut a deep cut onto the sides of the piece, then flipped the piece onto its side, adjusted the fence, and did a very shallow cut to trim off the hanging slice of wood.
I did another cross cut to add a trench into the front and back walls at the height to match the bottom piece.
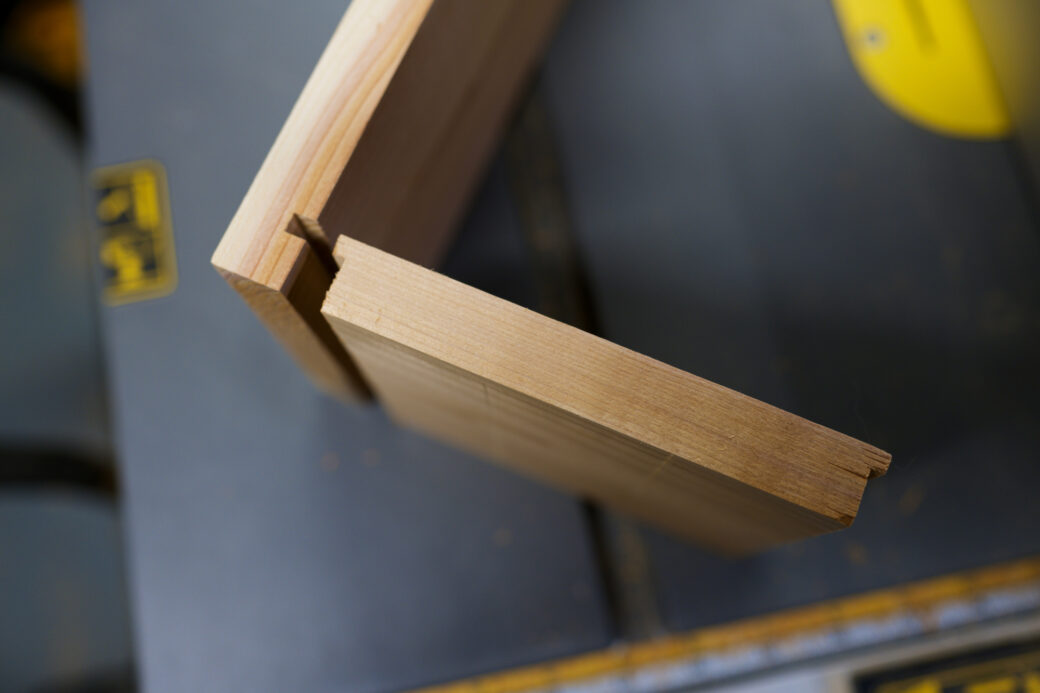
I didn’t get it quite right the first time through, so I wound up trimming things down a little bit to fill in some of the gaps that showed up when I first put it together.
Once I got things to fit, I tested out the bottom and things lined up nicely.

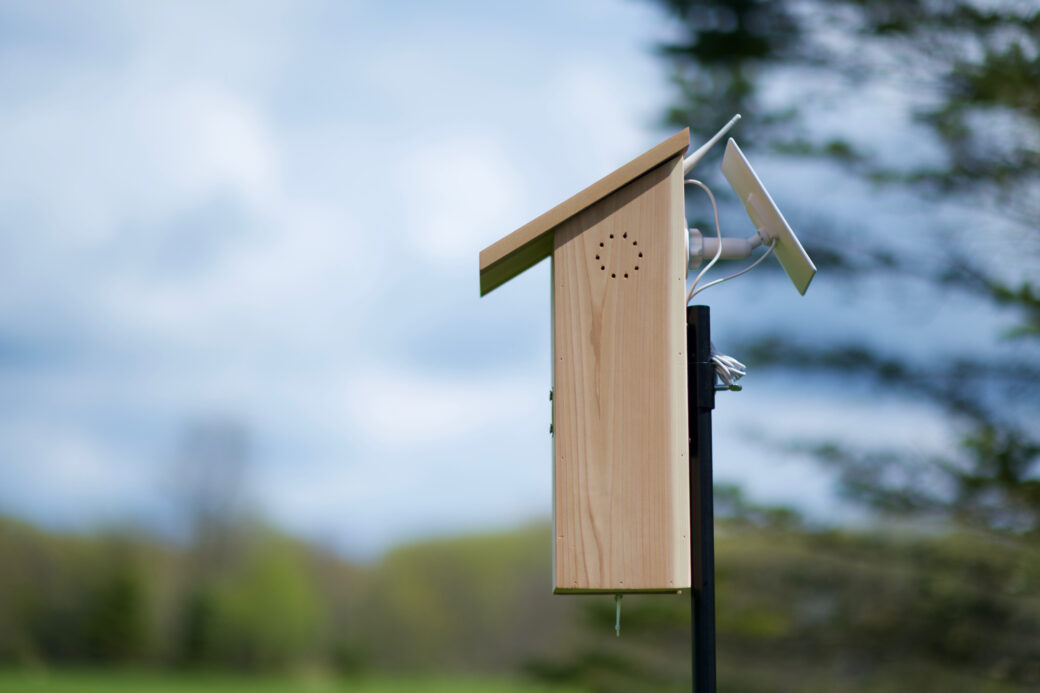
WiFi-Enabled Roofing
With the walls and floor cut to size, I did another test of the camera position.
This time I had to factor in where the camera’s antenna would need to go, as well as to make sure I had room to plug in the cable for the solar panel.
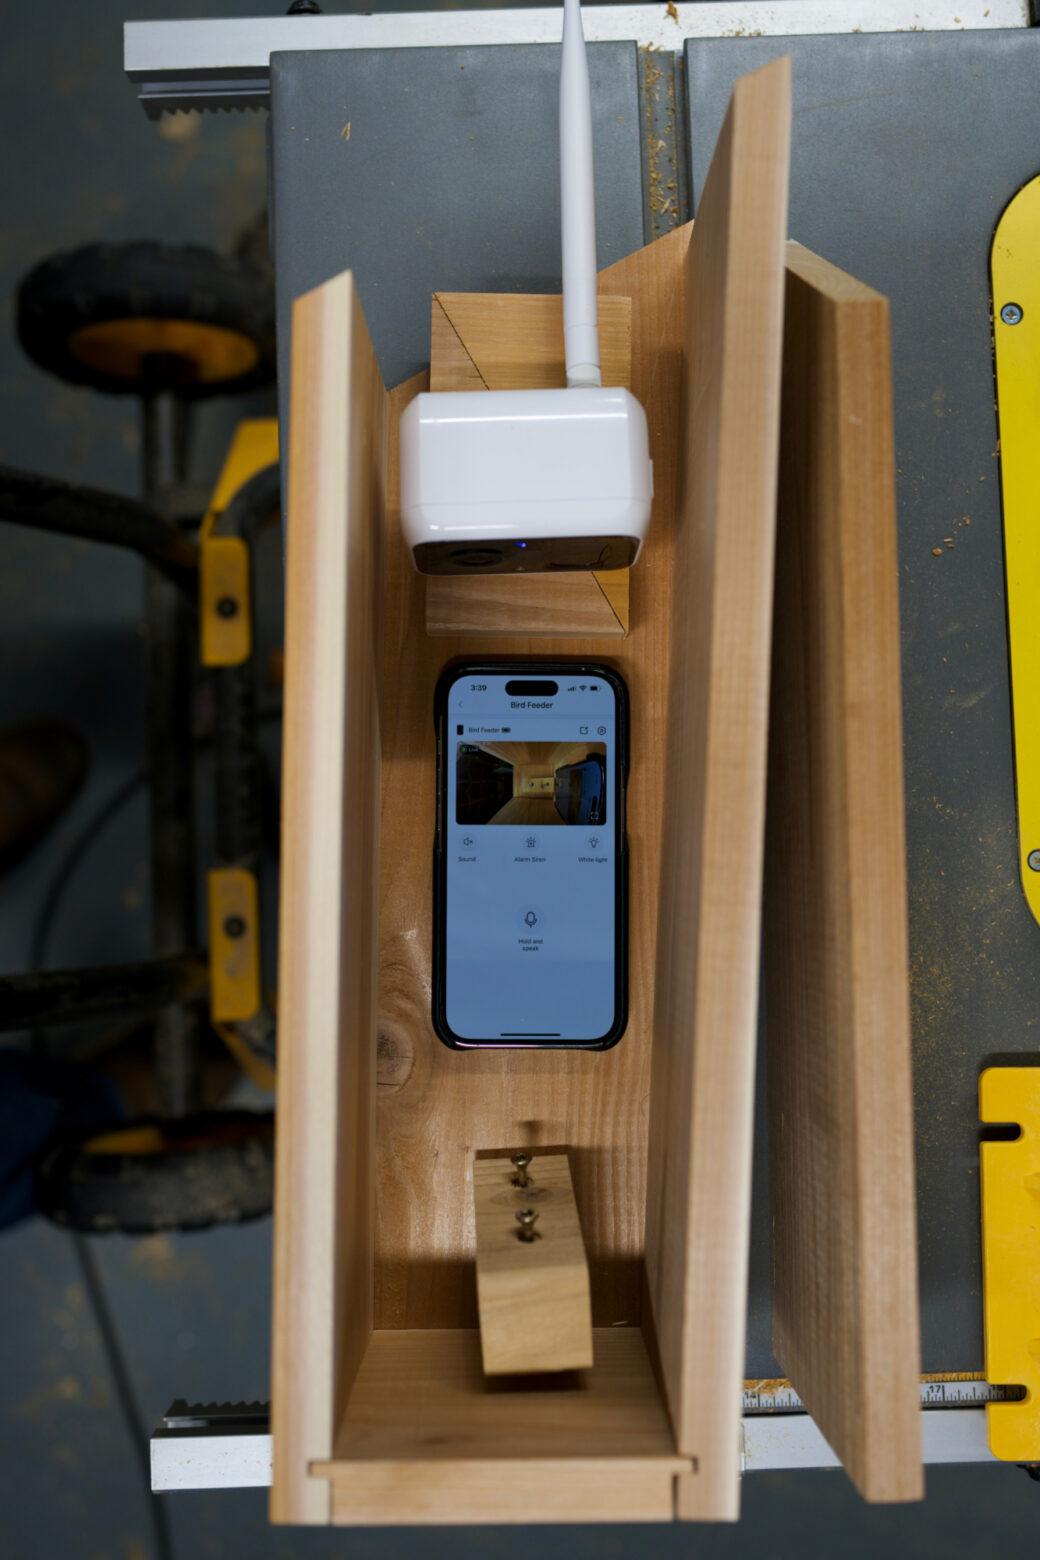
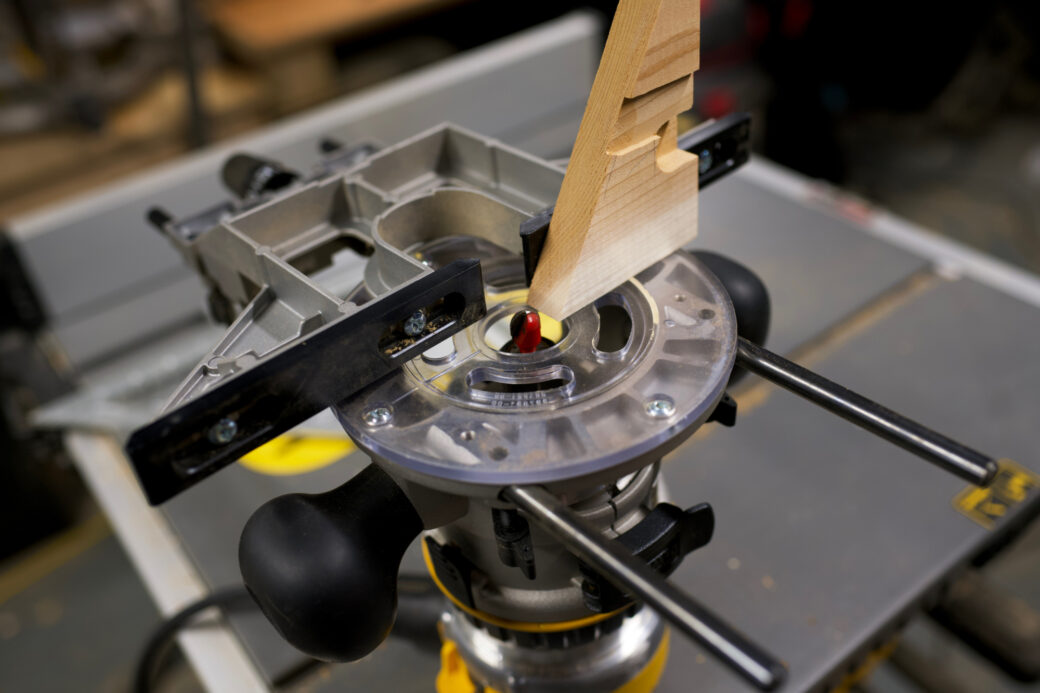
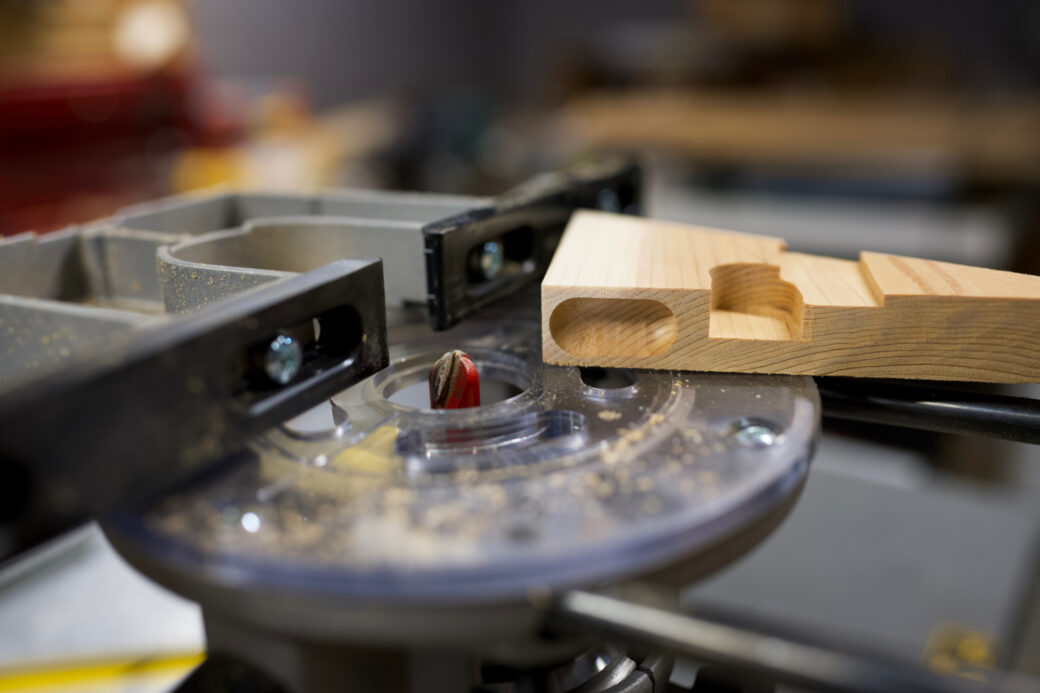
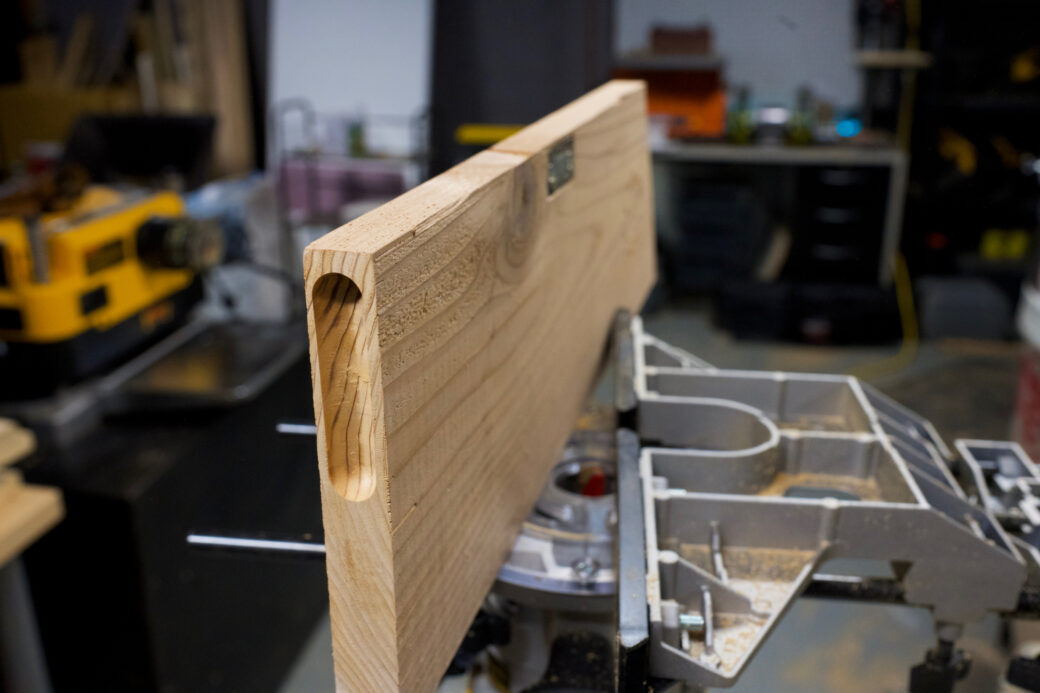
I grabbed the back wall and used my router to create a channel for the cable to to live in, as the camera plus the cable wound up being about a ¼ inch too tall.
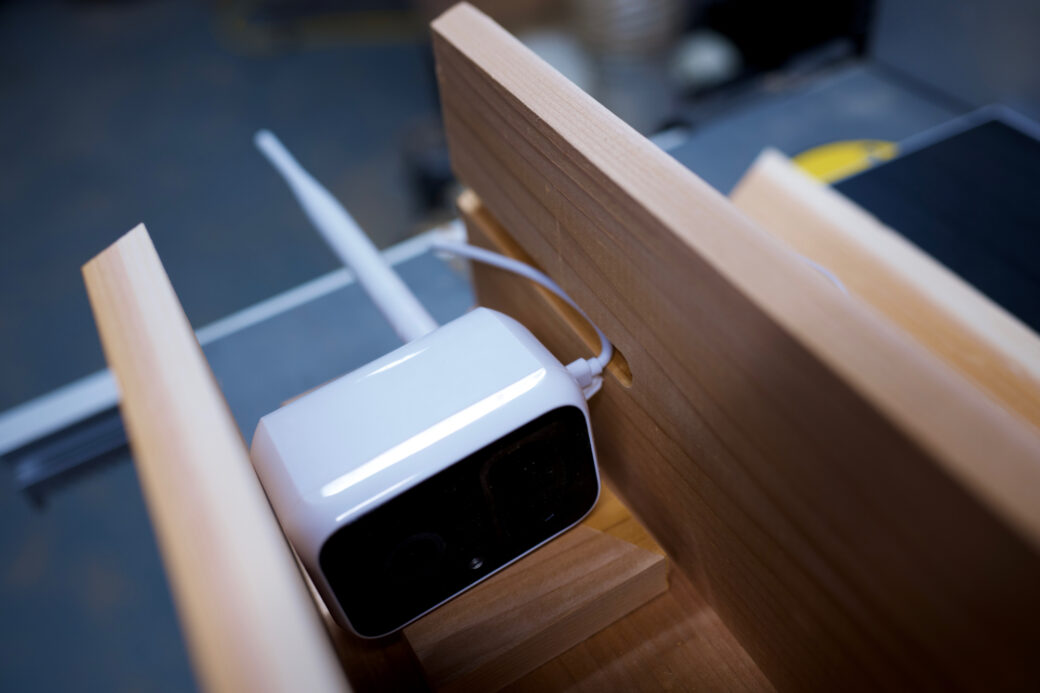
At the top of the channel, I used a slightly larger cutting bit to create space for the antenna to stick out the back of the birdhouse.
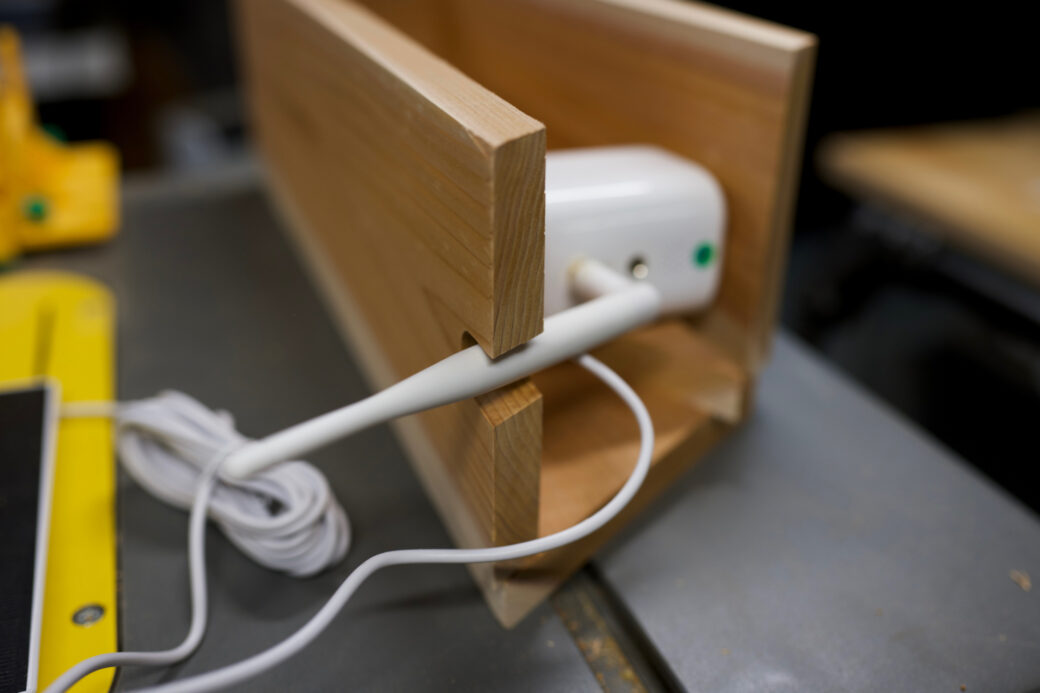
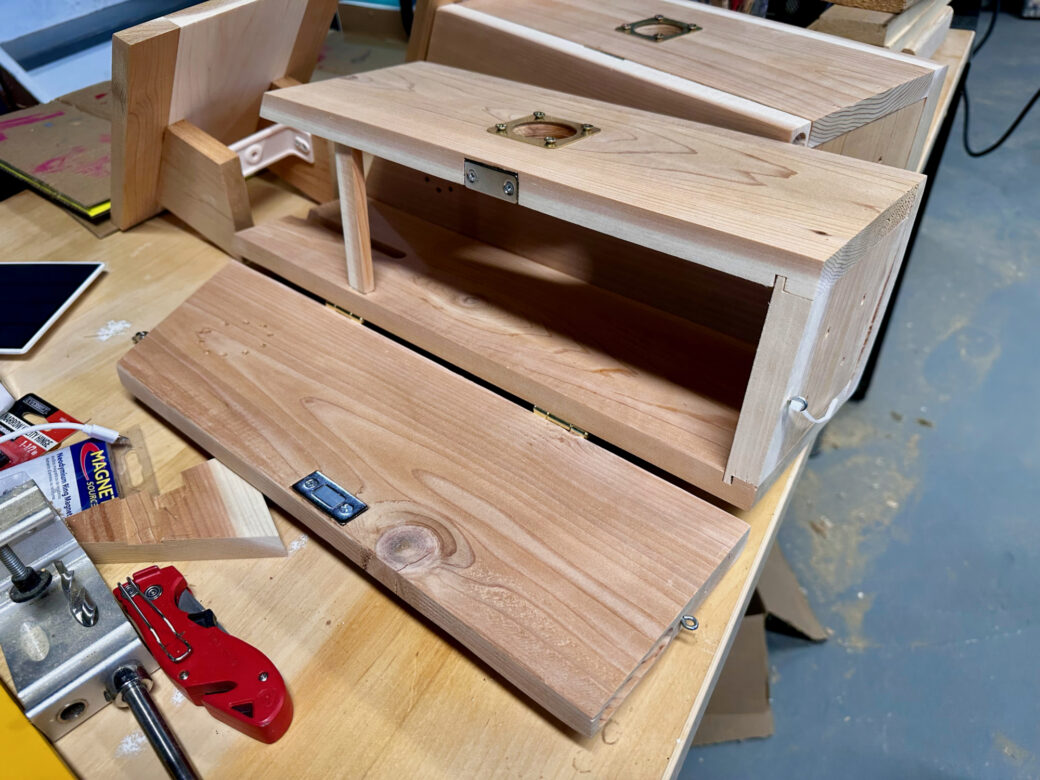
My plan was to mount the camera onto the roof and make it so the roof could be pulled out without disturbing anything going on in the bottom of the birdhouse. I don’t think any bird would tolerate any disturbance to their nest, so this gave better access to the camera in case some technical support was needed.
I still had to figure out exactly how to mount the camera to the roof, but I did know the dimensions I’d be using for the top piece.
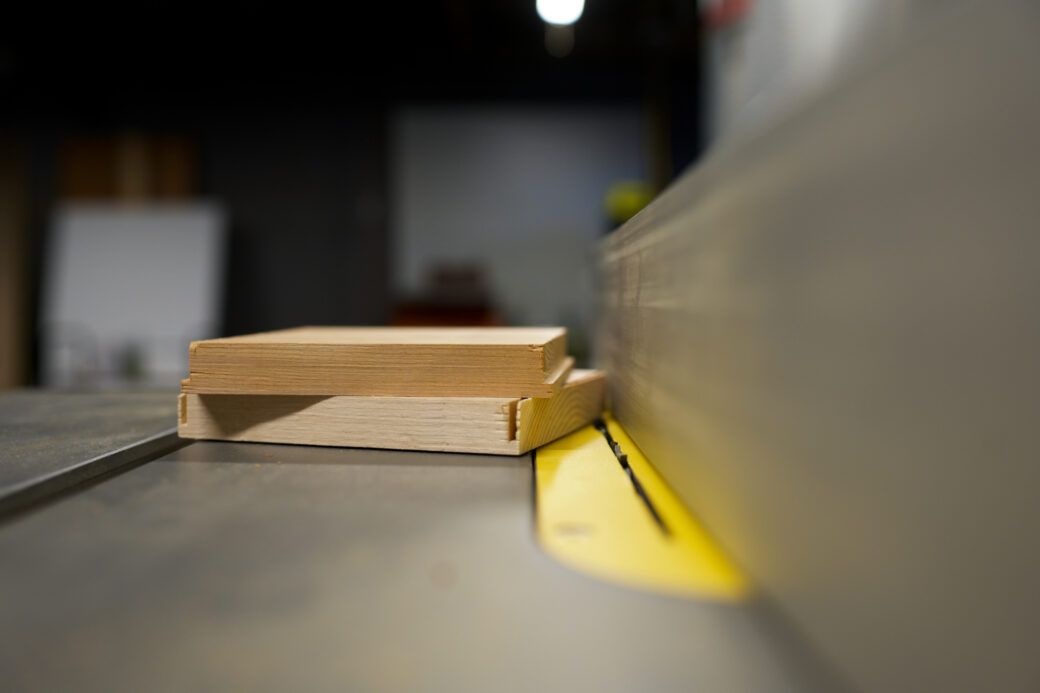
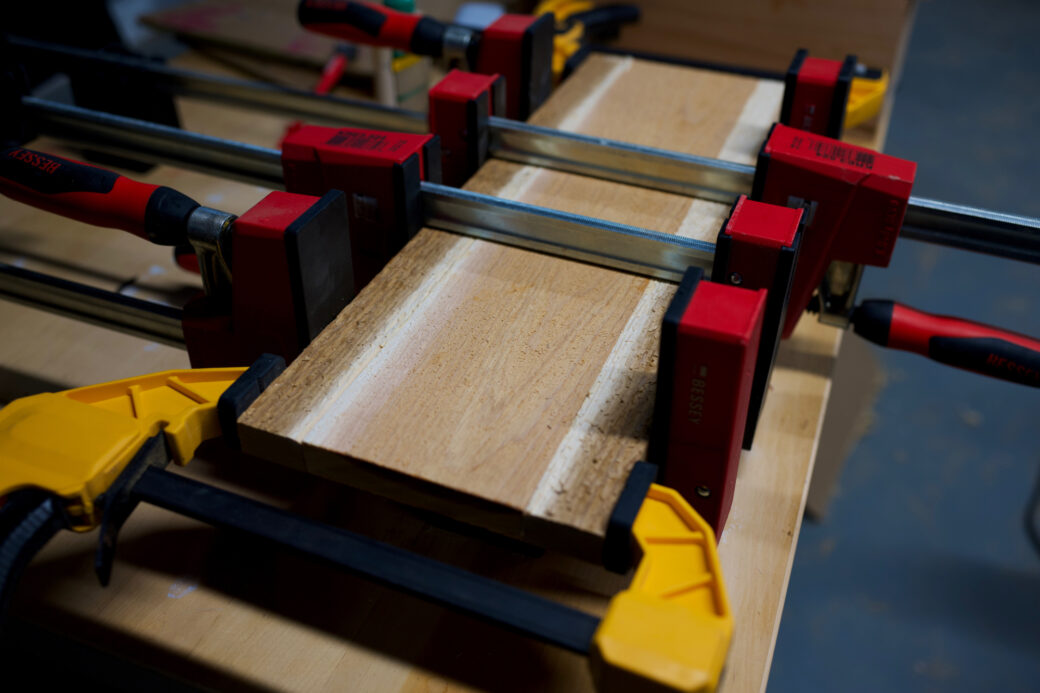
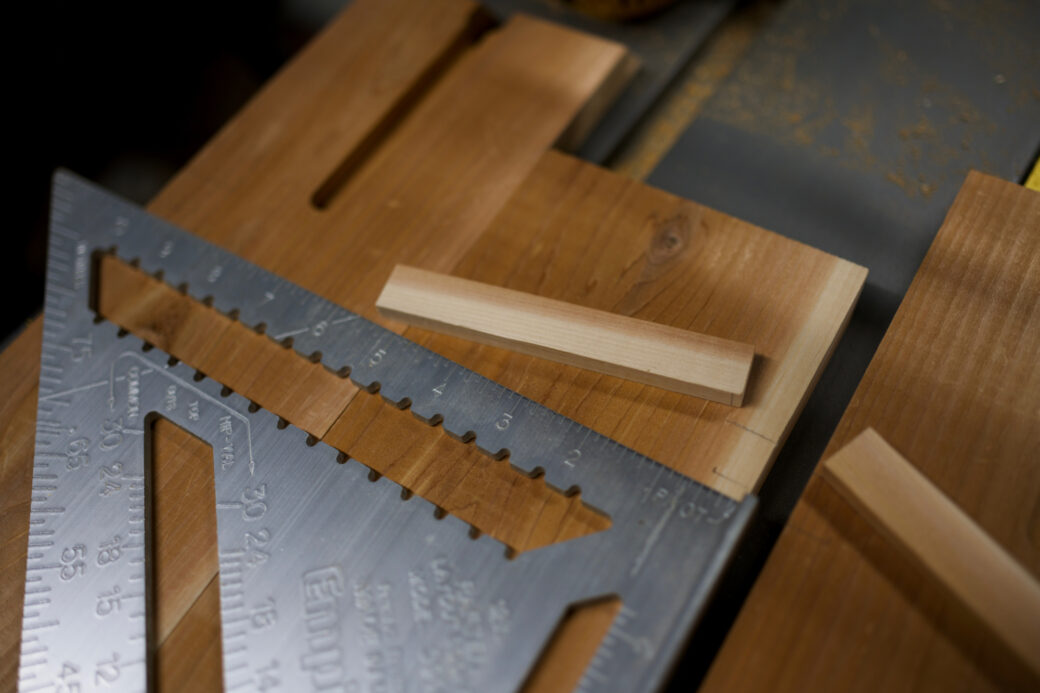
The lumber I had wasn’t wide enough to allow for an overhang along the sides the birdhouse, but luckily I had a really long and narrow piece of scrap cedar laying around. I cut the strip down to the same length of the roof piece and then glued two strips onto either side of the main piece.
After cleaning up some glue drips I ran the roof pieces through the planer to smooth them down and to get them to the thickness I wanted.

Once again I tilted the blade on my table saw and did a cross cut to match up the angle on the top and bottom ends of the roof pieces.
Speaking of Access
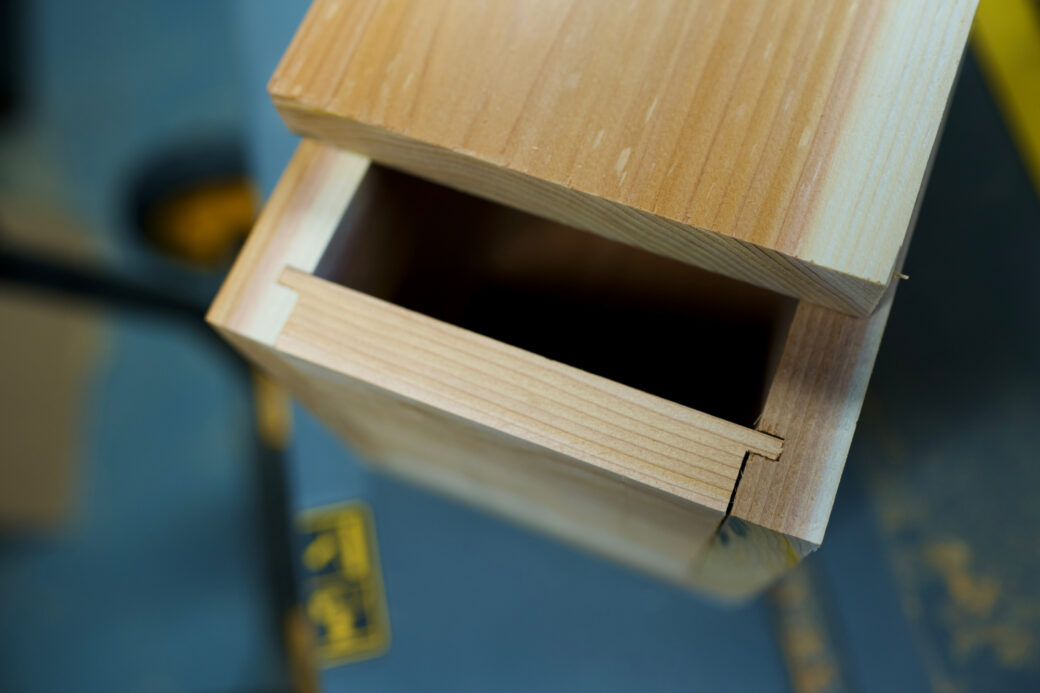
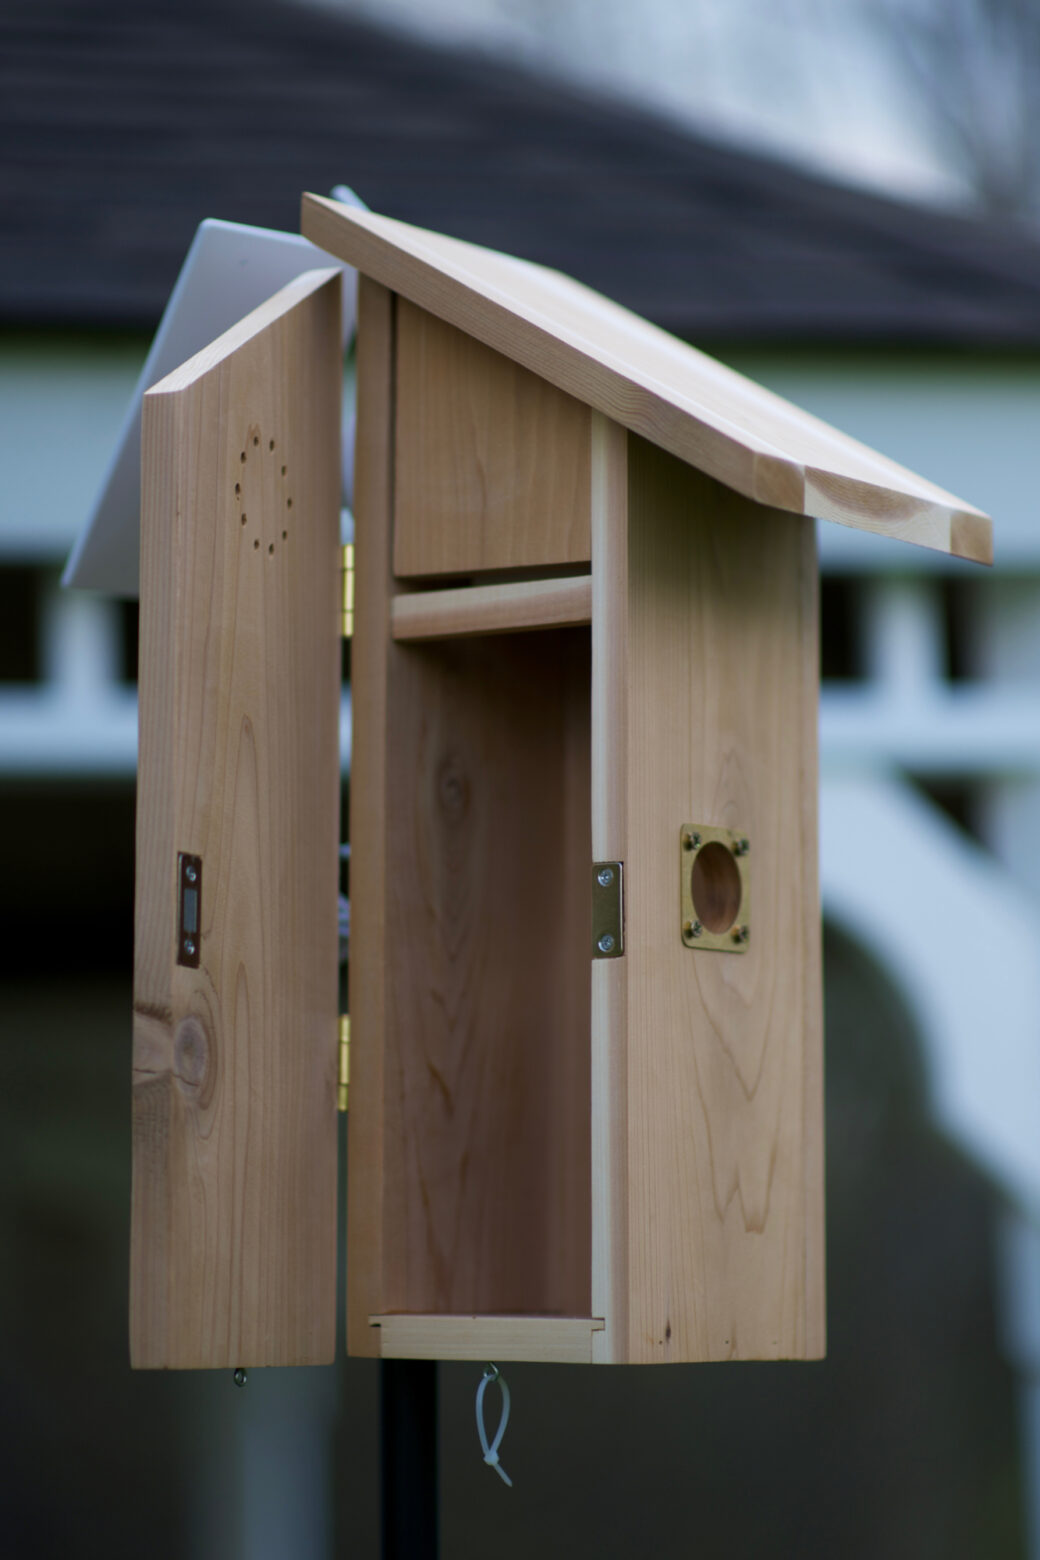
One of the things I remember from the birdhouse we had when I was growing up is that every year we would clean out the inside of the birdhouse to get it ready for the next bird who would come and make it their home. To do this we had a hinge on the front panel of the birdhouse and we would lift that up for access to the inside.
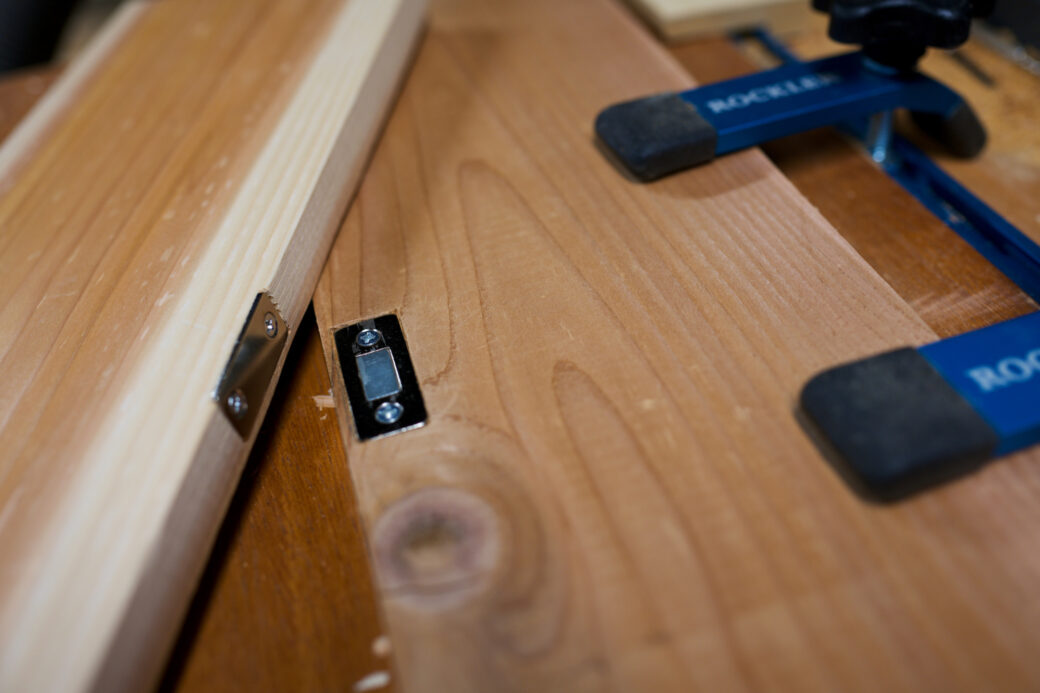
I wanted to add some hinges to the left side panel so you could open it up like a cabinet door. I wanted to avoid a big latch on the front of the birdhouse, so I decided to try using a magnet to keep the door shut throughout the year.
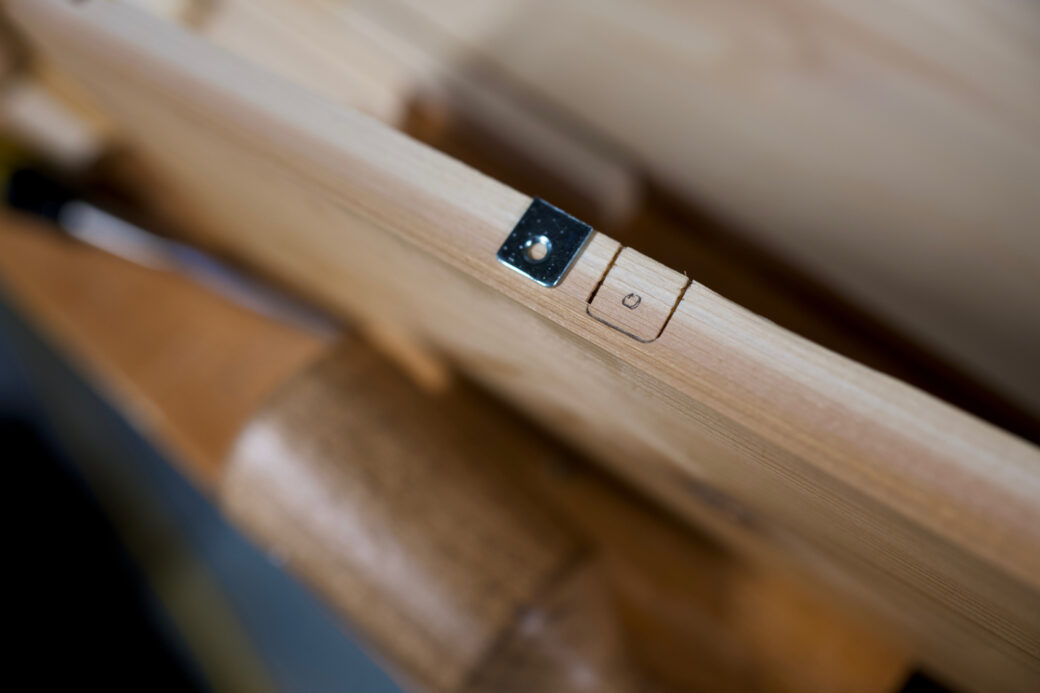
At first I thought I had picked out a strong magnet and a metal plate that would do the trick, but after actually getting it screwed into place I realized that the screws made it so the magnet wouldn't get close enough to the metal plate to provide a strong enough connection to hold the door on securely.
I wound up finding better hardware with a bigger magnet, more surface area, and recessed screw holes that make the screws flush with their surface.
I used a chisel to widen up the holes used for the original magnet.
Door Groove
To make it a little easier to open up the door, I wanted to use my router to create a groove along the bottom-front of the side door. While I didn't have a router table, I did have a guide attachment to my router that got me pretty close to a router table fence.
I lined up fence, turned the router on, and then slowly dropped a test piece onto the bit and pulled it across the guide.
To my delight, this worked as planned! I grabbed the side door pieces and carefully repeated my movement until I created the groove at a few inches in length.
Ventilation
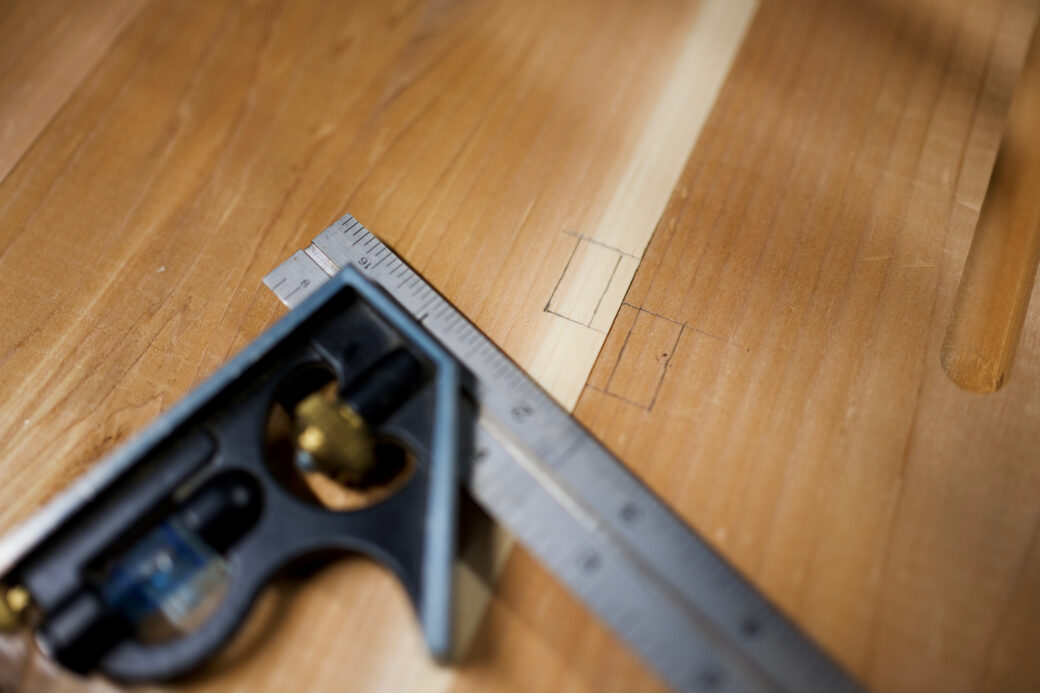
While I was working on the sides, I wanted to add some air holes to the top of each side for some extra ventilation. I wanted to drill holes in the shape of a circle using my drill press. While I know you could use a compass and some lines to map out the coordinate for each hole, I chose to go the visual route using a drawing app on my computer to add points to a circle and I printed that out a few times across a piece of paper.
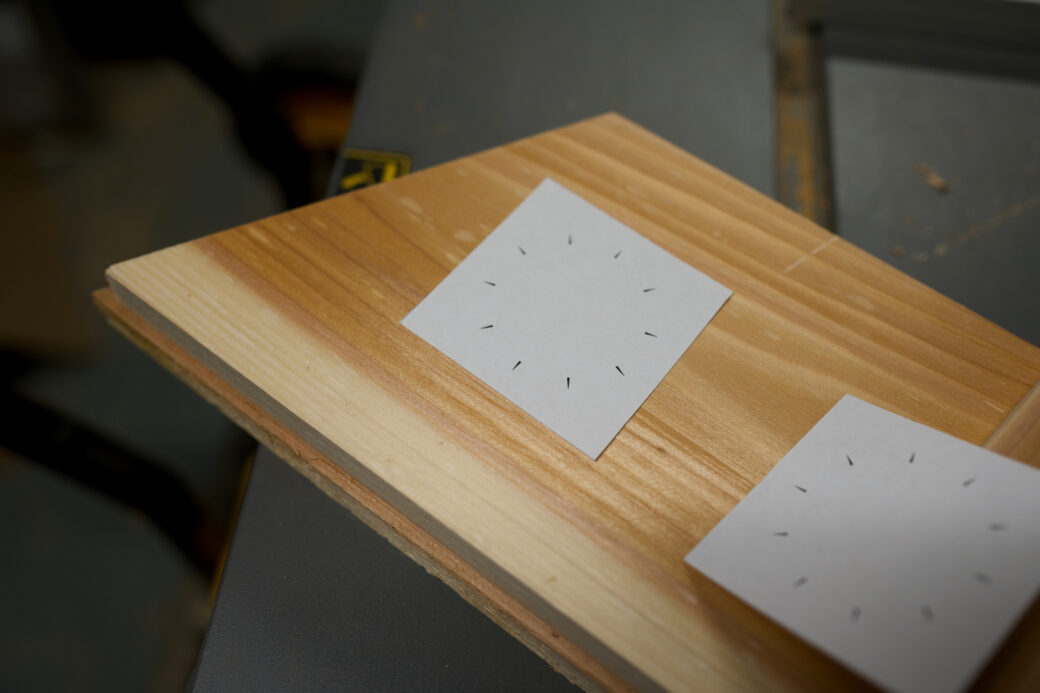
I taped down the paper to the wood and used a center hole punch to mark where each hole would go.
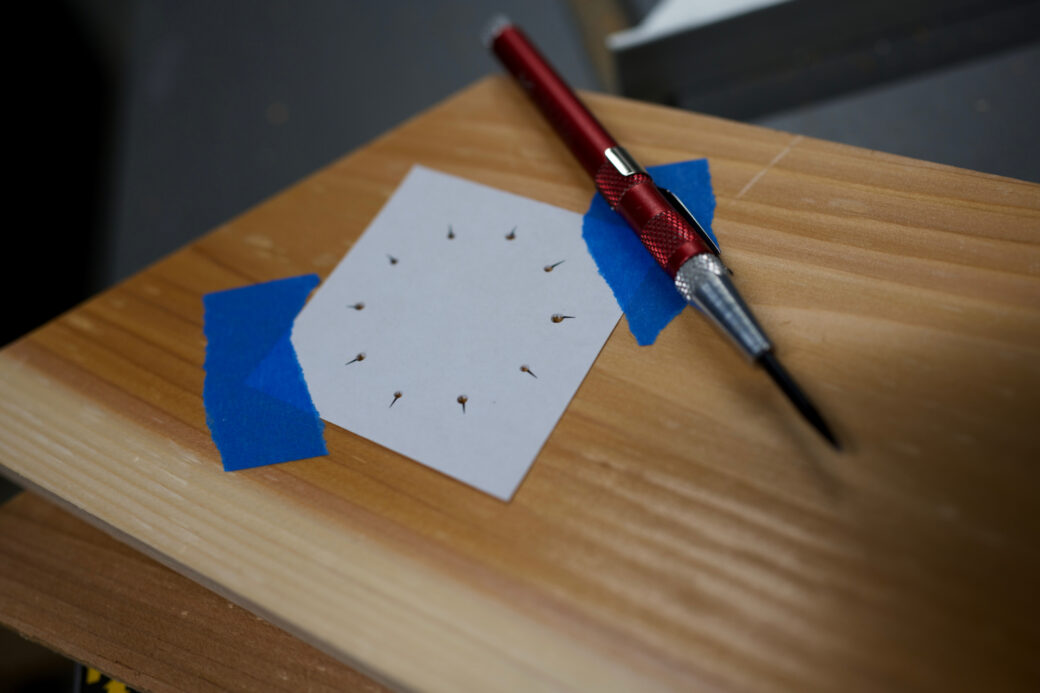
I pulled the paper off of the wood and drilled each hole where the marks were made.
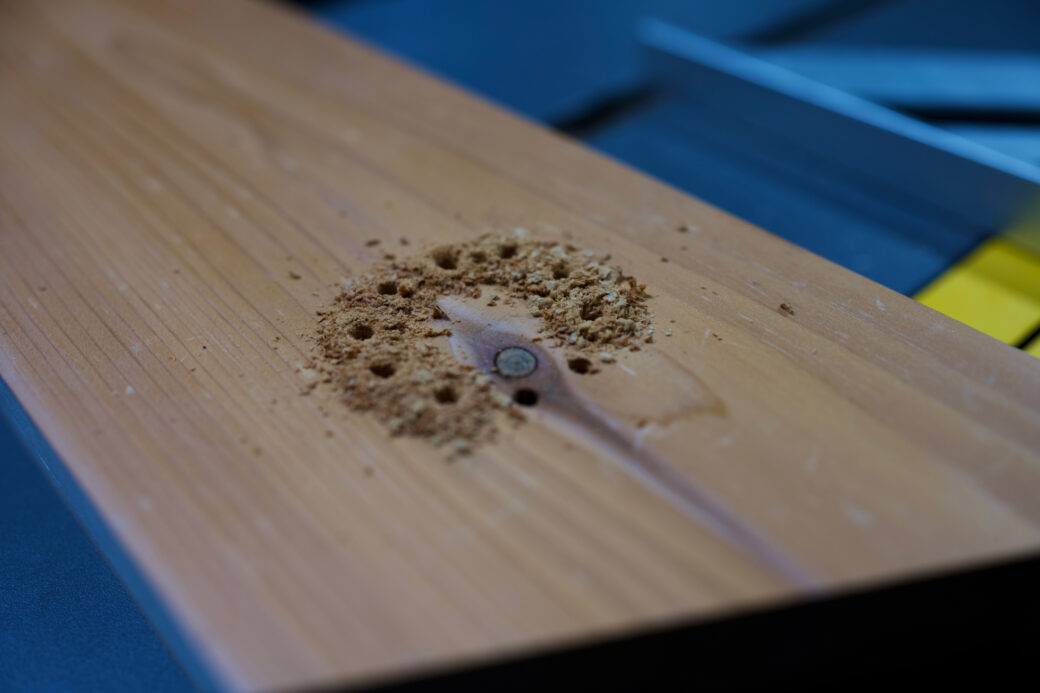
I cleaned up the holes a little bit, but I knew that I would eventually be sanding these pieces so I could come back and fix them along with that step.
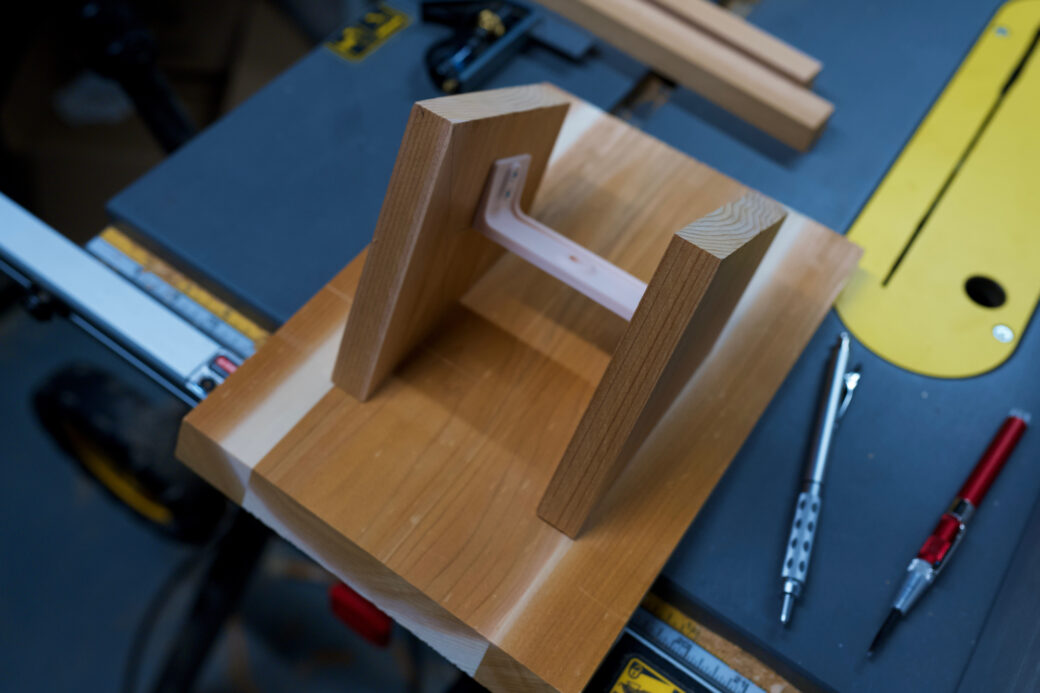
Extra Support
At this point, because of the door, the base of the birdhouse was in the shape of a U. I wanted to add just a little extra support but I didn't want to get it in the way of the roof or the camera. I found some scraps from my previous cuts and created a mortise and tenon joint to hold them into place.
This was my first time doing this kind of joint and while it wasn't perfect, using cedar did make things easier because the wood is so soft and easy to cut with a chisel.
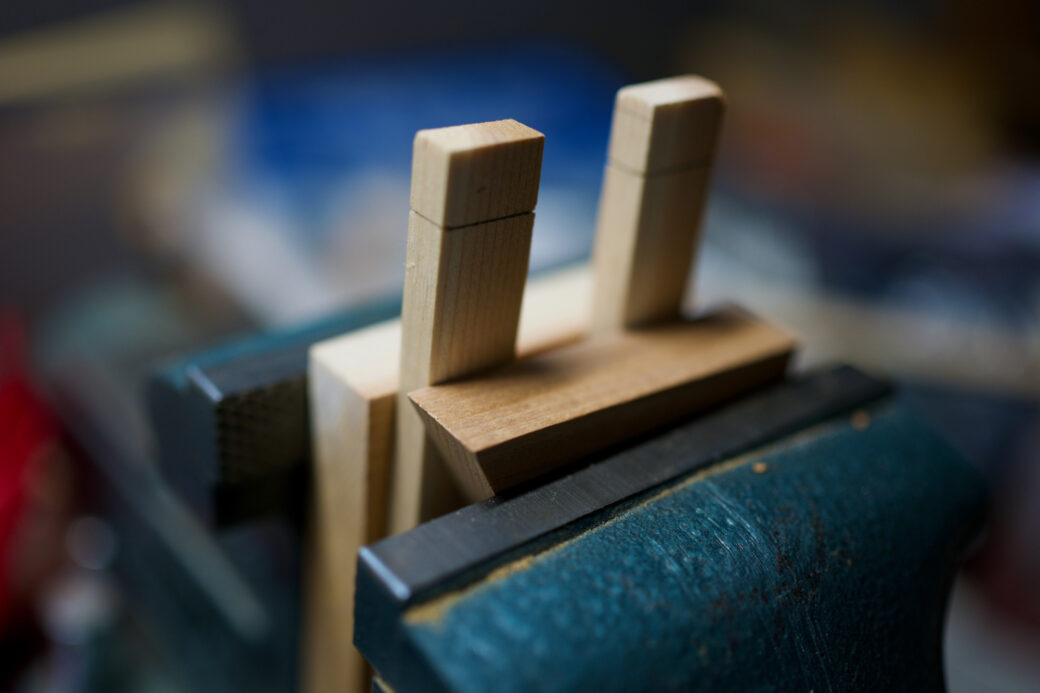
I used a vice to help cut the tops of the tenon side of the joint and then used a drill press and chisel for the mortise.
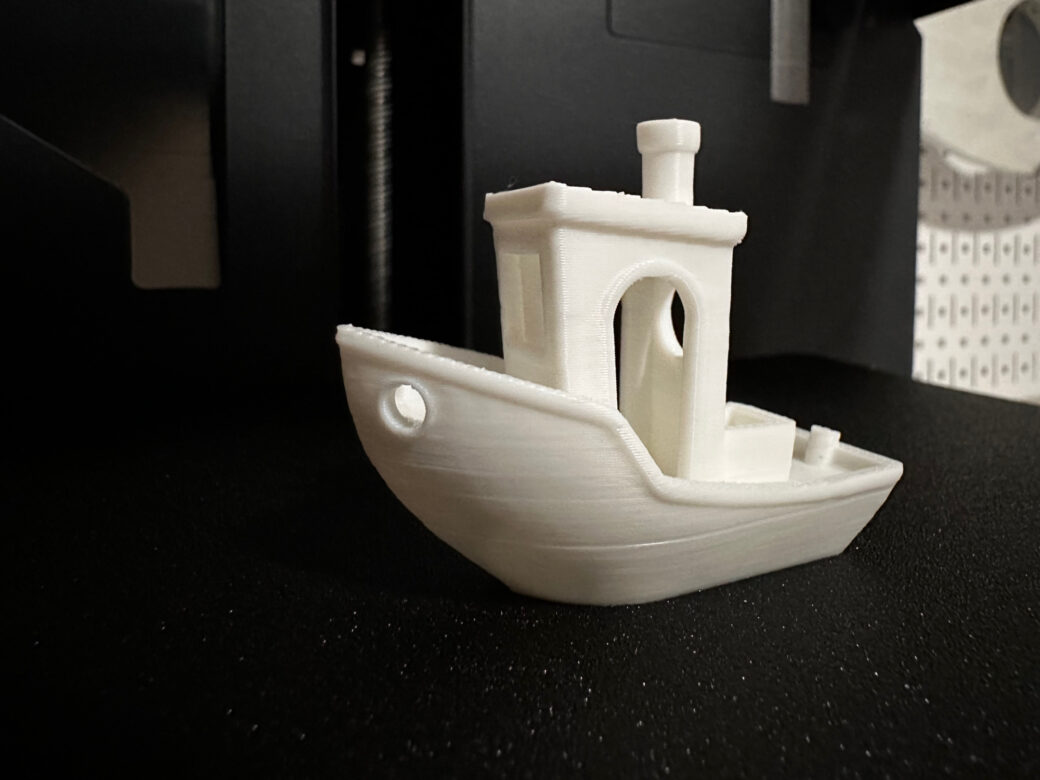
Hello, Benchy
At this point in the project I had been thinking about different ways to mount the camera onto the roof piece. I originally planned something out with a series of wooden pieces, but I wanted to make it easy to take the camera out if for some reason it could no longer be of use.
This was one of many little problems I wanted to solve in projects like this and it just so happened that I work with lots of folks who are into 3D printing. Our discussions over the years have had me interested in getting one, but they always seemed like they require a lot of work to get it up and running and maintain it over time.
I discussed the current state of 3D printers with a few people who have had experience and started to look into Prusa’s MK3 kit, but a friend of mine redirected me to the relatively new Bambu P1P. The P1P was a little bit cheaper than the MK3, but it promised faster printing speed and it seemed to be a little more accessible to 3D printing newbies like myself.
I took a chance and ordered the P1P—on the day before the similar Prusa MK4 was announced—along with a bunch of random PLA Basic and PLA Matte colors. In about a week the printer had arrived and with very little effort I had it set up and in about 20 minutes I had printed my first Benchy.
While I was waiting on the printer to arrive I looked into a couple of apps, Bambu Slicer and Fusion360. Fusion360 has been in the maker community for years and I had first heard about it for making woodworking plans. On the one hand it is very accurate and using things like User Parameters sounded like a great way to plan out woodworking projects, however, I found that I could get by with some simple sketches for now.
For 3D printing, however, that accuracy is important and Fusion360 is an amazing tool. If you search for Fusion360 tutorials on YouTube, this video is likely to come up—for good reason because it does a really great job of going over the basics:
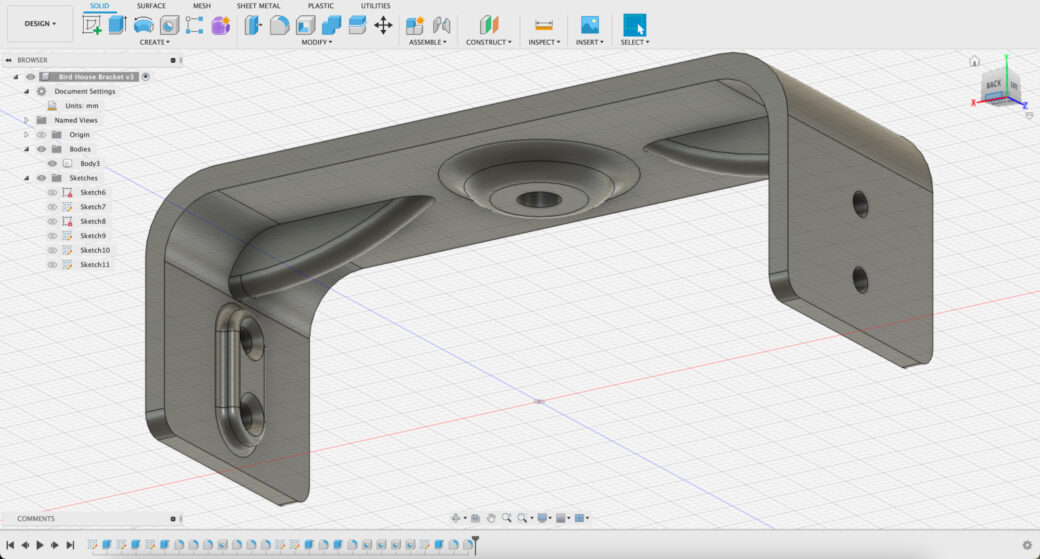
Following along with what I had just learned, I created a bracket in Fusion360, then sent that over to Bambu Slicer. to prepare the print.
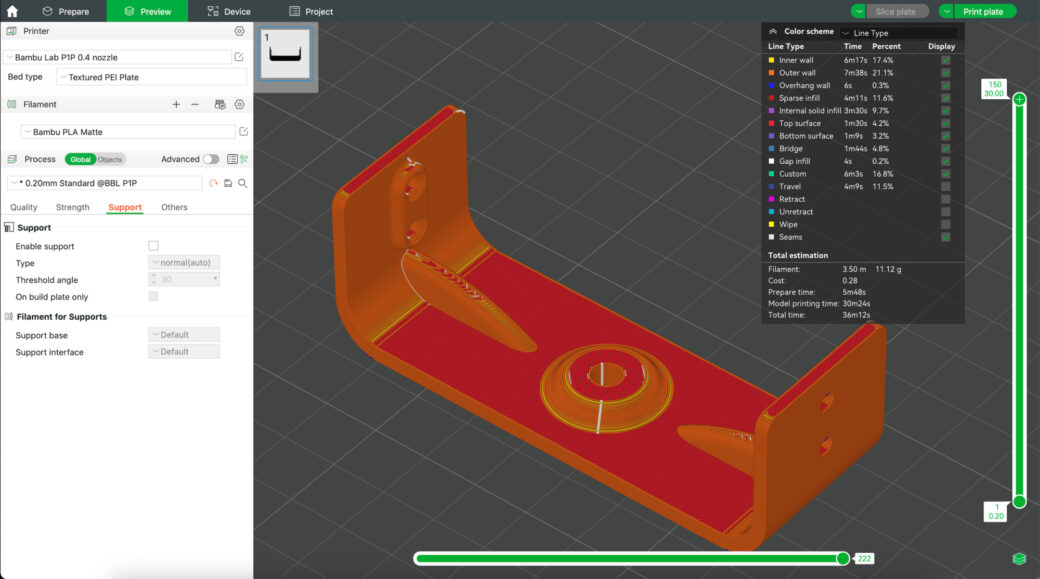
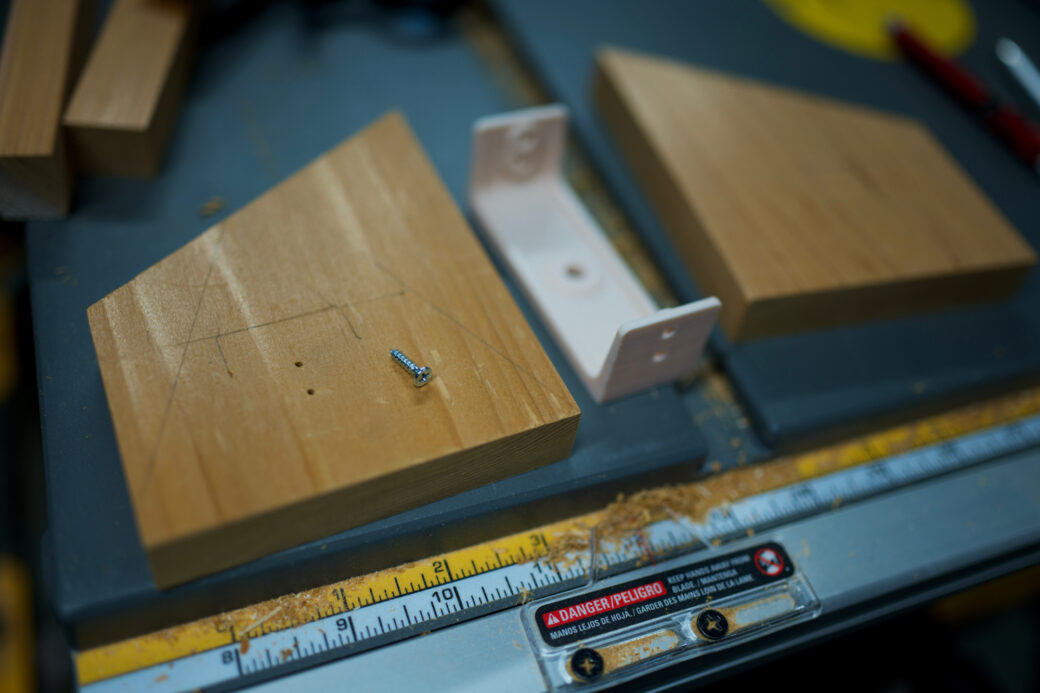
Since I hadn’t spent too much time with the printer yet, I had stuck to a lot of the default print settings. I printed my first design and tested the fit with the camera.
I had picked up a few ¼ inch screws and had to use a little pressure to get it to fit into the bracket, but for the most part it had fit and confirmed the size of the bracket would work.
I jotted down a few notes to make revisions, then I decided to test the strength of the bracket. Within seconds the side of the bracket snapped and right away I realized where support was weak.
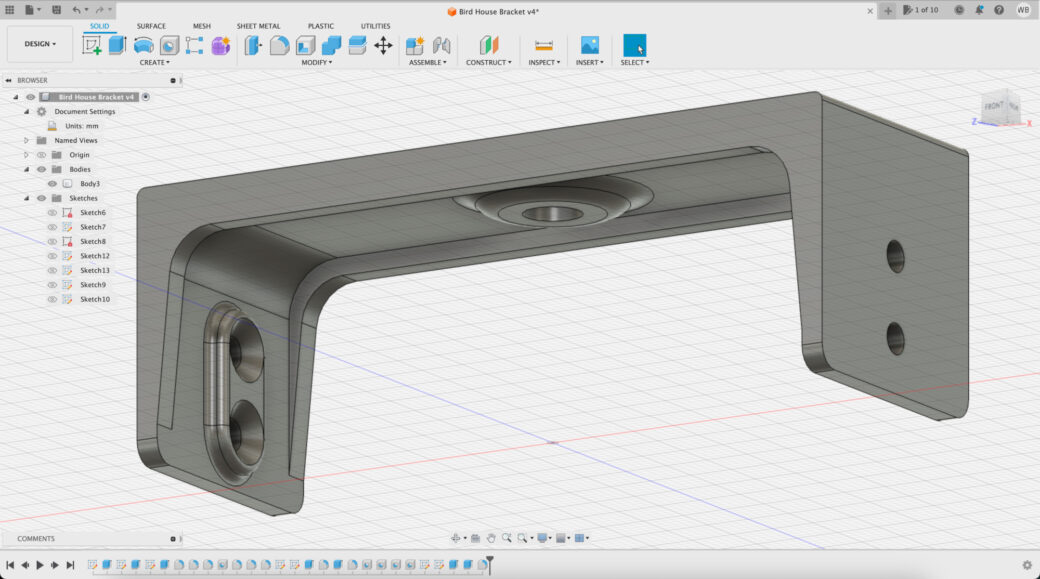
I went back into Fusion 360, made the adjustments I had written down, and then added some support along the length of the bracket.
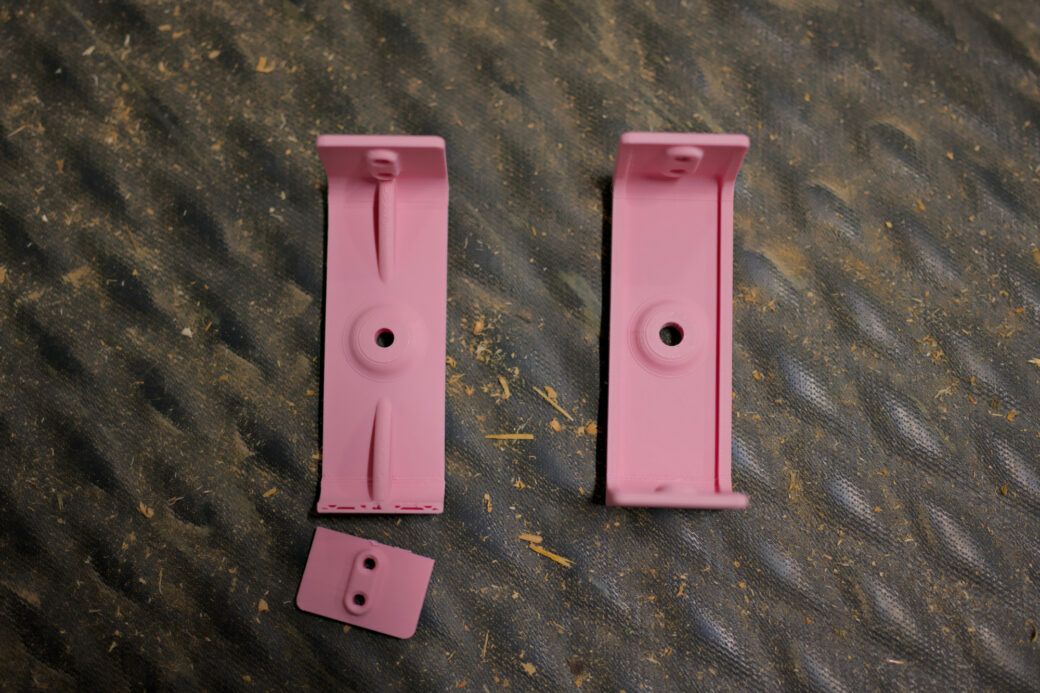
After printing out this revision I could tell right away that this was more solid. I had a few more minor tweaks to make and printed out a new revision. This time I switched to a beige-colored PLA that I got for woodworking projects.
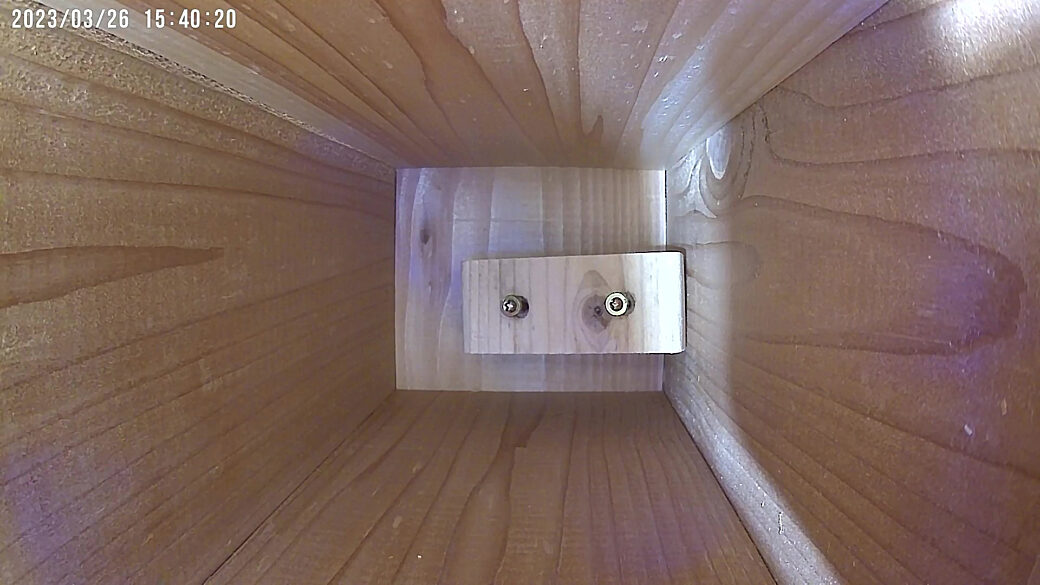
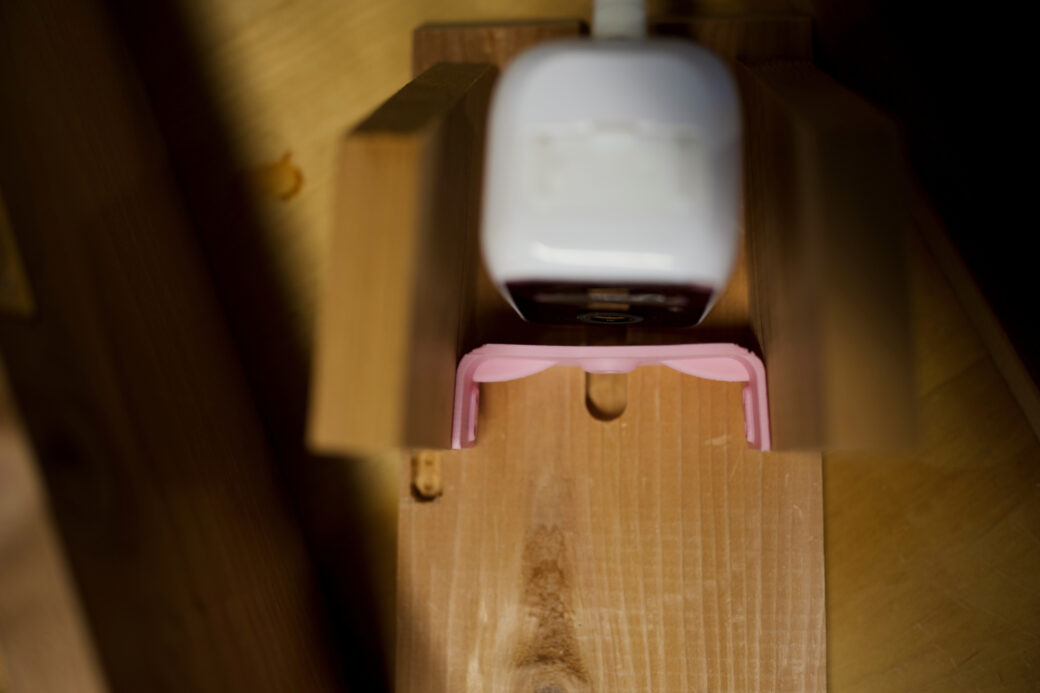
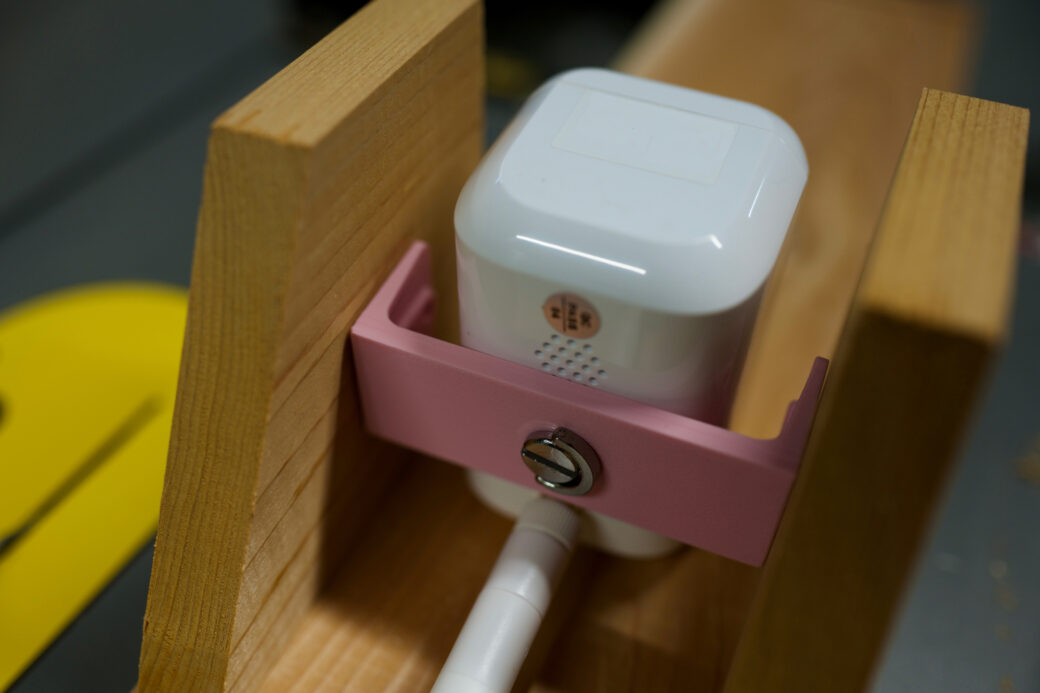
I used the camera to figure out where the bracket would need to go onto the pieces of wood that would be attached to the roof.
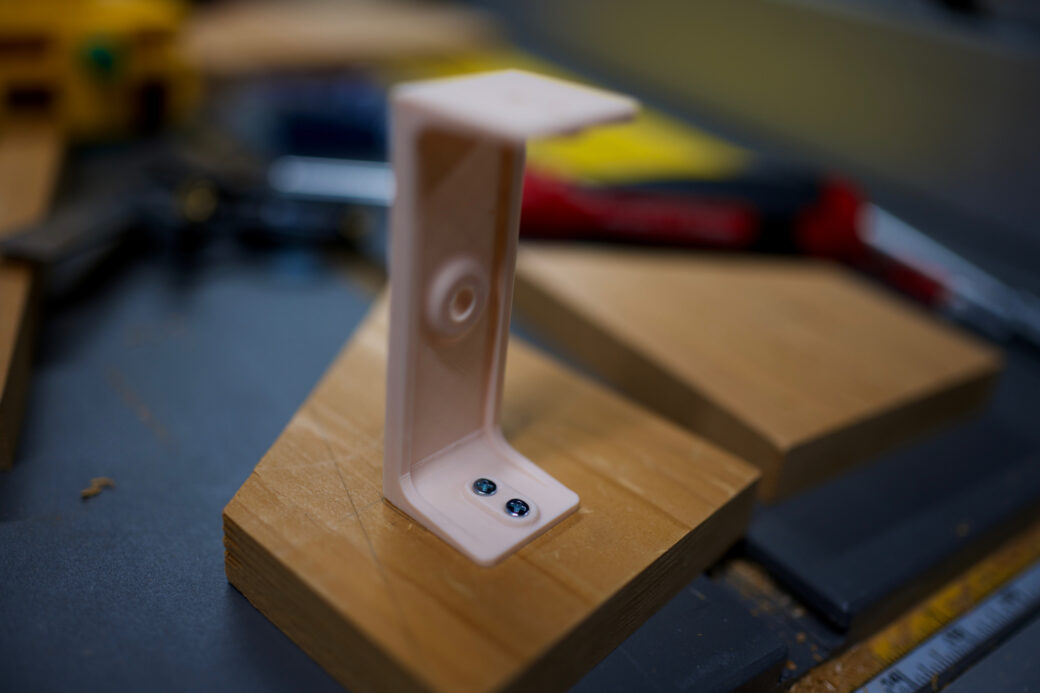
I drilled a few pilot holes and then used wood screws to screw the bracket into place.
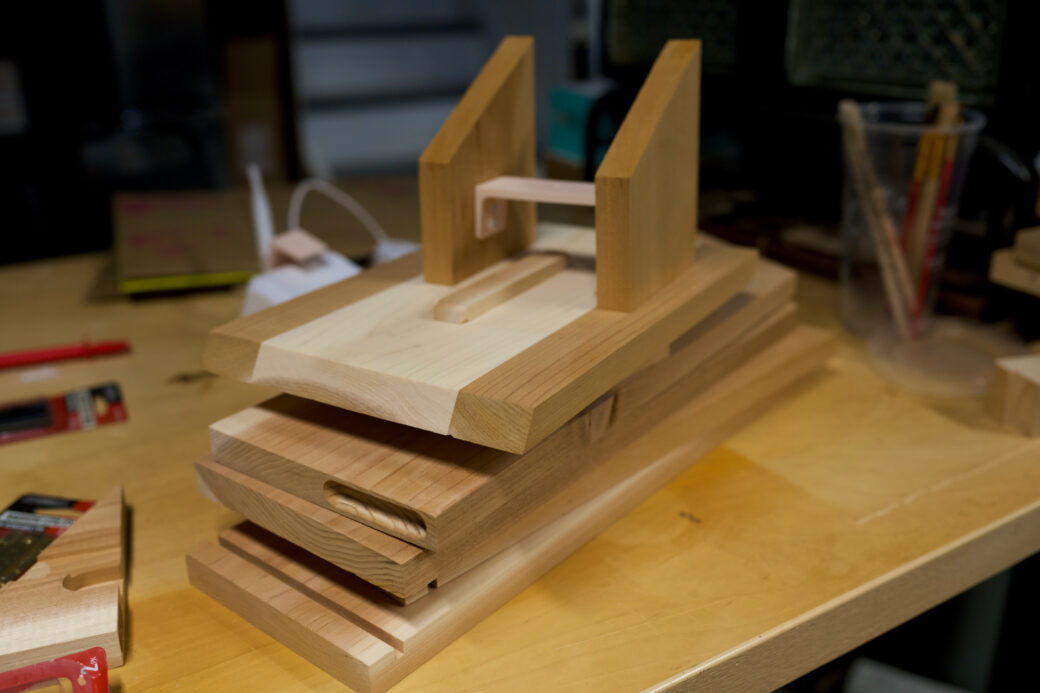
Assembly
At this point all of the wooden pieces were cut and ready for sanding. I knew I wouldn't be applying a finish to the wood so I went with 120 grit paper to smooth things down. I left the inside a little rough, as that might help the birds move around inside, and then I used a 220 grit for the final sanding on the outside pieces.
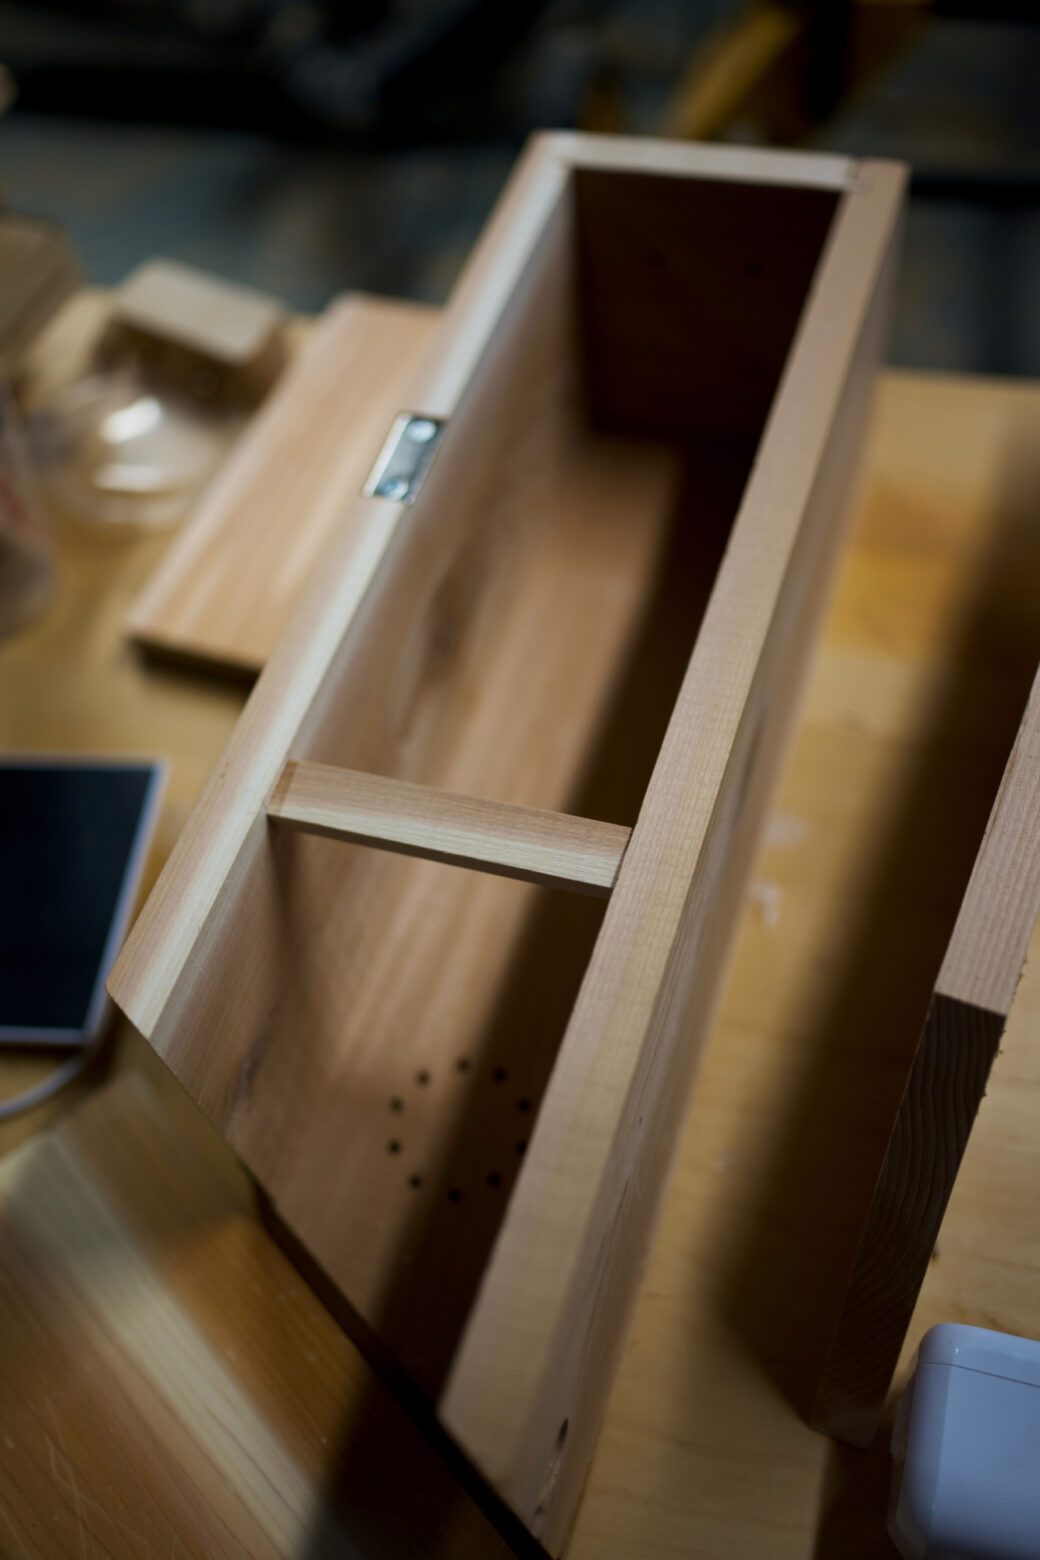
I grabbed my wood glue and used my brad nailer to assemble the floor and the walls. Keeping in mind the width of the door, I used glue and a clamp to assemble the mortise and tenon support.
After this dried I did one more round of sanding around the outside where needed.
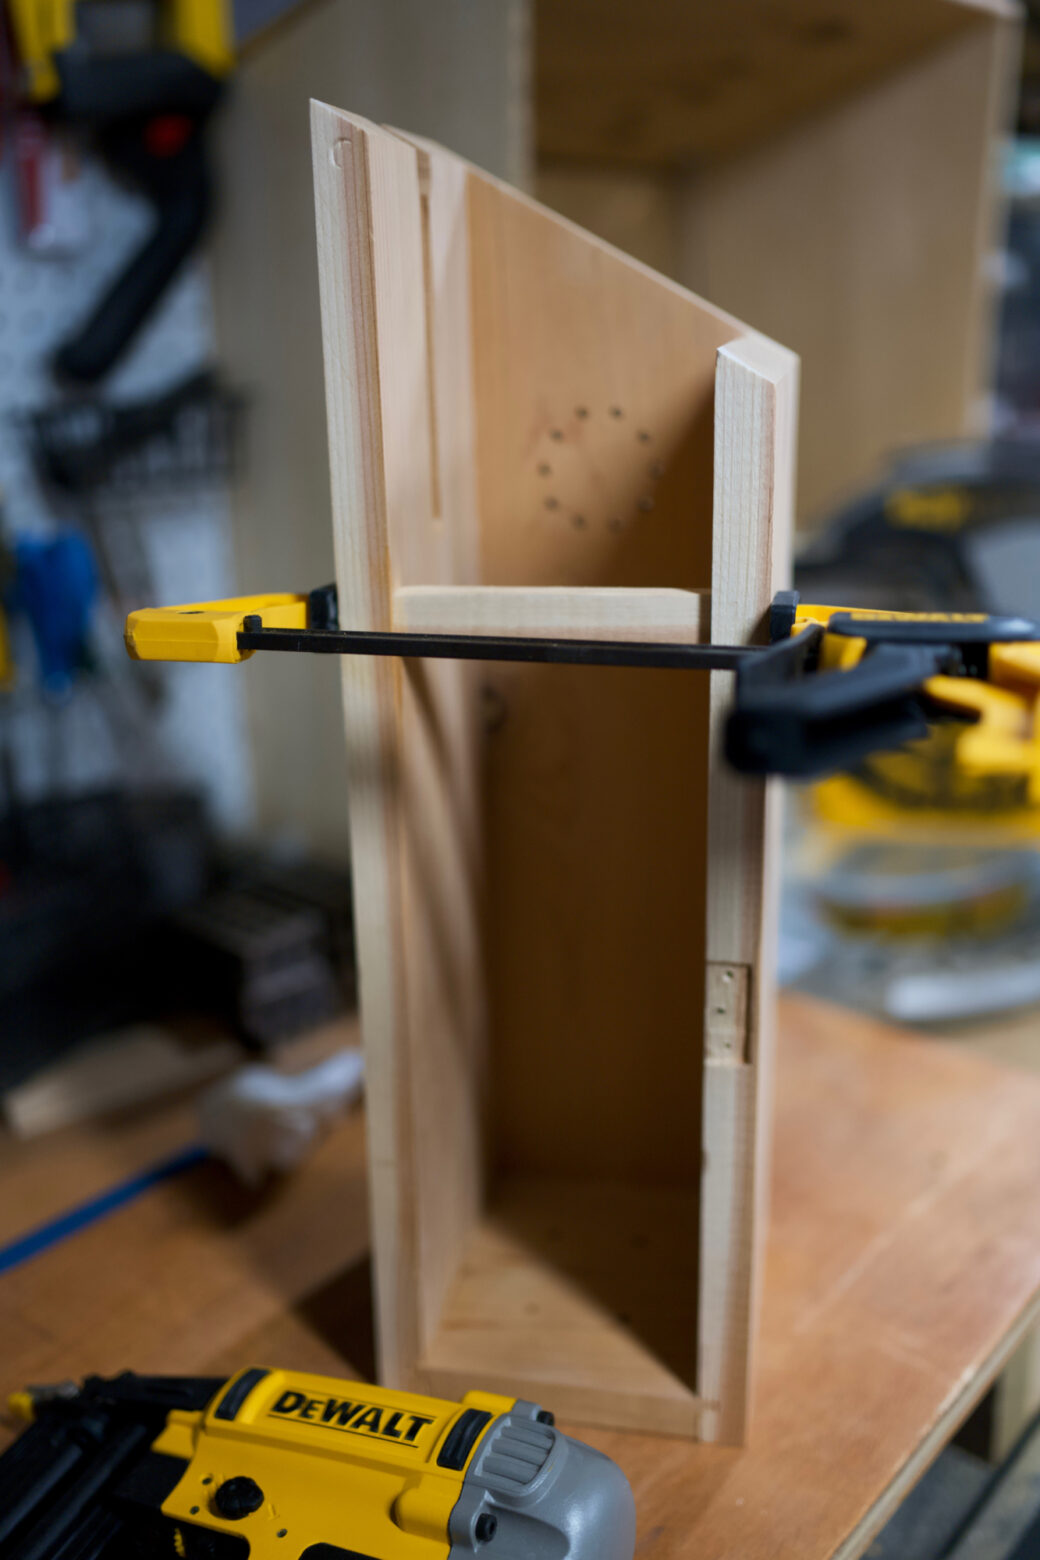
For the roof, I lined things up and clamped down a piece of wood to use as a guide while I measured out the location of the roof pieces.

I used some wood glue to hold the roof pieces together, then carefully drove a couple of nails in from the inner part of the roof. While the glue may be enough to hold it together, the nails add a little extra support.
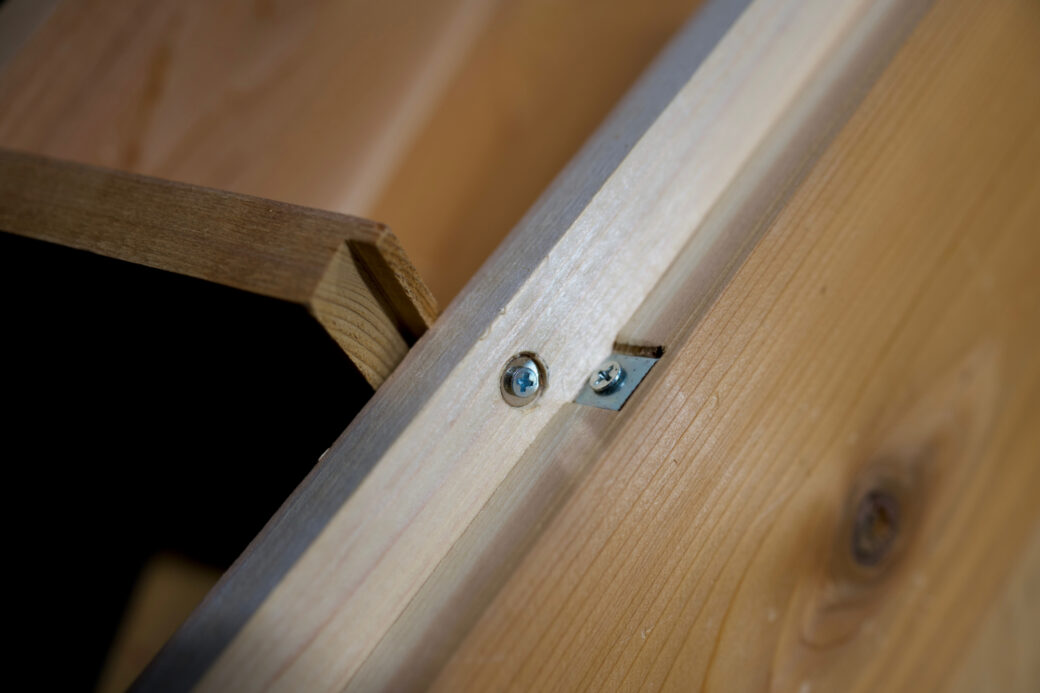
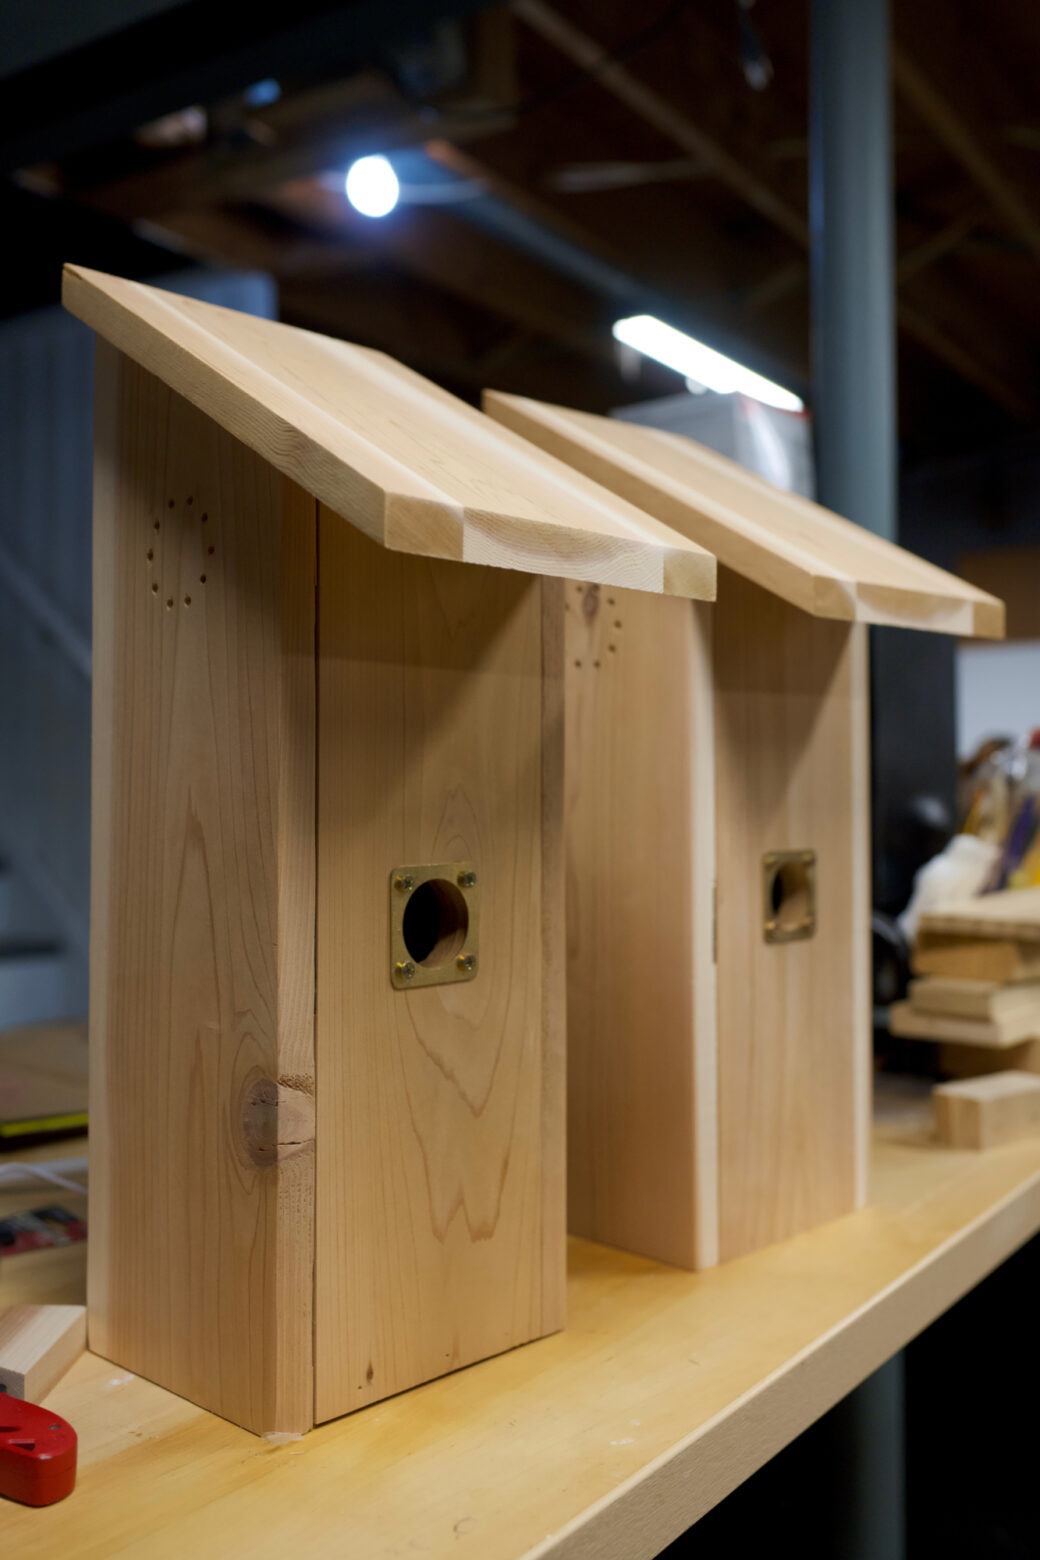
I re-added the magnet hardware to the door and the front wall, then use clamps to hold the door onto the side of the box. I mounted a couple of brass hinges along the back of the birdhouse. I used brass because it's weather resistant.
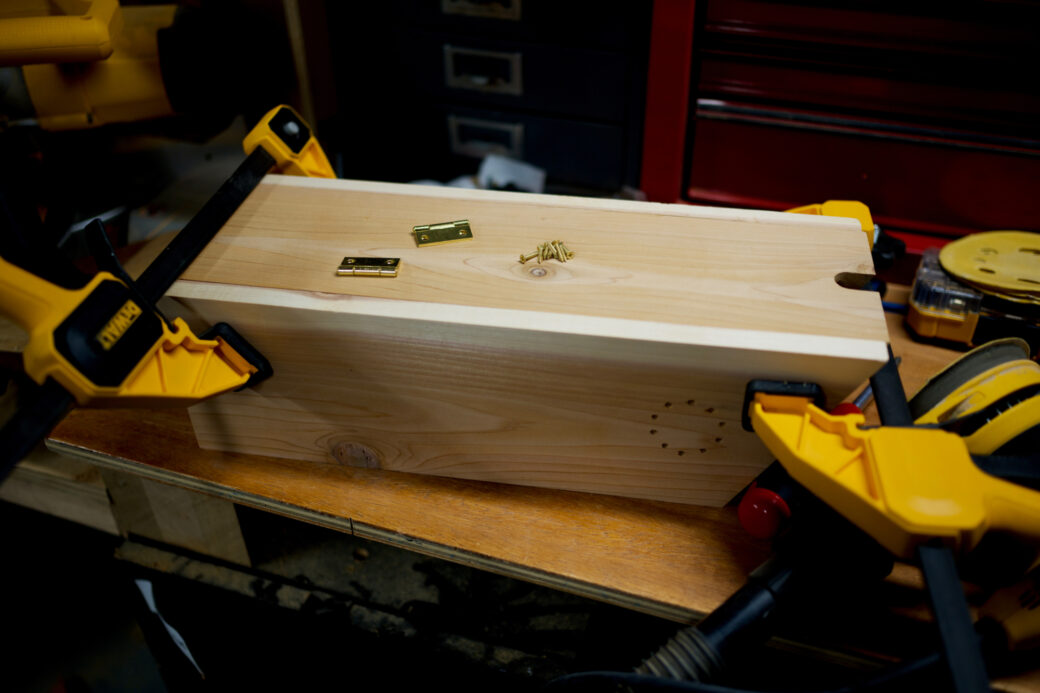
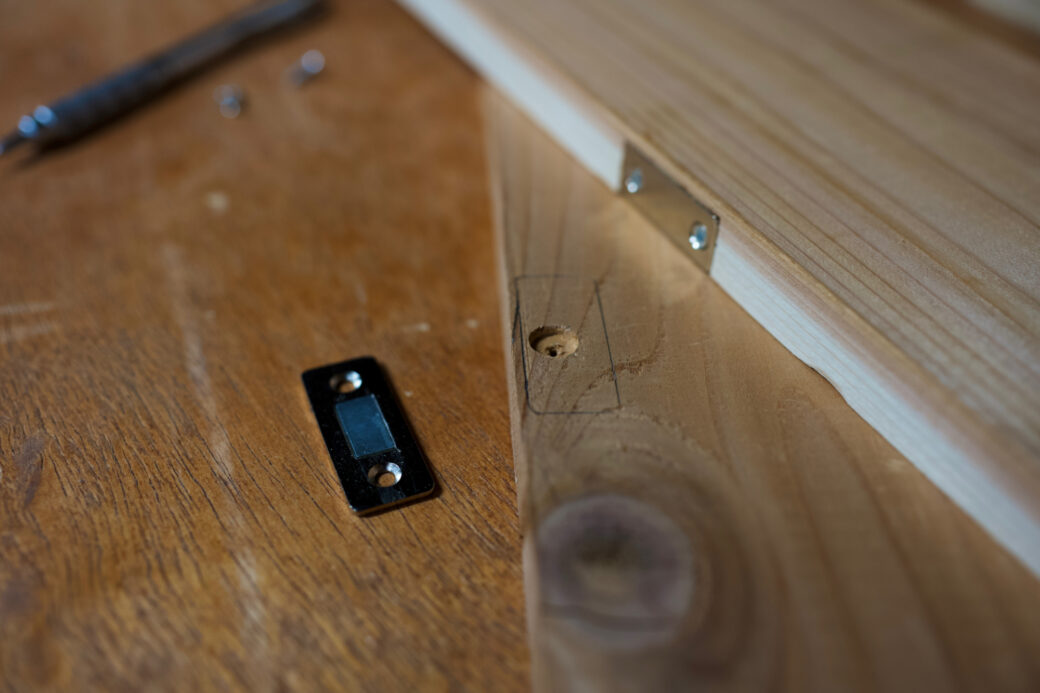
While the hinge and the magnet worked well to keep the door shut, I decided to add a couple of eyelet hooks to the bottom of the birdhouse. These could act like a lock by using a string or a small zip tie to hold them together.
One of the things that is highly recommended for bluebird houses is to provide young birds with something to grip their talons on as they try to climb out of the entrance for the first time. I used a rotary cutting bit to create some grooves beneath the entrance.
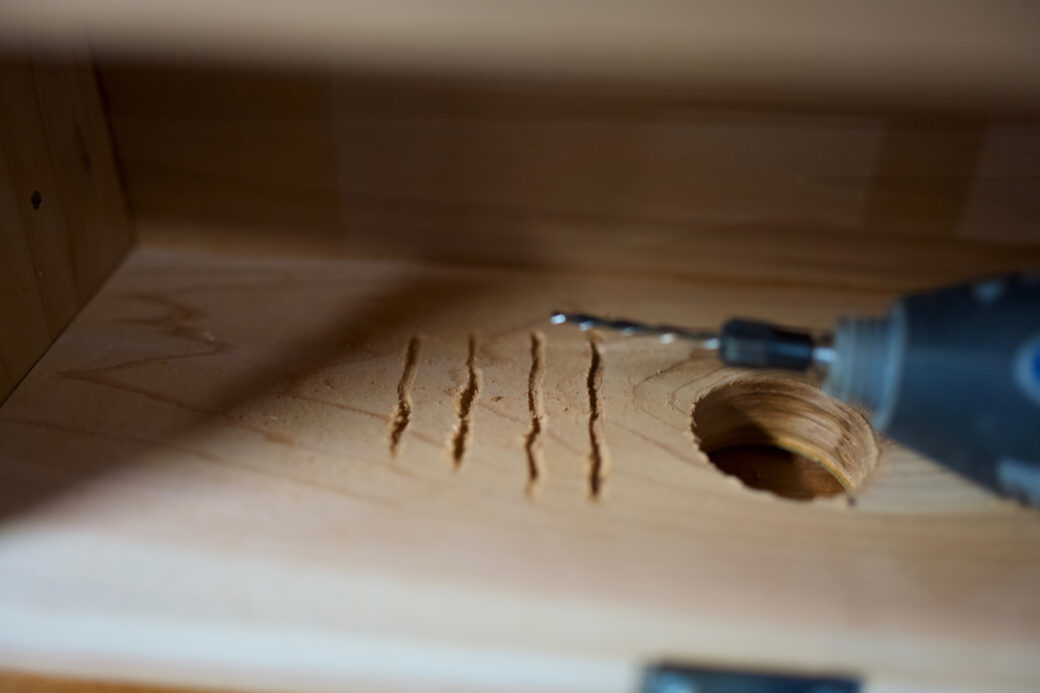
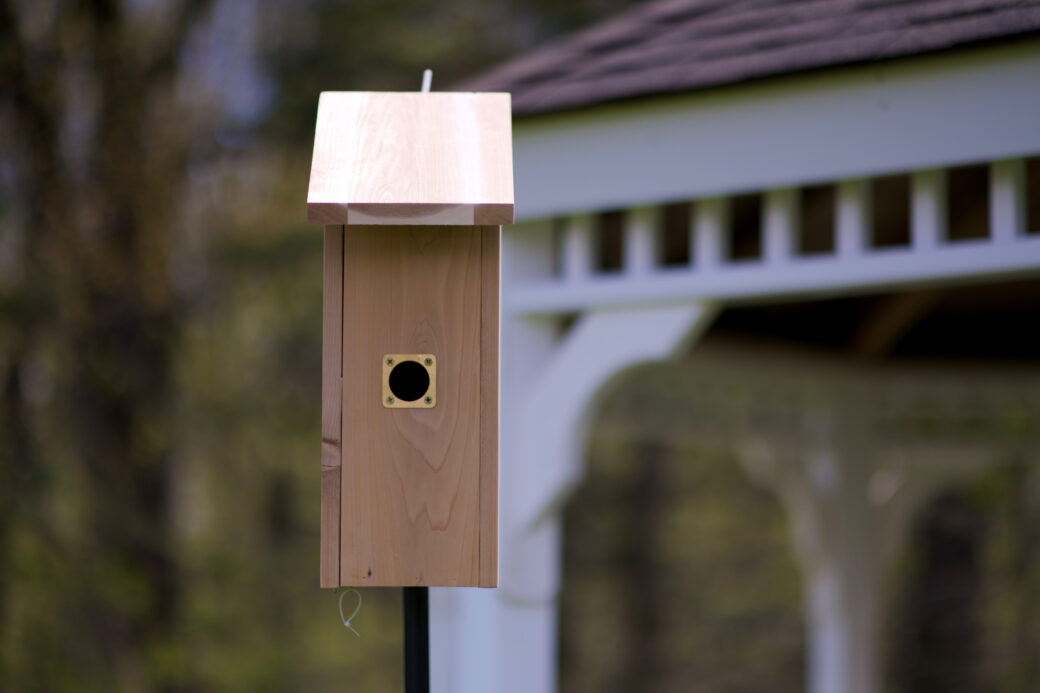
Another recommendation is to strengthen the entrance hole to avoid wear and to keep predators from scratching their way in. I found some 1½-inch plates and screwed those over the entrance holes.
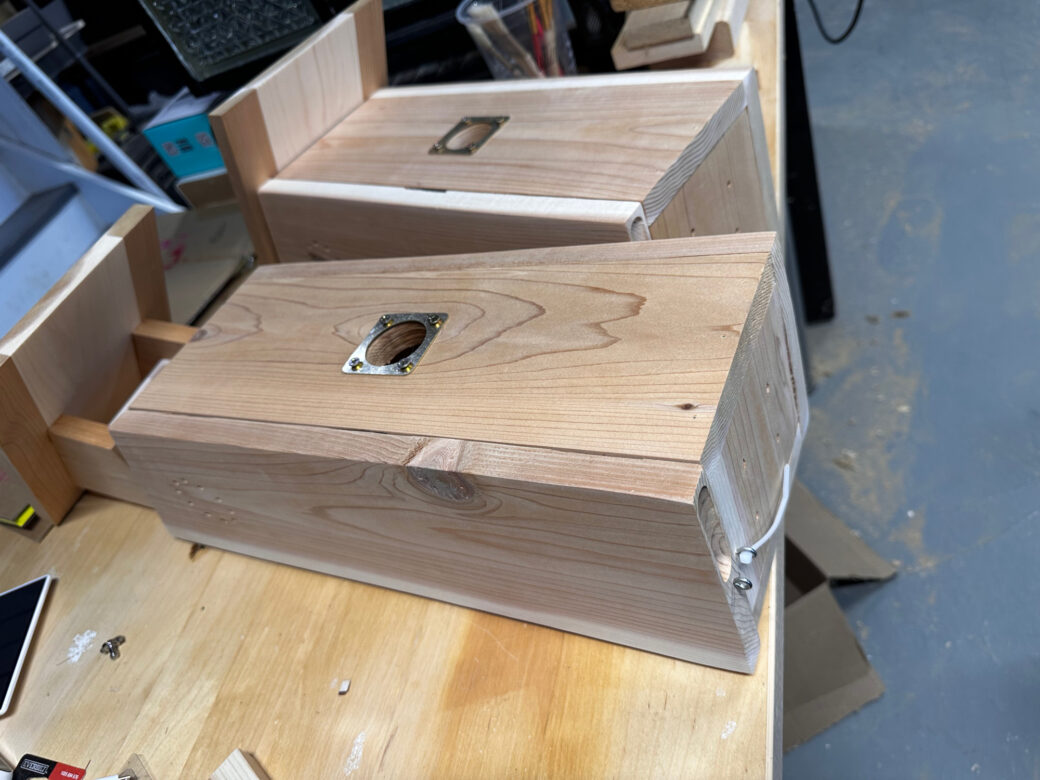
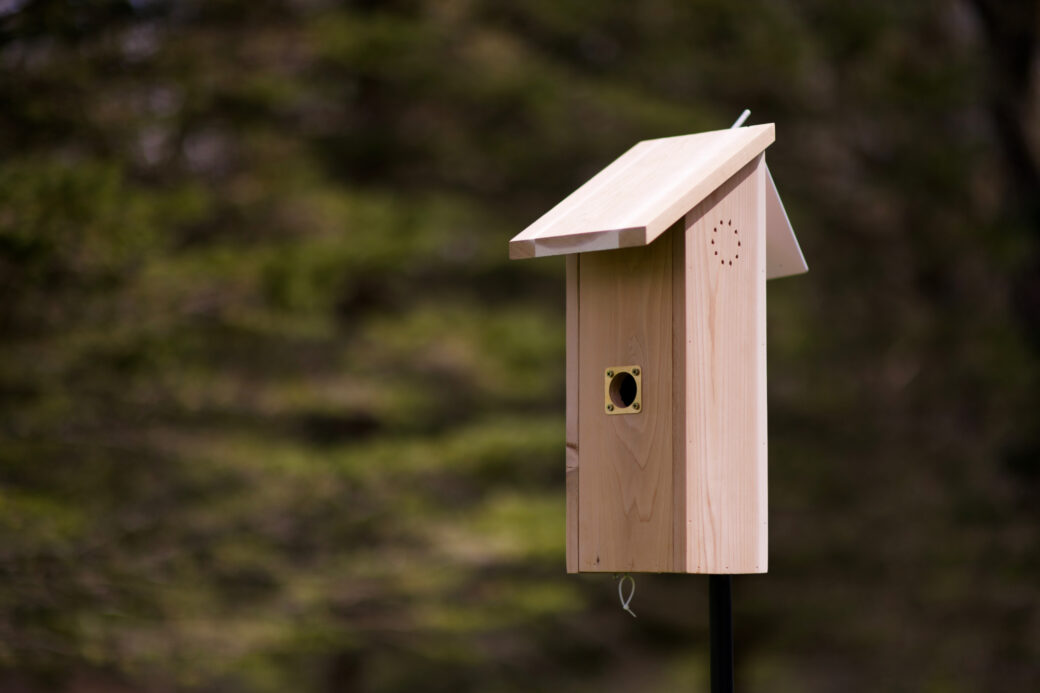
With that, both bird houses were assembled and ready for delivery.
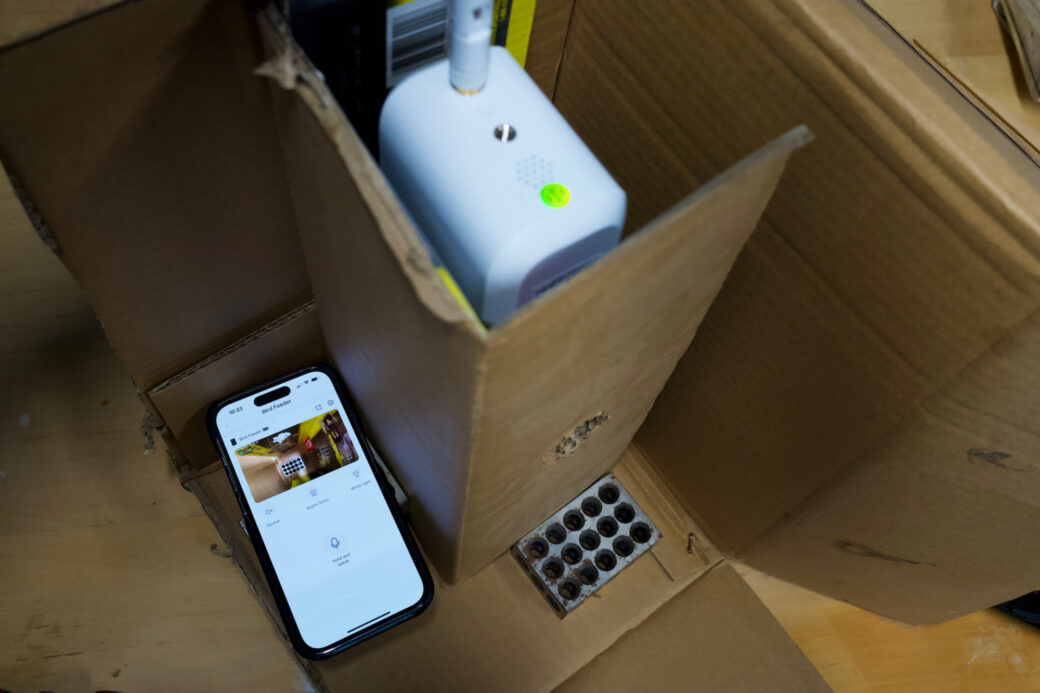
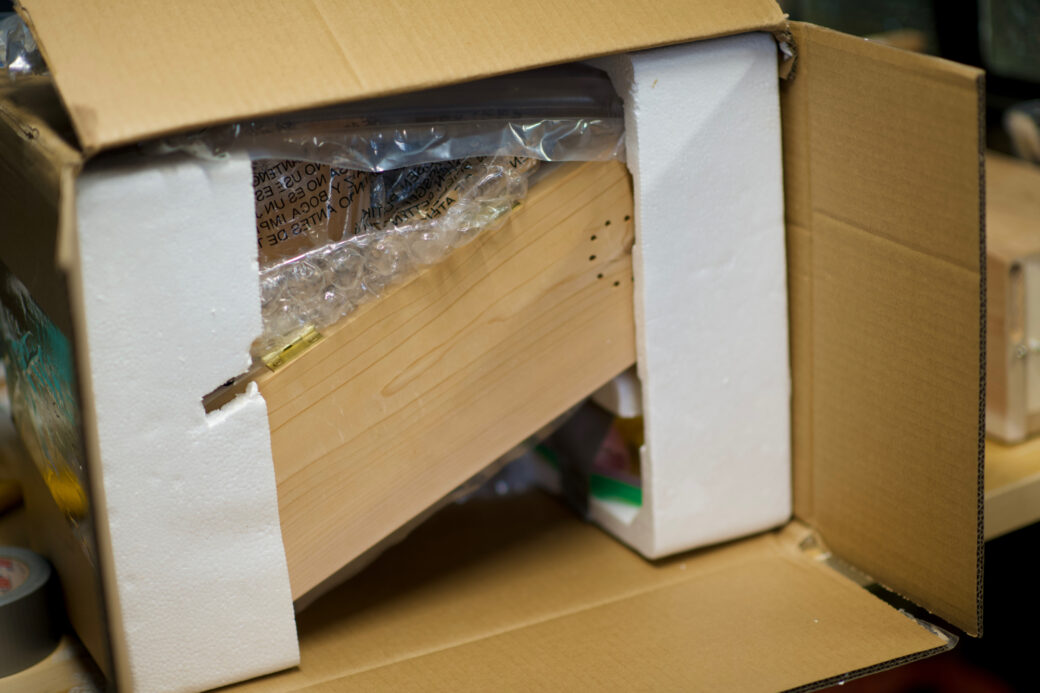
My mom lives nearby so her birdhouse could be hand-delivered, but my sister’s birdhouse would need to be shipped out of state. I reused some packing materials and did my best to secure the birdhouse in place. Because of the battery and extra weight, I had ordered her camera to be delivered directly to her as a separate package.
This project was fun in that this is the first time I was building two copies of the same thing. For the most part they came out identical, but there are a couple of places where the second time I did something I felt like I did a better job with it. I think that all comes with learning new things and making small improvements as you go.
This project also got me into 3D printing and since getting the printer up and running I've printed a couple dozen models off of sites like Thingiverse and Printables. I also started creating some more custom things in Fusion360 and I'll write about those in a future article.
As far as birdhouses go these are by the book, with a little added technology included. I learned that building a birdhouse can be super simple and scrappy, or super complicated and detail rich if you want them to be. As long as birds like them and can safely raise their family and send them on their first flight, then it’s a win.
Epologue
Speaking of winning, the research for this project also led to a really cool opportunity.
Because I had recently purchased a camera from Netvue, I received an email about a birdhouse product that they were working on that just happened to have its own camera situation. The product, called Birdfy Nest, had a lot of similarities to the general measurements in my birdhouse design, but they also include a camera on the outside so you can see birds as they enter and leave the birdhouse. It's also got a few nice features like a wire mesh floor and some nice ventilation holes on the roof.
The email was a call for testers and after applying and waiting a few days I was selected to join the testing program! This means that I’ll be getting my own Birdfy Nest to set up and try out, in exchange for providing feedback to the team behind the product. I’m really looking forward to setting it up and seeing if I get some birds of my own. After building my own birdhouses, it’ll also be cool to see how they’ve done things differently and I think it’ll help in providing feedback based around my own experience.